Julie Bowersett

juliebowersett{at}gmail{dot}com
Navigation
Search
Categories

Blog Writing Course Alumni

From Guide to Art Schools

CraftGossip

Entries in tutorial (14)

Monday
Feb222010

Clothespin Chic Tutorial

I found these oversized (6”) clothespins at Oriental Trading Company.  The ones I ordered are painted white.  You can also find natural finish pins at Create for Less.  This project requires only a few easily obtained supplies:

  • Large clothespin
  • Paintbrush
  • Scissors
  • Cocktail napkin or tissue paper
  • Modge Podge or white glue

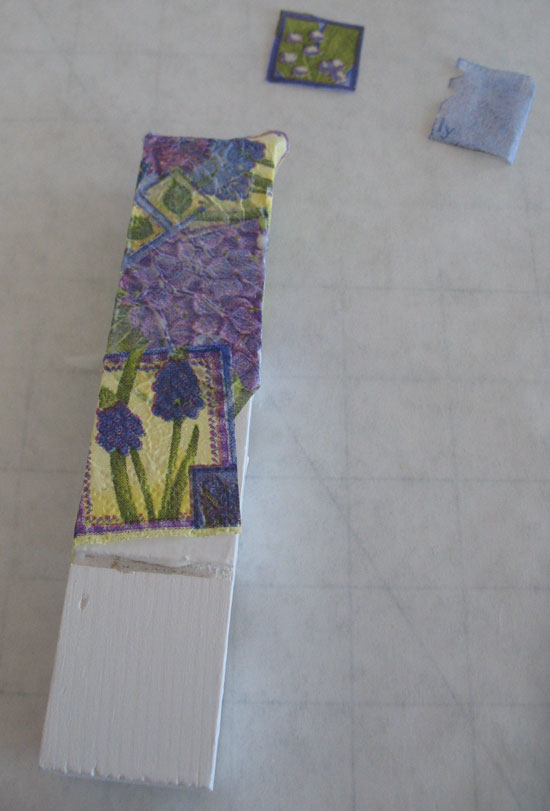
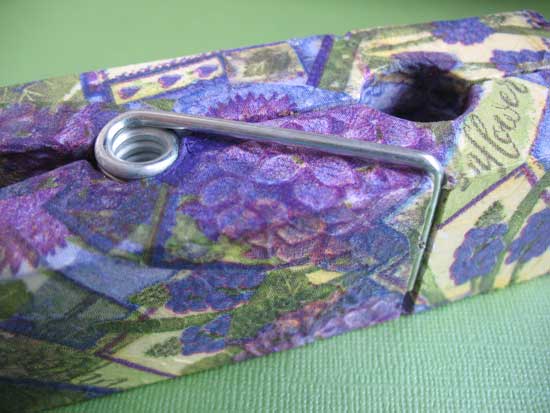
Begin by selecting the paper you will use to cover the clothespin.  I used two different types on the two clothespins I created.  For the purple/green one I used a cocktail napkin with floral designs.  Most napkins are more than a single ply so you want to start by carefully separating the patterned layer from the other plies.  This makes the paper thin, transparent and easy to work with.  Next, cut out the various motifs on the napkin.  You do not have to be too careful doing so.  You might choose to “fussy cut” a few motifs to use as the top layer, especially if there are words printed on the napkin.

If you are going to use tissue paper begin by tearing the paper into small squares.  Again, the shape of the squares is not critical – you will be tearing them further when you apply them to the clothespin.

You could also use other patterned paper such as scrapbook paper but the sheer quality of tissue makes it easy to mold and bend the paper to fit the curves of the clothespin.

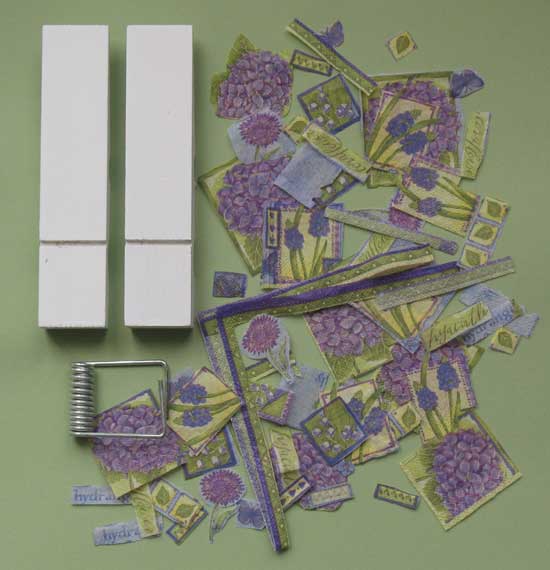
Separate the spring mechanism from the wooden arms of the clothespin.  Here's a little tip:  if you only have one clothespin take a digital picture of the side before you take it apart.  It helps to have a visual aid when it comes time to put it back together.

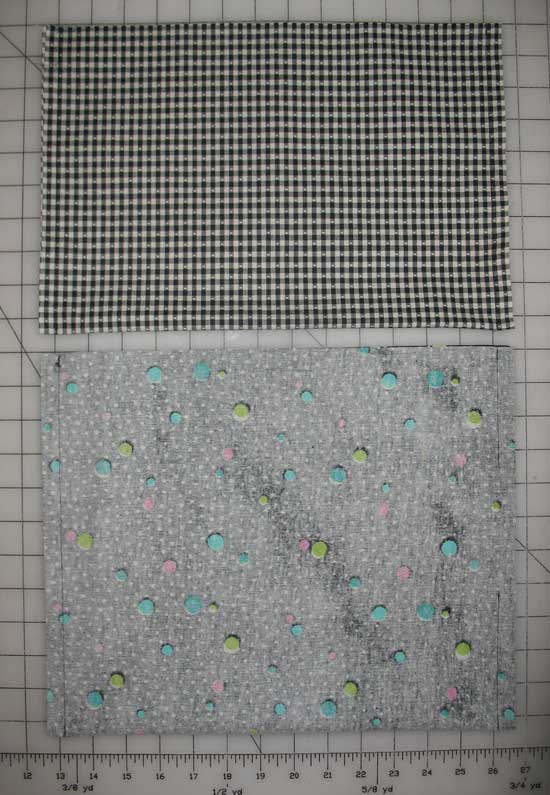
Your materials should now look something like this:

Modge Podge (MP) is a glue, sealer and finish all in one.  It comes in matte or glossy.  You can also use plain white glue though the finish is not quite as lustrous.  One jar of MP will last a long time.  Choose a clean paint brush for the project.  The MP washes out with water but you may want to dedicate a brush to the cause.

Begin by painting a small area of one wooden arm with the MP covering the top and sides. 

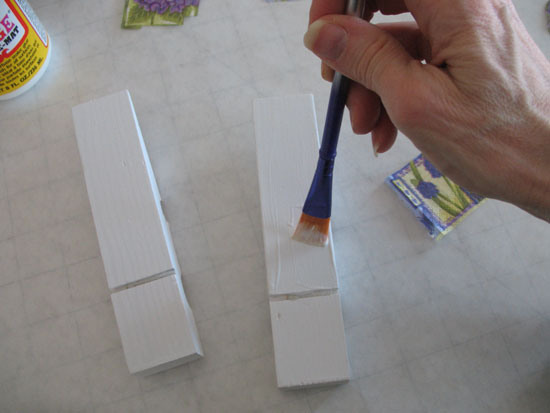
Place a piece of paper on the glue and brush additional glue on top.  Use the paintbrush to smooth the paper and mold it to the clothespin.  Continue covering the surface of the clothespin, overlapping paper and adding MP as you go.  The tissue is fragile when wet so take care to gently brush additional MP on top.  I recommend you start on the underside of the wooden arm so the final application will be from the top and wrap around to the underside.  Apply paper in the grooves on the front side of the pin and use your brush to press the paper smoothly down into the crease.  Ensure that there is no extra glue in this crease so the spring mechanism can seat back into the groove.

You may need to work in stages as holding wet areas causes the paper to stick to your fingers and tear.  Build up several layers of paper – the transparent quality of the tissue will create lots of depth and texture.  If your paper includes text apply this as the top layer so the writing will show.

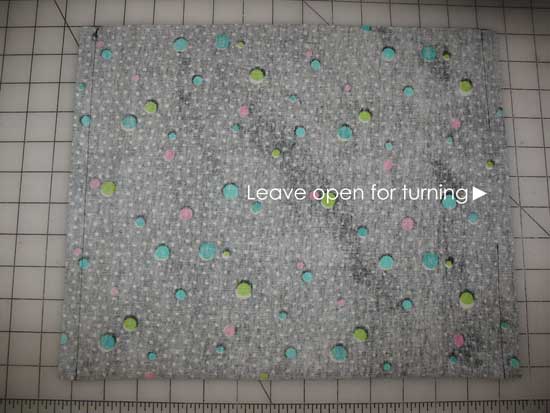
When you have completed one area or an entire side make sure you have a thick coat of MP over all of the paper and let dry thoroughly.

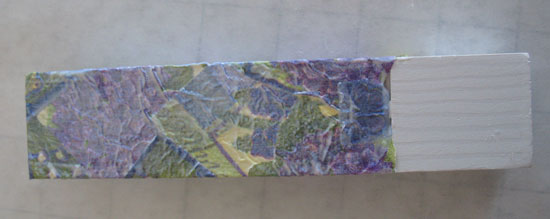
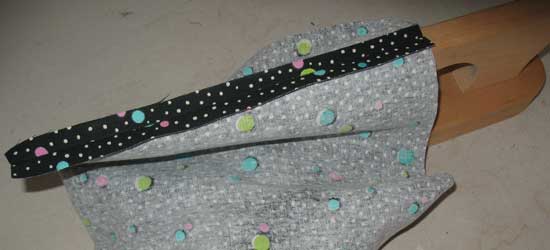
Continue layering paper until the entire clothespin has been covered.  Again, let the glue dry thoroughly.  Here’s what my clothespin parts looked like when I had finished.

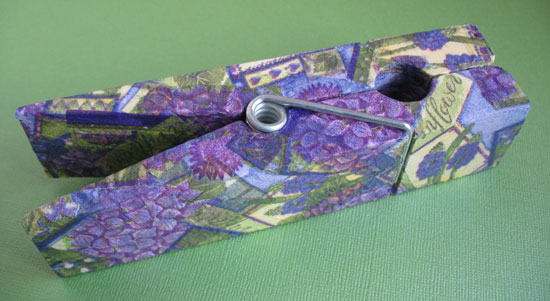
Carefully reassemble the clothespin.  This is easier if you have four hands as the spring is very tight.  Be prepared for some damage to the paper during this step.  This can be easily repaired after the clothespin is back together.  Just take a little MP and a tiny piece of paper and glue it over any scrapes that occur.

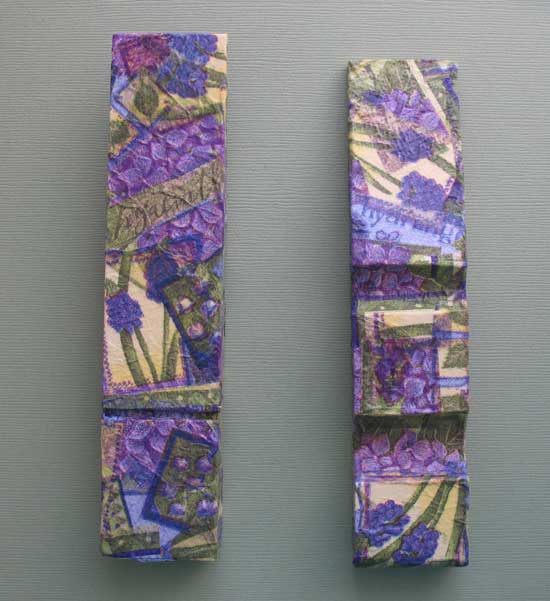
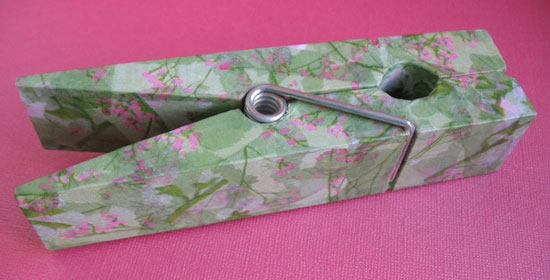
Here are some shots of my completed clothespins.  Click on the smaller thumbnails to view the full sized photo.  The light green/pink one was created using torn pieces of tissue paper.  I love how the layered paper shows through and gives so much depth to the project.   Enjoy making your own and please send me a picture.

Wednesday
Feb032010

Ribbon Handled Bag

You can make this bag any size you want.  The trick is to cut the lining fabric 4” longer and the same width as the outer fabric.  I will give the dimensions of the bag I created which is on the small side, great for carrying lunch, a handwork project or a journal and pen.

Cut outer fabric 14” x 19”

Cut Lining Fabric 14” x 23”

For handles use 1-1/4 yard of 1” grosgrain ribbon.  Cut this length in half for two handles.


Fold outer fabric in half matching the 14” ends, right sides together. Pin along the sides and stitch ½” from the cut edge of the fabric.  Repeat for the lining fabric, leaving a 4” opening in one side for turning.


Press the seams flat and then open.  A point presser makes this easier.

Fold the lower corners of the bag into a triangular shape making a box bottom and matching the side seam with the fold at the bottom of the bag.  Sew across the triangle 2” from the point.  Repeat on both sides of each fabric piece.

Turn the outer fabric right side out but leave the lining fabric inside out.  Make sure you poke out the lower corners of the outer bag.  Drop the outer fabric bag inside the lining fabric bag with the right sides of each piece facing each other.  Match the side seams on the two bags and align the top cut edges of the fabric.  Pin along the entire upper edge. 

Sew completely around the upper edge of the bag 1” from the cut edge of the fabric.

Turn the bag right side out through the opening in the lining.  Reach through the opening and finger press the 1” seam allowance toward the lining half of the bag.  Press the seam where the two fabric layers join with an iron.

Push the lining fabric into the bag allowing the top 1” to fold over the top seam allowance.   Edgestitch along the fold of the lining fabric (or stitch in the ditch if you prefer).

For the handles mark approximately 3” on either side of the center of the top edge of the bag on both the front and back of the bag.  Mark the ribbon 4 “down from each cut end and fold the ribbon in half lengthwise at this point.


Sew the ribbon to the bag at the marks you made 3” on either side of the center front and back having the ribbon folded in half as you sew. 

Use the free end of the ribbon to tie a knot over the attached ribbon and leave end hanging.


For details on the kanzashi flower I used on this bag see my post Love in Bloom.

Monday
Jan182010

Journal Cover


This tutorial will explain how to make a customized cover for a journal or other hardcover notebook.  Click on the thumbnails below to see the full sized image.  

Begin by measuring the book you would like to use.  Open the book out flat and measure the width and height from edge to edge.  My example journal was 9” x 12” (example measurements will be shown in parentheses in italics).  Add 1” to both dimensions to allow for ½” seam allowances (10” x 13”).  In the example I am showing the outer fabric is created from a fabric panel of woven strips.  You can use any fabric you wish and cut it to the correct size. 

Cut one outer layer and one lining layer this size.  Also cut two pieces of fabric for the “pockets” that the book cover fits into.  These should be cut the same height as your outer and lining fabrics (10”) by 6” wide. 

Press these two pieces in half along the 6” sides – you will have a folded rectangle measuring 3” wide by the height of your book.

Lay the lining fabric right side up.  Match the cut edges of the pocket pieces to the raw edges of the lining fabric and pin in place.  The folded edge of the pocket pieces should be toward the middle of the lining fabric.

Baste the pocket pieces to the lining.  Lay the outer fabric layer over top of the pockets with the right side facing the right side of the lining fabric (pockets will be sandwiched between the two layers).  Pin around all four sides.  Stitch around the edges using ½” seam allowance, leaving an opening for turning in the center of one of the long edges.  Clip corners diagonally and press the seams open as much as possible.  Turn the cover right sides out, taking care to fold the pocket pieces to the lining side of the fabric.  Push the corners out, fold in the edges of the opening, and press the cover to form crisp edges. 

If you plan to embellish the cover you should do so before sewing the opening closed.  I chose to make three ultrasuede flowers and sew them on with buttons.  Here is a trick for sketching freehand flowers that will have balanced petals.  Draw a star just slightly smaller than the desired flower.  Use the five points of the stars as a guide to draw the petals.  Alternatively, draw a “love sign” then divide the two largest quadrants in two forming five arms.  Again, use the arms as a guide to draw your petals.

Cut out the flowers from ultrasuede.  Working through the opening as needed, pin the flowers in place on the cover.  I used pearled cotton to sew the buttons on.  Take a stitch through the flower and the cover as shown.  Pull the needle through leaving long tails.

Thread the buttons onto the thread tails.  Push the needle through one set of holes on the button, switch the needle to the other tail and push through the other set of holes.

 Tie the thread tails into a double knot and trim the ends as desired.

When all of the embellishing is complete sew the opening closed by hand or machine.

Slip the cover of the book into the pockets in the lining.  Enjoy!

Tuesday
Jan122010

The Safari Bag

The design for this bag was based loosely on the size of a commercial paper gift bag.  Of course you can make your bag any size you want but when finalizing the dimensions I took into account how many bags I could cut from 54” fabric since I was planning to make 12.


First, create your pattern.  Using drafting paper draw a rectangle measuring 13.5” x 24” (this will allow for laying out four bags across 54” decorator fabric).  Mark the center of the long dimension (12” above and below the line).  Now draw the cutouts which will make the corners of the bag.  At the center mark, measure in 2.5” and draw a line parallel to the long edge.  Measure 1.75” on either side of the center mark and draw lines perpendicular to the last line.  You will have a rectangle measuring 2.5” x 3.5” spanning the center mark on the bag.  Repeat on the other long edge.  Along both short edges measure in 3 inches from the outer edge and make a mark on the pattern for strap placement.


Cut out the pattern, removing the paper in the rectangles you just created.  If you plan to use this pattern repeatedly you may want to cut one from poster board or some other durable material. 

Cut one outer fabric and one lining from the pattern. 


Make 1/8” snips at the center mark on both edges (two snips for each fabric layer) and at the strap placement marks along the short edges on the lining fabric only (four snips). 


Cut two 18” straps from webbing (or create your own straps from fabric).  If you are using a custom label sew it to the lining fabric now.  I centered mine 1.5” from the top cut edge.  You can also add pockets to the lining at this point if desired.


Baste the straps to the lining fabric before you begin constructing the bag (you can do this step later but it is easier to do while the fabric is flat).  Place the right side of the strap against the right side of the lining fabric, cut edge of strap even with the top edge of the fabric.  Place the strap to the inside of the strap placement snips.  Pin in place.  Repeat with the other end of the same strap and the other snip mark (ensure that strap is not twisted).  Repeat with the other strap on the opposite end of the fabric.  Baste across the straps ¼” from the fabric edge.


With right sides together fold the outer fabric along the center snips and stitch the sides seams using ½” seam allowances. 


Press the seams flat then press open (a point presser makes this task easier). 


Repeat with the lining fabric, leaving a 5” opening in the middle of one side seam for turning.  Press the seams flat then open.

Box the corners of the bag by aligning the cut edges of the cut out rectangles, matching the side seams to the center mark snips.  Pin, stitch at ½”.  Press the seam flat only.  Do this for both the outer and the lining fabric.  Turn the outer layer right side out.  Leave the lining wrong side out.  Drop the outer layer into the lining layer, right sides together, matching side seams.  Pin along the upper edge and stitch around entire edge, overlapping the stitching at the beginning and end.  Carefully press this seam flat and open. 

Turn the bag right side out through the opening in the lining.  Reach through the opening and push the corners of the outer fabric layer out.  Do not do this on the lining layer.  Sew the opening in the lining closed.  You can do this my hand or machine.  If by machine, pin the edges of the opening together and edgestitch 1/8” from the folded edges. 


Push the lining down into the outer bag and finger press the upper edge.  Press lightly with the iron.  Topstitch around the top edge of the bag.

You can stop at this point or add trim around the top edge of the bag.  Measure around the top edge of the bag to determine the length needed.   The eyelash trim I used on these bags was created using three different colors of Lion brand Fun Fur yarn (black, brown, ivory).  Holding all three colors together, knit an I-cord the length needed.  For a full look make sure you knit your stitches loosely.  For instructions on creating an I-cord please see this video. http://www.youtube.com/watch?v=jcGj6tpqeJA

Tie the two yarn ends together forming a circle with the trim.  Fold in half at the knot and mark the other fold with a pin, dividing the trim circle in two.  Match the knot to one side seam (orange pin) and the pin to the other side seam (yellow pin), placing the trim around the top edge of the bag.  If possible, use long, flat head pins to pin on the trim; take a tip from the operating room and count your pins as you insert them and then again as you take them out – don’t lose a pin in the thick trim!

You can sew the trim on by hand or machine.  If sewing by hand use a curved needle and a backstitch.  For machine stitching make sure you have used plenty of pins to hold the trim in place.  Sew from the lining side of the bag directly on top of the previously stitched topstitching.  The trim will be down against the feed dogs.  Use a large tapestry needle to bury the yarn ends into the trim.


Page 1 2 3