


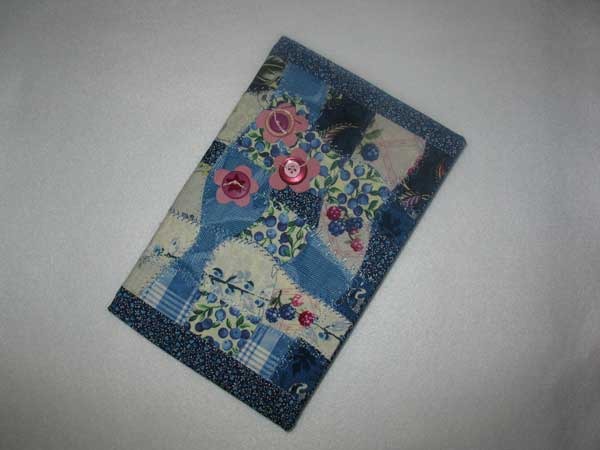
Journal Cover
This tutorial will explain how to make a customized cover for a journal or other hardcover notebook. Click on the thumbnails below to see the full sized image.
Begin by measuring the book you would like to use. Open the book out flat and measure the width and height from edge to edge. My example journal was 9” x 12” (example measurements will be shown in parentheses in italics). Add 1” to both dimensions to allow for ½” seam allowances (10” x 13”). In the example I am showing the outer fabric is created from a fabric panel of woven strips. You can use any fabric you wish and cut it to the correct size.
;)
Cut one outer layer and one lining layer this size. Also cut two pieces of fabric for the “pockets” that the book cover fits into. These should be cut the same height as your outer and lining fabrics (10”) by 6” wide.
;)
Press these two pieces in half along the 6” sides – you will have a folded rectangle measuring 3” wide by the height of your book.
;)
Lay the lining fabric right side up. Match the cut edges of the pocket pieces to the raw edges of the lining fabric and pin in place. The folded edge of the pocket pieces should be toward the middle of the lining fabric.
;)
Baste the pocket pieces to the lining. Lay the outer fabric layer over top of the pockets with the right side facing the right side of the lining fabric (pockets will be sandwiched between the two layers). Pin around all four sides. Stitch around the edges using ½” seam allowance, leaving an opening for turning in the center of one of the long edges. Clip corners diagonally and press the seams open as much as possible. Turn the cover right sides out, taking care to fold the pocket pieces to the lining side of the fabric. Push the corners out, fold in the edges of the opening, and press the cover to form crisp edges.
;)
If you plan to embellish the cover you should do so before sewing the opening closed. I chose to make three ultrasuede flowers and sew them on with buttons. Here is a trick for sketching freehand flowers that will have balanced petals. Draw a star just slightly smaller than the desired flower. Use the five points of the stars as a guide to draw the petals. Alternatively, draw a “love sign” then divide the two largest quadrants in two forming five arms. Again, use the arms as a guide to draw your petals.
;)
Cut out the flowers from ultrasuede. Working through the opening as needed, pin the flowers in place on the cover. I used pearled cotton to sew the buttons on. Take a stitch through the flower and the cover as shown. Pull the needle through leaving long tails.
;)
Thread the buttons onto the thread tails. Push the needle through one set of holes on the button, switch the needle to the other tail and push through the other set of holes.
;)
Tie the thread tails into a double knot and trim the ends as desired.
;)
When all of the embellishing is complete sew the opening closed by hand or machine.
Slip the cover of the book into the pockets in the lining. Enjoy!

 sewing, tutorial