Julie Bowersett

juliebowersett{at}gmail{dot}com
Navigation
Search
Categories

Blog Writing Course Alumni

From Guide to Art Schools

CraftGossip

Entries in silk (4)

Tuesday
Mar082011

Dyeing some silk

With today’s post I hope to illustrate a little something about color and fabric dyeing.  I’ve been playing around with fabric dyes this week in preparation for dyeing a large piece of fabric as the backing of a banner for my church (which I will share in a future post).  Whenever I have some dye left over, especially if it is in the green color family, I like to dye some silk pieces to use for the leaves in some of my flower creations.  The following two pictures illustrate the fact that dyeing silk fabrics with fiber reactive dyes can yield some pretty surprising and unpredictable results.

In this picture all of the fabrics were dyed with the same two dyes, one blue and one yellow, mixed at varying proportions.  All of the silk fabrics were dyed in the same container at the same time.  I was especially surprised to see how different the chiffon turned out.  The velvet, which I’ve labeled as silk, is actually a silk ground with a rayon pile.  You can see the selvedge edge of the fabric where the silk is exposed – it is almost the same color as the chiffon.  The rayon pile soaked up the rich color from the dye (fiber reactive dyes were developed, after all, to dye cotton and rayon).  The cottons were dyed with a more dilute solution of the same dye in a separate container. 

The dye mixture I started with looked much more blue than the silk fabrics turned out.  Silk fibers are notorious for unpredictable results, especially with blue dyes.  When you mix blue with another primary color to make a secondary color, my experience tells me that the resulting color of the silk will be a secondary color leaning more toward the primary other than blue.  For instance, if you mix red and blue to make purple, you will end up with a more reddish-purple, the silk responding more to the red than to the blue.  The same was true for this green (a more yellowish-green was achieved).

These next fabrics were dyed with a mixture of the same yellow from above but a different blue.  I used far less yellow this time, resulting in a more blue-toned green.  Again, all of the silks were dyed together in the same bag and the cottons were dyed with two different dilute versions of the same dye in their own containers.

I like experimenting with dyes and fabrics to see the results.  Luckily, the projects I use these fabrics in do not require a reproducible color or even very predictable results (after all, nature is full of variation).  But taking the time to learn about how different fibers react to the different dyes helps me know where to start.  I encourage you to try it yourself.

Tuesday
Oct122010

More Handmade Fabric Flowers

Many of you know how much I love fabric flowers (I’ve blogged about Kanzashi flowers several times in the past).  I have been trying my hand at another style of flower recently.  I am combining machine embroidered designs with handmade fabric flowers to create “wearable bouquets”.  My latest creation is something that I made to wear to a workshop I am attending tomorrow night , Inside the Creative BusinessThis gathering is aimed at women–owned creative businesses in the wedding industry.  I am hoping to begin marketing some of my creations, particularly wedding accessories combining hand sewn items with handmade fabric flowers.  I currently have someone working on a logo and brand for me, and am working on a portfolio of items.

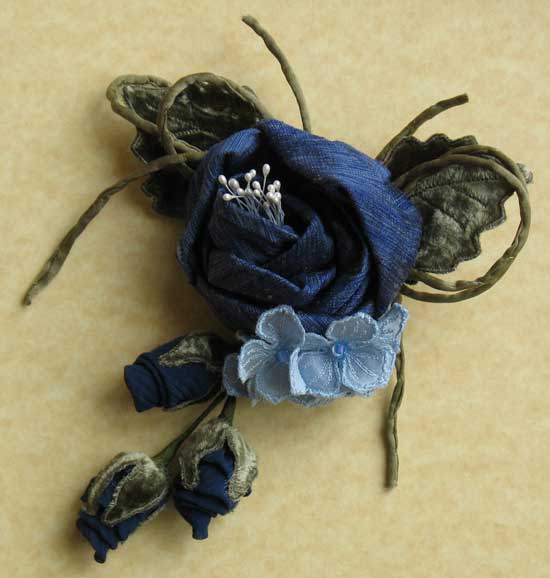
The large, blue rose in this pin was created using vintage millinery techniques as were the small rose buds dangling below.  The leaf and hydrangea were both made from machine embroidered designs. 

Most of the materials I use are natural fibers (silk, wool, cotton, linen, rayon) and many are hand-dyed (by me).  I also incorporate beads and other decorative  elements into my pieces.  This piece uses silk velvet, silk dupioni, silk chiffon, hand-dyed silk cording, vintage stamens and glass beads.

I felt like I should wear an example of my work to this workshop since it is the detail and texture of such pieces that really make them stand out (and, hopefully, will make them memorable).  Now, here’s a question for you:  what do you think I should call this piece?  Post your suggestions in the comments section.

Thursday
May202010

Bag of the Week 19

Handwoven Mini Drawstring Bag

A number of years ago someone brought a Deborah Brunner bag to a gift exchange and everyone fought over it.  Deborah has created several fabulous patterns for bags made from handwoven (or pinwoven) pieces of fabric.  Their diminutive size makes these projects simple to complete without a huge investment of time (which handweaving can demand).  I have made several of these bags and will showcase them today and next week. 

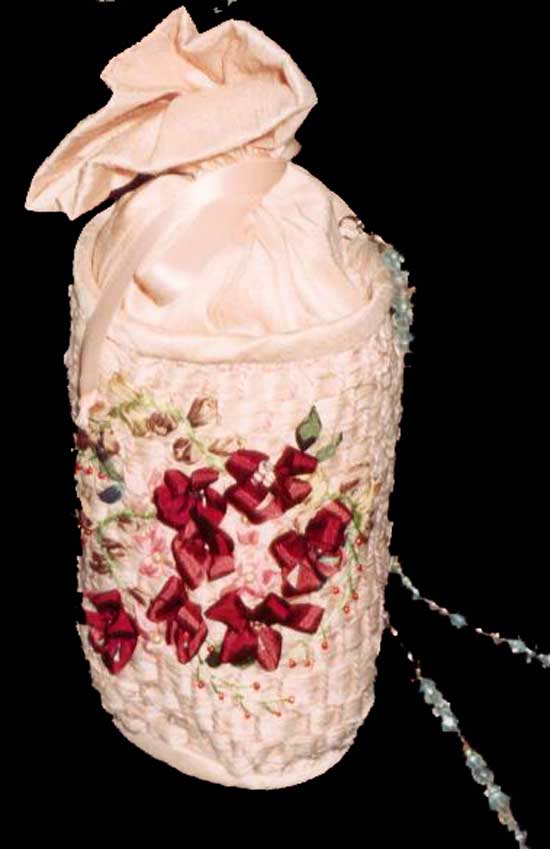
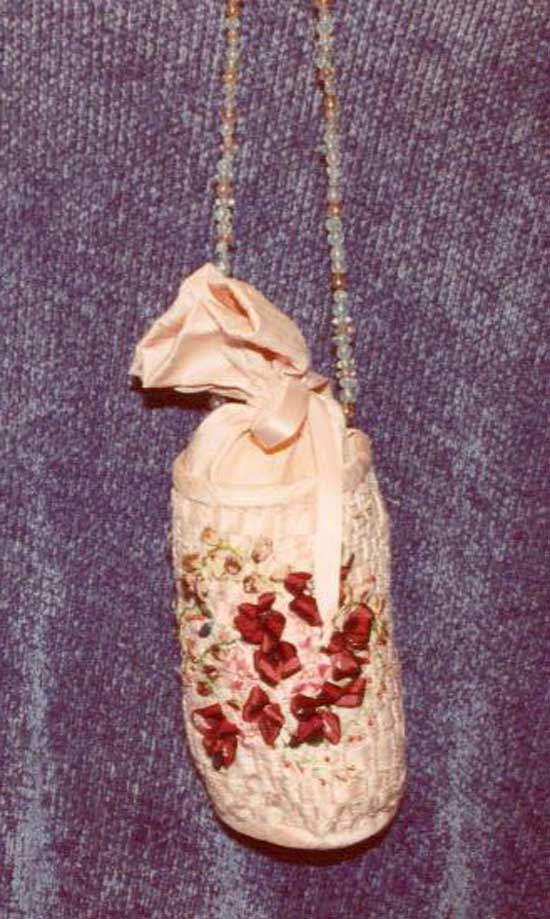
This little pastel pink drawstring bag was created by weaving a panel of torn fabric strips (I used silk dupioni).  First, a foundation is created using Pearle cotton thread pinned to a foam core base.  The fabric strips are woven through these threads and the panel sewn to additional silk to create this 9” purse.  The woven panel was adorned with silk ribbon embroidery and beading.  The strap was created from strung glass beads.

These pictures were taken in the olden days of film so I apologize for their poor quality.  Next week I will feature an underwater seascape created with the same weaving technique.

Saturday
Jan232010

from my sewing room

I’ve been working on a scarf to donate to a silent auction for an event I’m attending next month.  I’ve done this for a number of years now and I can’t always predict what will be a hit.  One year I spent a ton of time making a small wardrobe for an American Girl doll thinking this would be very popular but it wasn’t.  Another year I cut up a printed velvet scarf that I had purchased at a thrift store for $1 and made it into a simple evening bag.  It went for big bucks.  I have also learned that the way I feel about a piece is also no indication of how well it will sell and am no longer disappointed when something I love is not loved as much by others.  The scarf I’ve made this year is not something I would personally wear, but I am hoping it will appeal to some of the artistic-of-nature in the crowd.

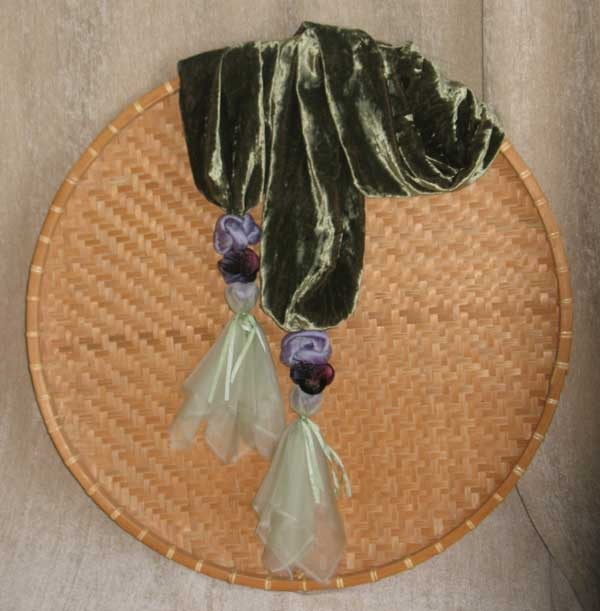
I based the design on a scarf by Diane Ericson which can be found in Linda Lee’s book Scarves to Make.  The body of the scarf is made from silk velvet.  The ends are embellished with three knots.  The largest and smallest are made from dupioni silk.  The middle size is made from stretch velvet.  The tassel is formed by tying a piece of silk organza over the smallest knot and securing with silk ribbon.  Silk velvet is a very trying fabric to work with.  I have found that basting the seams with Wonder Tape before stitching prevents the fabric from shifting, a real sanity saver.

Here’s hoping I’ve come up with a winner this time.