Julie Bowersett

juliebowersett{at}gmail{dot}com
Navigation
Search
Categories

Blog Writing Course Alumni

From Guide to Art Schools

CraftGossip

Entries in flowers (7)

Wednesday
Jul132011

My Mother's Vase

Dear Readers:

I am really enjoying spending the summer with my two, active little boys.  Really, I am.  But I am also struggling, STRUGGLING (!) to get my blog updated as often as I like.  Please bear with me; fall is just around the corner.

Today I leave you with a lovely picture of some summertime flowers in my mother's vase.  I remember this vase from my childhood, usually filled with lilacs from the bush in our yard or lily of the valley from our boxwood border.   My mom gave me this vase when she was downsizing from her house to a small apartment.  She tells me that it was a gift to her mother from some visiting relatives, already an antique when it was given back in the 1930's.  I love it because it is perfect for so many different types of flowers.  I cut these long-stemmed alstromeria lilies short and love how they look.  These are some of my favorite flowers for several reasons:  you can pick them up inexpensively from almost any grocery store so there is never any excuse for not having fresh flowers in your home; they come in so many different colors you can suit your mood; they make great filler for use with other flowers; they last forever.  This batch looked fresh for about three weeks.  $4 for three weeks of flowers -- how can you beat that?

Tuesday
May312011

What I Like in May:  Peonies

It’s the last day of May (though it feels more like mid-August this week) and I am sharing with you some pictures of yet another item off my favorites list.  This month it’s peonies, those sweetly scented, shabby-chic, tousled mop-heads of the flower world.  The former owners of my house were kind enough to plant two peony beds around our deck so that I can enjoy them each May.  I also am drawn to designs featuring peonies, and have included a few shots of those along with a few of the real thing.  I hope you enjoy them.

Tuesday
Jan252011

Lots of Little Projects

People who sew are the most generous people in the entire world. 

I spent a wonderful two days at a sewing retreat over the weekend:

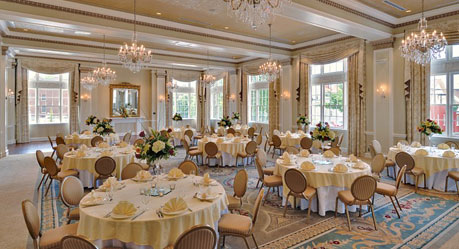
George Washington Hotel ballroom

  • a fine, luxury hotel with a lovely ballroom where we sewed (with floor to ceiling windows and lots of natural light);
  • socializing with friends I hadn’t seen in a long time and meeting some new ones, too;
  • excellent food (and someone else to wash all of the dishes);
  • gracious staff who took care of all of our needs;
  • shopping at the local shops and finding some treasures;
  • completing some long overdue projects
  • inspiration by the truckload;
  • mini-classes with lots of fabulous ideas.

One of my favorite parts was the last item on the list.  Various members generously volunteered to share a quick project that they had made and showed the rest of us how we could make our own.  There was a great variety of items. 

Michele showed us how to create fabric covered pattern weights using metal washers and strips of fabric.  You can find this (and other fabulous) projects on her blog Sew Inspirations.

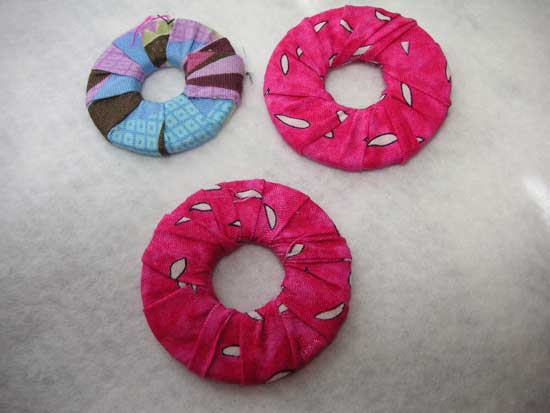
Photo by Michele at Sew Inspirations

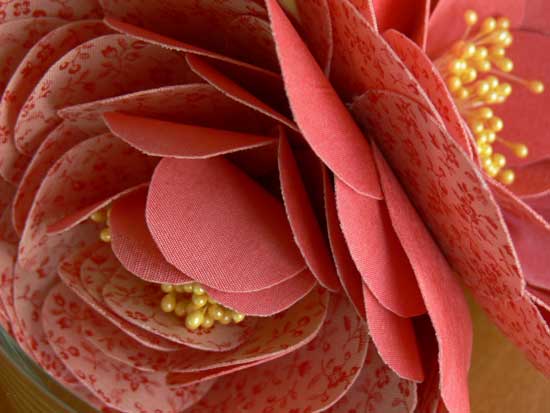
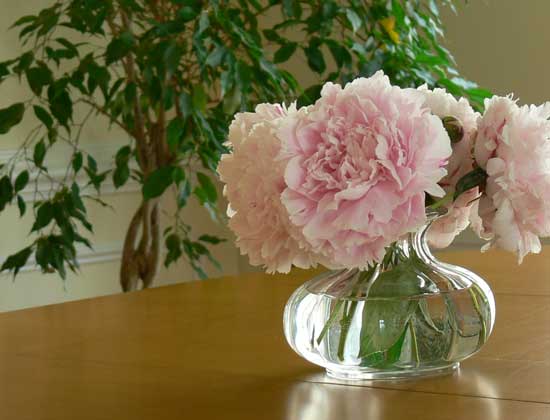
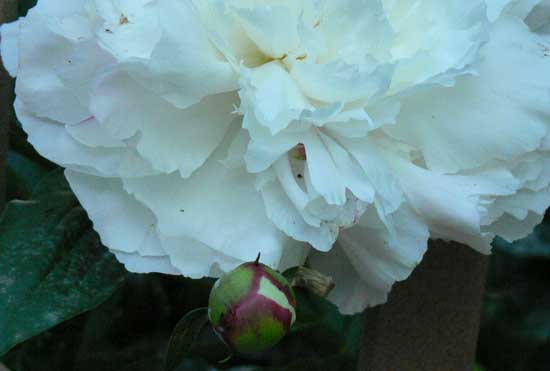
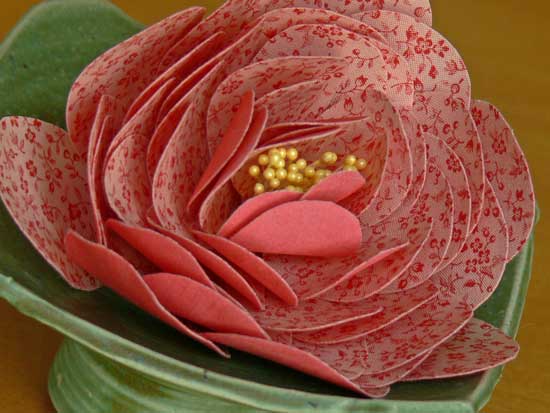
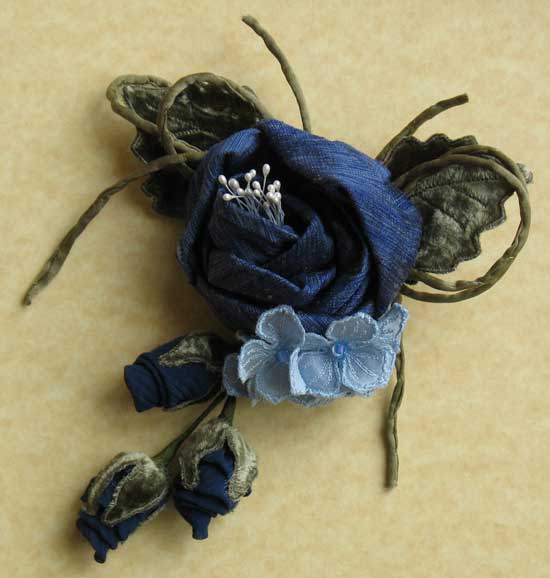
My friend Jane came all the way from Florida to attend this retreat and I was so glad to see her.  I follow her blog Lucky Sew and Sew religiously (and you should, too!).  Jane was my very first table mate at my very first sewing retreat years ago.  She showed us how she created gorgeous fabric flowers a la Kenneth King. 

Photo by Jane at Lucky Sew and Sew

You can find Kenneth King’s original directions on the Threads website.

Anne made Studio Kat Designs’ Aeropac, a very clever pouch that stores your travel documents and hangs around your neck.  Studio Kat offers the pattern free on their website.  Anne was so generous that she handed out many of the materials needed for the project so we could all make our own.

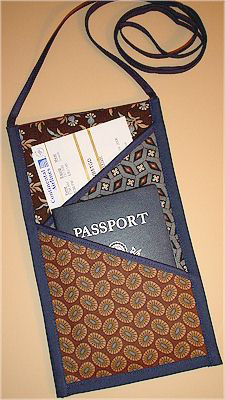
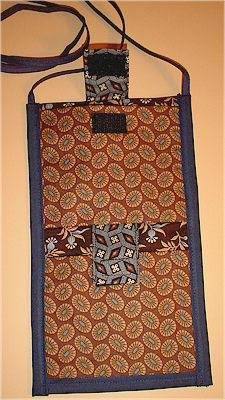
Photos by StudioKat Designs

Martha showed us how to make the very popular snap bags that use a metal tape measure as the closure.  She had made several from fabric but also had the brilliant idea of making one from clear vinyl to carry her liquids on airplanes – she reports having no trouble with the bag at security.  There are several blogs that have tutorials for making these bags, and Martha shared those web sites with us.  You can find these tutorials at Tattered Garden and Stash Manicure.

Photo by Samm at Stash Manicure

Grace had made the most adorable little silk bags called Little Japanese Bags that resemble flower blossoms when all tied up.  She showed us step by step with samples she had made just how easily we could create our own.  She had a set of instructions written by Hannelore Nunn which I was not able to find anywhere on the internet.  But I was able to find Hannelore’s email address and sent her a note.  She very graciously emailed me a copy of the instructions for the bags which she tells me are a traditional Japanese design.  We have been emailing back and forth over the last day and she is a warm and generous person, someone I’d like to go to a sewing retreat with.  I'll post some pictures of the process when I make one of these myself.

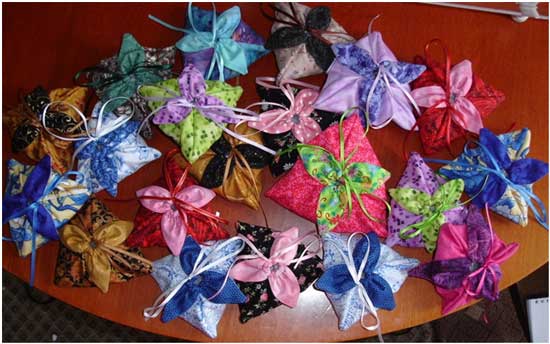
Photo by Hannelore Nunn

I am working on my own version of a couple of these projects and will post pictures as soon as I’ve completed them.  In the meantime get on over to some of these wonderful sites and make some of these goodies for yourself.

Tuesday
Oct122010

More Handmade Fabric Flowers

Many of you know how much I love fabric flowers (I’ve blogged about Kanzashi flowers several times in the past).  I have been trying my hand at another style of flower recently.  I am combining machine embroidered designs with handmade fabric flowers to create “wearable bouquets”.  My latest creation is something that I made to wear to a workshop I am attending tomorrow night , Inside the Creative BusinessThis gathering is aimed at women–owned creative businesses in the wedding industry.  I am hoping to begin marketing some of my creations, particularly wedding accessories combining hand sewn items with handmade fabric flowers.  I currently have someone working on a logo and brand for me, and am working on a portfolio of items.

The large, blue rose in this pin was created using vintage millinery techniques as were the small rose buds dangling below.  The leaf and hydrangea were both made from machine embroidered designs. 

Most of the materials I use are natural fibers (silk, wool, cotton, linen, rayon) and many are hand-dyed (by me).  I also incorporate beads and other decorative  elements into my pieces.  This piece uses silk velvet, silk dupioni, silk chiffon, hand-dyed silk cording, vintage stamens and glass beads.

I felt like I should wear an example of my work to this workshop since it is the detail and texture of such pieces that really make them stand out (and, hopefully, will make them memorable).  Now, here’s a question for you:  what do you think I should call this piece?  Post your suggestions in the comments section.

Tuesday
Sep282010

My DIY Wedding

Tomorrow is my 9th wedding anniversary.  I was married in late September 2001, a very emotional time in this country.  The Washington, DC area had not recovered from the terrorist attacks earlier in the month and a number of people were unable to come to our wedding because of travel difficulties created by airport closures in this area.  But we felt that it was imperative that we forge ahead and celebrate life and love in this very unsettled time.  One story I will always remember:  one of my DIY projects was to make fabric tissue covers which I stuffed with heart-printed tissues.  I remember my then-fiance watching me fill a basket with the completed covers and saying, “make more, make more”.  I think he had a good idea that there would be a few tears shed during the course of the day.

Being a lover of all things handmade I determined early on that I would take on as many DIY projects as I could for my wedding.  I started with the invitations which I created from beautiful handmade paper overlaid with vellum sheets and tied with a ribbon.  I love the look of hand lettered envelopes but didn’t want to spring for the expense.  Instead, I printed the addresses in a beautiful script on my computer but at only a small % setting for the ink, making the letters barely visible.  I then used a large-nibbed gold metallic pen and traced over each letter, giving the appearance of hand lettering.

I also decided I would do all of the flowers.  I have had a wee bit of experience making wedding flowers in the past, mostly artificial flowers back in the 1980’s when those were popular for weddings.  After a lot of research and searching I found that a local grocery store had the best price on roses; I think they were $6/dozen.  I went to six or seven different stores of the same chain and bought up all of the roses they had in my chosen colors as well as dozens of bunches of alstroemeria lilies.  I used all warm shades from gold to red and everything in between.  I decided that what I lacked in variety could be made up in sheer volume.  I made all of the boutonnieres, corsages, and venue décor.  I decided to wear a wrist corsage instead of carrying a bouquet as we had planned to have a cocktail hour before the ceremony and I did not want to be encumbered by a bouquet.  I used simple vases from Ikea filled with roses on the tables and also filled a milkglass urn for the top of the cake pedestals I used to hold the cupcakes, as well as two standing candle holders.

The cupcakes were another thing I did myself.  My husband does not particularly like cake so I thought it would be silly to spend a large amount of money on a cake he would not enjoy eating.  I considered pie (his favorite) but couldn’t image how messy it might be to feed this to one another so we went with cupcakes.  To this day people still tell me these were the best cupcakes they had ever eaten (including my husband).  It’s no surprise considering the name:  Whipped Cream Cake with Italian Meringue Buttercream.  Both recipes come from Martha Stewart’s 1987 Weddings book.  I flavored the buttercream icing with Frangelico liqueur which gave it a wonderful flavor.  I piped the icing on in a swirled pattern and sprinkled the tops with edible glitter.

My biggest project for the wedding was making my own dress.  I took a series of classes at G Street Fabrics in Falls Church, VA, working with a wonderful woman who became my sewing mentor.  Starting out I made several dress muslins attempting to create the wedding dress I envisioned wearing.  Finally realizing that the styles I was choosing were not appropriate for my figure I changed my plan and decided to find a flattering silhouette and learn to love it.  Which is what I did.  I used a Vogue pattern by Vera Wang (#2118, now out of print) which featured a fitted empire waist, princess-line bodice, and flared skirt.  I piped the empire waist seam and added self-covered buttons down the back.  The fabric, was a champagne-colored silk matelasse with an embossed floral design.  The center back of the skirt was left open and designed for layers of tulle to peek out.   I substituted a flounce of lace which I hand beaded with gold and ivory pearls.  I loved making this dress and hope it will be passed down one day as an heirloom to someone in my family. 

I loved all of the hands-on work I did for this wedding.  It not only allowed me to achieve certain looks that I craved (and appealed to my budget mindedness) but also fed my soul like only working with my hands can do.  My wedding really was “from these hands”.

I'm sharing this post today with the folks over at Today's Creative Blog on their Get Your Craft On feature.  Check them out.