


My DIY Wedding

Tomorrow is my 9th wedding anniversary. I was married in late September 2001, a very emotional time in this country. The Washington, DC area had not recovered from the terrorist attacks earlier in the month and a number of people were unable to come to our wedding because of travel difficulties created by airport closures in this area. But we felt that it was imperative that we forge ahead and celebrate life and love in this very unsettled time. One story I will always remember: one of my DIY projects was to make fabric tissue covers which I stuffed with heart-printed tissues. I remember my then-fiance watching me fill a basket with the completed covers and saying, “make more, make more”. I think he had a good idea that there would be a few tears shed during the course of the day.
Being a lover of all things handmade I determined early on that I would take on as many DIY projects as I could for my wedding. I started with the invitations which I created from beautiful handmade paper overlaid with vellum sheets and tied with a ribbon. I love the look of hand lettered envelopes but didn’t want to spring for the expense. Instead, I printed the addresses in a beautiful script on my computer but at only a small % setting for the ink, making the letters barely visible. I then used a large-nibbed gold metallic pen and traced over each letter, giving the appearance of hand lettering.
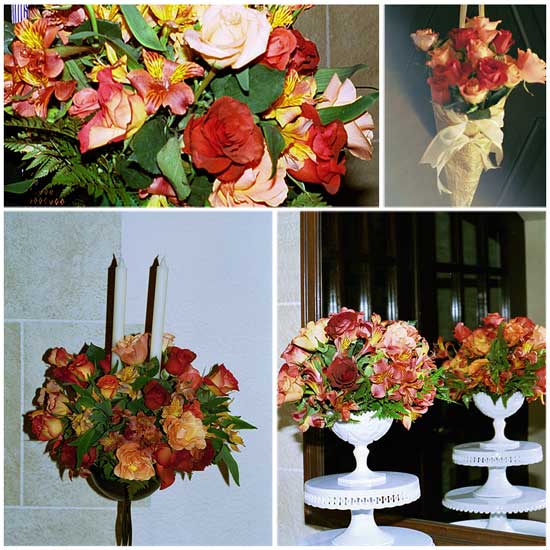
I also decided I would do all of the flowers. I have had a wee bit of experience making wedding flowers in the past, mostly artificial flowers back in the 1980’s when those were popular for weddings. After a lot of research and searching I found that a local grocery store had the best price on roses; I think they were $6/dozen. I went to six or seven different stores of the same chain and bought up all of the roses they had in my chosen colors as well as dozens of bunches of alstroemeria lilies. I used all warm shades from gold to red and everything in between. I decided that what I lacked in variety could be made up in sheer volume. I made all of the boutonnieres, corsages, and venue décor. I decided to wear a wrist corsage instead of carrying a bouquet as we had planned to have a cocktail hour before the ceremony and I did not want to be encumbered by a bouquet. I used simple vases from Ikea filled with roses on the tables and also filled a milkglass urn for the top of the cake pedestals I used to hold the cupcakes, as well as two standing candle holders.


The cupcakes were another thing I did myself. My husband does not particularly like cake so I thought it would be silly to spend a large amount of money on a cake he would not enjoy eating. I considered pie (his favorite) but couldn’t image how messy it might be to feed this to one another so we went with cupcakes. To this day people still tell me these were the best cupcakes they had ever eaten (including my husband). It’s no surprise considering the name: Whipped Cream Cake with Italian Meringue Buttercream. Both recipes come from Martha Stewart’s 1987 Weddings book. I flavored the buttercream icing with Frangelico liqueur which gave it a wonderful flavor. I piped the icing on in a swirled pattern and sprinkled the tops with edible glitter.

My biggest project for the wedding was making my own dress. I took a series of classes at G Street Fabrics in Falls Church, VA, working with a wonderful woman who became my sewing mentor. Starting out I made several dress muslins attempting to create the wedding dress I envisioned wearing. Finally realizing that the styles I was choosing were not appropriate for my figure I changed my plan and decided to find a flattering silhouette and learn to love it. Which is what I did. I used a Vogue pattern by Vera Wang (#2118, now out of print) which featured a fitted empire waist, princess-line bodice, and flared skirt. I piped the empire waist seam and added self-covered buttons down the back. The fabric, was a champagne-colored silk matelasse with an embossed floral design. The center back of the skirt was left open and designed for layers of tulle to peek out. I substituted a flounce of lace which I hand beaded with gold and ivory pearls. I loved making this dress and hope it will be passed down one day as an heirloom to someone in my family.


I loved all of the hands-on work I did for this wedding. It not only allowed me to achieve certain looks that I craved (and appealed to my budget mindedness) but also fed my soul like only working with my hands can do. My wedding really was “from these hands”.
I'm sharing this post today with the folks over at Today's Creative Blog on their Get Your Craft On feature. Check them out.


 Julie Bowersett
Reader Comments (2)
your wedding looks absolutely beautiful, a perfectly successful DIY which does not look diy... what a lovely post ♥
WOW! I am speachless, what a great work.