Julie Bowersett

juliebowersett{at}gmail{dot}com
Navigation
Search
Categories

Blog Writing Course Alumni

From Guide to Art Schools

CraftGossip

Entries in sewing (68)

Friday
Jun182010

Bag of the Week 24

Dress up a straw purse with dresses!

Here is a simple way to embellish a summery straw bag.  I created a panel of embroidered designs and attached it to a purchased bag.  I first embroidered the dress designs onto a white background and then satin stitched that rectangle onto a larger checked fabric piece.  I created a satin stitch frame around the outside by stitching through tearaway stabilizer.  When the panel was complete I glued it onto the outside of the purse with fabric glue.  If your bag is unlined you could also stitch the panel onto the purse.  Then use some of the fabric from the project to make a lining for the bag.

These designs come from A Bit of Stitch’s Appliqué Fashion Dresses.  I have used these designs on all sorts of projects and I love them.  Wouldn’t it be cute to make a dress to wear and then use the same fabric in the appliqué for a matching purse? 

Monday
Jun142010

Sewing with Sheets

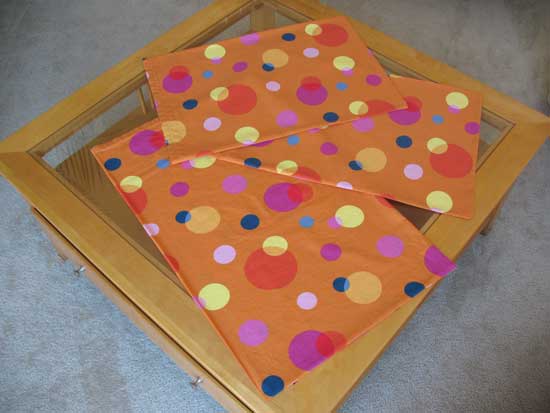
When we travel, my husband and I always take our pillows with us.  The big fluffy ones in hotels always end up giving us neck aches so we prefer to take our own.  I am always a bit worried that they will get left behind, our neutral colored pillowcases blending into the hotel linen.  Well, worry no more!  I fashioned some traveling cases for our pillows to wear when they leave home.  My mother always did this when I was a kid.  She left our good linens at home and covered our pillows in dirt-hiding darker colors for travel.  There is not much chance that these eye-poppers will get lost in a sea of white linens.

These pillowcases, as a sewing project, are not too exciting but they do give me the opportunity to talk about one of my favorite fabric sources:  sheets.  Sheets are fantastic for several reasons.  They are an economical source of a large amount of fabric.  The quality of the fabric can be quite good and you can take advantage of all of the pre-sewn hems.

The first project I ever made with sheets was a pair of Austrian shades for my dining room back in 1988.  I found a lovely pair of twin sized flat sheets in a pale rose with a Jacobean print.  An interesting feature of these sheets was the side seams which were bound with a contrasting ribbon.  I was able to use the wide top hem as the rod pocket (it was, surprisingly, open on both ends) and had to do nothing more than sew rings onto the back of the sheet.  After that project I was hooked.

Since then I have used sheets for a number of different projects.  I have made dozens of crib sheets.  They make great baby gifts.  Depending on the size sheet you start with you can usually end up with two crib sheets (once I had to take out some of the hems to add a couple of needed inches).  One real benefit of this is that you end up with a fitted sheet whose quality is much higher than most commercially available crib sheets.  My favorite place to buy sheets is The Company Store.  They often have great sheets in their clearance section for a very reasonable price.  I’ve written a brief tutorial outlining how to make these.

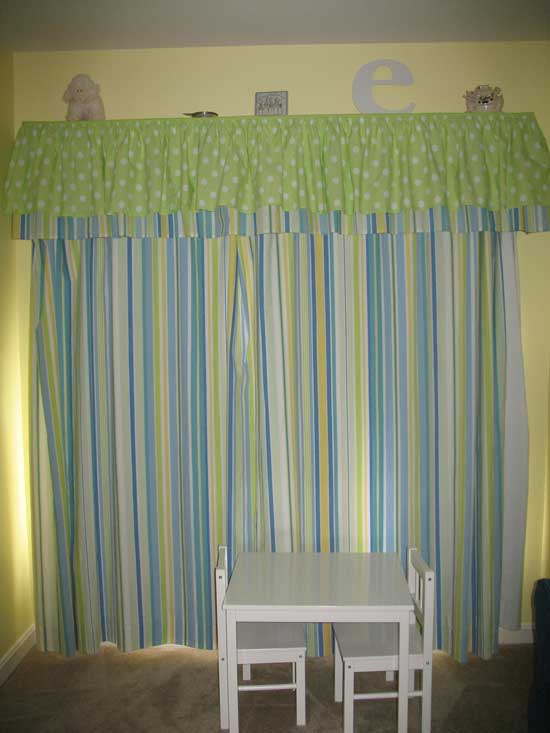
Sheets also make great lined curtains.  My latest ones are the pair in my son’s bedroom.  I simply lined them with another sheet, turned them upside down so the sheet’s wide top hem became the curtain’s bottom hem and hung them from clip-on curtain rings.  These sheets are a bright and colorful stripe and I took several of the colors to use as accents in my son’s room.  I also created the matching valance.  I cut off the desired length from the striped curtain using the narrow hem on the sheet as the finished edge on the valance.  This became the back layer.  For the front dotted layer I started with a crib skirt which was already pre-gathered (yea!).  I cut the skirt panels away from the decking, pieced together enough of the skirt to make the valance and then I bound the two layers (stripes and dots) together with purchased bias tape.  I sewed the soft side of some Velcro to the back of the valance and attached the hard side to the cornice so I can easily remove the valance for cleaning.  In the coming weeks I will have a post on how to build your own cornice like the one in this picture.

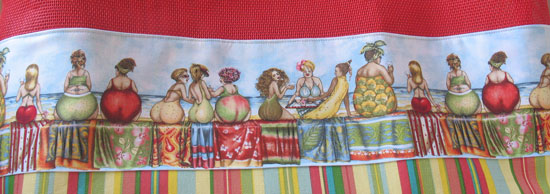
Lastly, I use many of the leftover pieces in other projects.  When my son got a little older and needed his first pillow I was able to make cases that coordinated with his crib sheets (now being used on his toddler bed).  I have used other leftovers to make pillow cases for my bed pillows.  Plan your case to take advantage of one of the pre-sewn hems and then sew your seams with either French seams or on a serger.  Other scraps have been incorporated into quilted wall hangings and used as the backing for those same projects.

Here is a handy link that lists standard sheet and bed sizes. 

I encourage you to try sewing with sheets.  Once you do I think you will find lots of uses for them and become hooked just like me.

Friday
Jun112010

Bag of the Week 23

Curvy Strip-Pieced Bag

Remember the Ribbon Handled Bag I blogged about previously (you can find a tutorial for this design here)?  Well, this is another version of that bag.  This time I took my inspiration from Hope Yoder’s Chit Chat Backsack pattern and created the fabric for the body of this bag from her instructions which she calls Curvy Wurvy piecing.  This technique is fun and very easy to do.  The curved strips are layered on top of each other and fused to a foundation.  I added the blanket stitching along each edge for added definition.  The flower appliqué is from Hope’s pattern and is also available as a machine embroidery design on her website.  It is fused into place and stitched with the same blanket stitch.  I added jumbo rickrack in the seam between the top band and the body and added striped ribbon handles.

This colorway is my absolute favorite:  hot pink, orange, yellow and lime green.  You can see a plaid fabric in this project with those colors.  The first time I used that piece of fabric years ago I based my design around those colors and have been using them ever since.  I am hoarding every scrap of that plaid and dearly wish I could find more.  It may be my most-used fabric ever. 

Sunday
Jun062010

Bag of the Week 22

Mermaid Tote

This is actually a catch up post.  I’ve been a week behind on my bags since the beginning of May when an unexpected trip out of town ate up a week I had not planned for.  So there will two Bag of the Week postings for this week.

Last week I wrote about Nancy Ota’s Screen Play pattern and shared a bag with a decidedly summer theme.  This week I am sharing another:  my Mermaid Tote.  This bag is made from blue pet screen and Michael Miller’s Mermaid fabric which I bought at a quilt store in Virginia Beach a number of years ago.  I have written about this pattern for Week 21 and Week 12 and you can read more about it in those posts.  This picture shows the bottom of the bag which is composed of screen.  This is a handy feature that allows water and sand to filter through.

I made this tote bag to take to the pool and carry home wet items.  It works great for that purpose but I kept losing my keys and pool pass in the bottom of the bag.  Since I had some screen and fabric scraps left over I made myself a little zippered pouch to contain them.  Have fun at the beach!

Thursday
Jun032010

Bag of the Week 21

Summer Screen Tote

Our pool opened this past weekend so I guess it is officially summer.  And this bag is perfect for trips to the pool.  It is another of Nancy Ota’s Screen Play bags (which I wrote about back on Week 12) .  The body is made from pet screen and is perfect for carrying wet towels and toys back from the pool or the beach.   The screen bottom lets sand sift right through. 

I absolutely love this fabric, Fruit Ladies by Mary Stewart.  When I saw it I immediately knew I would use it on one of these bags.   The stripe is a Waverly home dec fabric.

This pattern includes four sizes of bags.  This one is the large size (there is still one larger than this one).  Try this pattern and make your own summer bag, perfect for the pool, beach, library or farmer’s market.