Julie Bowersett

juliebowersett{at}gmail{dot}com
Navigation
Search
Categories

Blog Writing Course Alumni

From Guide to Art Schools

CraftGossip

Entries by Julie Bowersett (316)

Wednesday
May012013

Beaded Bolero

Hello friends.  I cannot believe how long it has been since I last posted on this blog.  Many, many factors have conspired to prevent me from writing and also from having anything to write about.  This was a tough winter for my family.  There was a five-week period where my kids were trading germs back and forth, occasionally sharing with me or my husband.  During that period I believe there were only 4 days when both boys were in school at the same time.  Also during this time I had been bitten badly by the nesting bug, the one that causes you to clean out closets and boxes and reorganize your storage space.  Lastly, I seem to have misplaced my sewing mojo along with my camera.  I am hoping I find both soon but it's not looking good for the camera which has been MIA for more than a month.

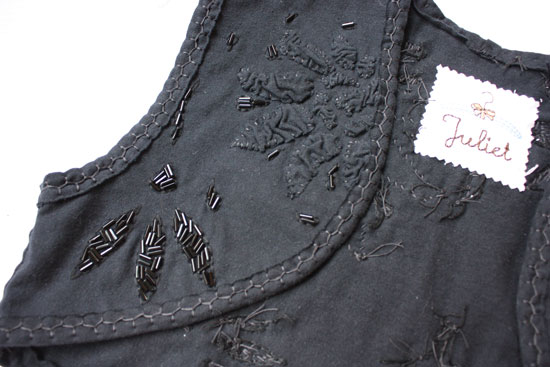
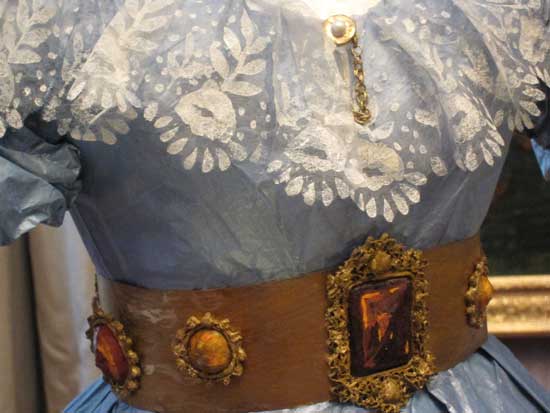
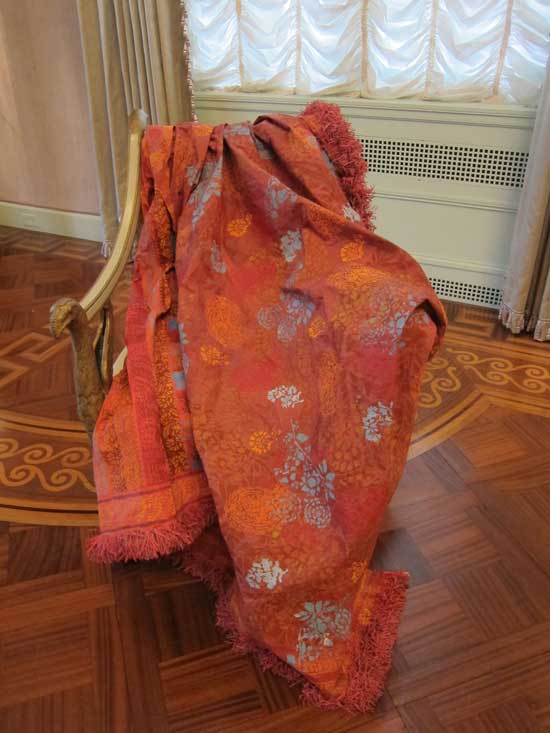
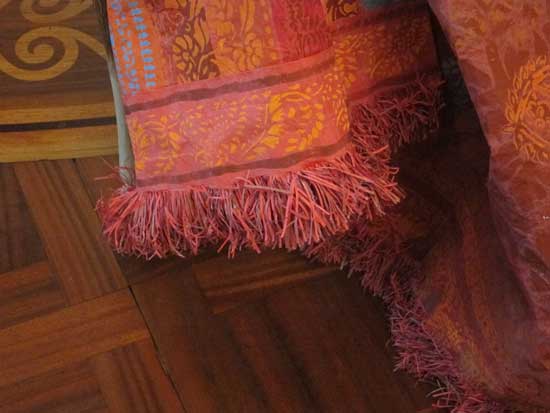
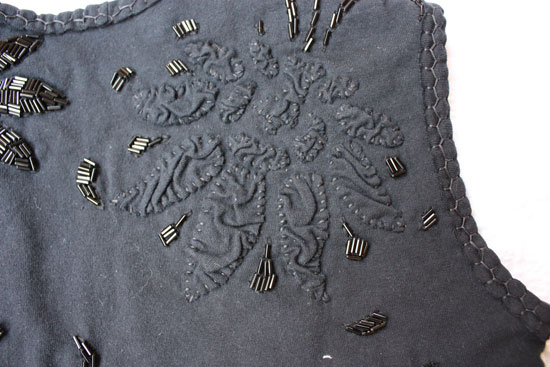
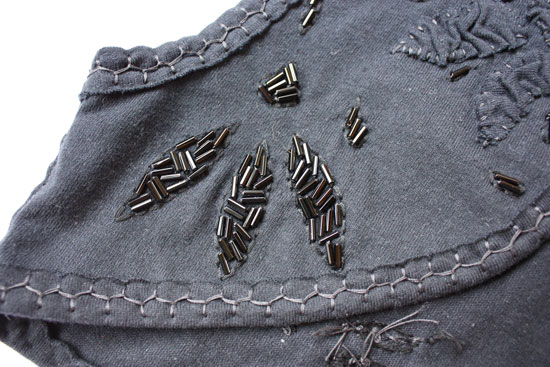
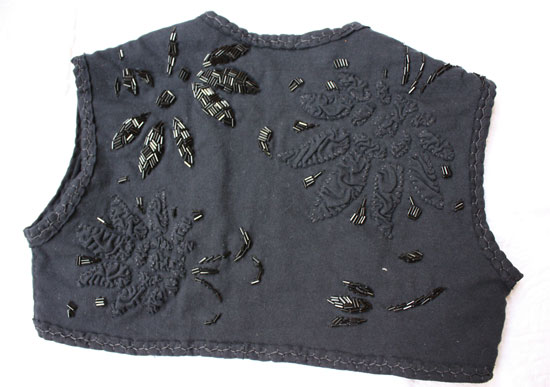
I have been plugging along on some hand sewing projects and recently finished one that I can share with you.  This is a sleeveless bolero that I made using the pattern in Alabama Chanin's third book, Alabama Studio Sewing and Design. (This book is currently on sale on the Alabama Chanin site).  The stencil design is Angie's Fall worked in the Special Angie pattern.  The large floral designs are worked in the Relief Applique technique where the appliqued pieces are cut larger than the space where they are to appliqued.  The extra fabric creates a beautifully textured surface that I really love.  The other elements were backstitched before being filled in with black beads.  I love this bolero pattern.  It is so quick to stitch up, the surface embellishment notwithstanding. 

I realize I have yet to share my blue embroidered dress on the blog.  Now that the weather is looking conducive to wearing it I am hoping to get some real-life action shots and post them soon.  And, as soon as I find the time to clean my studio to the point where I can get some work done I am hoping to get back to my sewing machine, too.  Perhaps by then my camera will materialize.

Monday
Feb112013

Masks for Mardi Gras

I've been working on these masks for a couple of weeks.  They are for a couple of friends' daughters.  The embroidery designs come from Embroitique and stitch out very nicely.  There are no instructions accompanying the designs, so beginners might have some trouble with this project.  The designer did write a blog post which helped me quite a bit.

My original idea was to make these masks from lamé and other sparkly fabrics but I came to my senses in time and opted for easy-to-work-with quilting cottons.  Even so, I made the blue mask three times.  I would recommend doing a sample to determine how close to trim the fabrics for optimal results.

I hooped two layers of water soluble stabilizer and then used a layer of Floriani's Stitch and Shape which was fantastic for the backing of the mask though fairly difficult to trim away close to the stitching line.  I will experiment with something slightly thinner next time.  After the stitching was complete, I soaked the masks to remove the stabilizer and then shaped them by air drying them wrapped around a cylinder -- I used a rubber band to hold the mask in place on a plastic "jar". 

To attach the elastic band I fed the elastic through one of the stitched (and punched) holes, then through a bead and back through the hole, tying it on the inside.

I am also celebrating Fat Tuesday by baking a King Cake.  You can read my post from last year with all of the details about baking your own.

Laissez les bons temps rouler!

Sunday
Jan202013

Pret-a-Papier, Couture Paper

I had the great good fortune to see the exhibit Prêt-à-Papier at Hillwood Estate, Museum and Gardens last week with a good friend who also loves to sew.  Artist Isabelle de Borchgrave has created a wardrobe of couture garments and accessories entirely from paper.  Employing techniques from painting to crumpling and pleating, each garment is a masterpiece.  Based on historical garments from the late 17th to early 20th centuries, each one is crafted with details likely found in the original.  Borchgrave uses a number of different types and weights of paper, some as fine and sheer as organza, others with the texture of fine brocade.  Here are pictures of many of the pieces in the exhibit which runs through January 24th.

The tour begins in the Visitor Center with a video about the artist and samples of the different papers she used.  These colorful caftans were part of the exhibit.

The bulk of the exhibit is housed in the Adirondack House.  This is the first piece that greats you on entry.  The inspiration was the coronation gown of Empress Josephine, 1804.  Jewels and beads are simulated with glitter.  There is even paper piping along the neckline (some of you know how much I love piping!)

Based on a court dress from England, c. 1755.

A French-styled dress inspired by the works of painter Jean-Antoine Watteau.

This gown is based on the one worn in the painting Self Portrain with a Harp by Rose-Adelaide Ducreux, 1791.  The underlighting was particularly effective on this piece.

The gauze-like scarf and layers of lace on the sleeve are created from very delicate paper painted with a lace design.

I took this photo to show how perfectly the stripes match at the center front.

Inspired by the painting Le Bal Pare, c. 1760 by Auguste de Saint-Aubin.

Even the elaborate jeweled closure is made from paper.

The blue stitches were actually sewn on the garment with thread.

Based on a 1777 engraving of Marie Antoinette by Jean-Michel Moreau le Jeune along with matching shoes.

Madame de Pampadour dress, from Francois Boucher's Portrait of the Marquise de Pampadour, 1756.  The dress has more than 120 applied paper roses.  The sleeves were absolutely stunning, the painted paper closely mimicing real lace.  Note matching purse.

Changing directions at bit, these three gowns were all inspired by Mariano Fortuny, who designed pleated gowns in the early 20th century.  Close up shots of each show more detail.

This gown had a beautiful, soft green pleated underdress and a sheer, beaded over dress.

More pleats and beads (made from paper, of course).

Three early 20th-century dresses, inspired by the flapper era.  The black dress on the right was embellished with glitter resembling ornate beading.

The garments in the Adirondack House were accesible up close.  It was possible to see the detail very clearly.  The remainder of the pictures come from the garments in the main house which were all roped off, so it was not as easy to get a close look at them.

Based on figures from the tapestry hanging behind them, these garments showed lovely detail from the sheer fichu (scarf) on the lady's gown to the buttons and bound buttonholes on the gentleman's ensemble. 

I truly wondered if this piece was a permanent part of the house decor.  The "fabric" looked so much like just that it was hard to believe it was paper.

Based on an evening dress from 1866.

While I did not care for this garment (based on a portion of the painting behind) I did find the jewels and headpiece remarkable, all created from paper.

This gown was commissioned for the museum, based on one of the resident paintings, and will become a permanent part of its collection. 

Note the lovely sheer "lace" and the jewel-encrusted "leather" belt.

There was a coordinating shawl with the most spectacular "fringe".  My friend and I were marvelling over what precision cutting was involved in this.

All in all, this was a wonderful and visually beautiful exhibit.  I hope you enjoyed the pictures.  If you ever have the chance to see these garments, do.  You will not be disappointed.

Saturday
Jan052013

A New Year

I don't think I've ever taken such a long break from blogging.  Christmas time came and went at my house and, though I completed lots of projects, I hadn't the time to get them posted here.  At least one will have to wait until next year, but I've got the tutorial mostly written so I'll be able to get off to an early start.  Christmas with a four- and six-year-old in the house was pretty exciting and busy.  Here is our Christmas card from this year.

It only took about 300 tries to get one shot with all four of us looking at the camera (sort of).

I was busy in my kitchen this year, making some little goodies for friends.  I tried a recipe from Food and Wine magazine for homemade Mulling Spices.  I tried them out myself over the New Year's weekend and they have a much more complex flavor than any I have ever purchased.  I dried the orange slices in my oven

mixed them with other spices

and then packaged them in paper tea bags tied with kitchen twine.

I packaged them up in glassine bags with a tag printed with instructions for use.

I also made Chai Latte lollipops, based on the recipe from Liddabit Sweets Candy Cookbook.  I modified their recipe to suit my own needs by using chai latte mix stirred into a basic sugar lollipop.

I packaged up the lollipops and mulling spices in white bags with some little paper flowers I made which I think conjur up a poinsettia.

Here's how I did these.  I cut three layers from red kraft paper (have I mentioned how much I love kraft paper?) using a die to cut the two larger ones and paper punch to cut the smallest.  I then gave each layer a little dimension by creasing the petals.  Then it was assembly line time.

I glued the three layers together with white glue

then glued three gold beads in the center using Jewel It glue.

The last step was to glue a mini clothespin on the back of each one.  I made about two dozen of these, all told, and used them to adorn all sorts of packages.

Last year I posted that I wanted to sew more garments in 2012 and also spend a little time each day doing some hand stitching.  And, while I don't think I accomplished that every day, I did do an awful lot of hand work last year.  I think I could still sew more garments, but the ones I have been making have been very time consuming.  Combining those two goals, I completed my Alabama Chanin blue dress and have been trying to find the time (and warm weather) to take some pictures.  I promise those very soon.  My blog is now three years old and I hope to add lots of interesting projects to the pages this year.  I hope you'll check back often.

Wednesday
Nov212012

Coconut Acorn Squash

For my readers in the US, happy Thanksgiving.  It's not too late to add this simple recipe to the menu for tomorrow though it is good any time.  I was certain that I had recently seen a recipe using coconut and acorn squash together, but a search through my cooking magazines and even an online search failed to turn up what I was looking for.  Sometimes, I like to blog about things I haven't been able to find online so the next person who searches for "coconut acorn squash" will find a hit or two. 

Preheat oven to 400 degrees.  If you have a silicone baking mat, line a baking sheet with it (this makes clean up a breeze and also keeps the coconut from burning).  You can also use parchment paper or simply oil the baking sheet.

Wash your squash well.  The skin softens enough during cooking to become edible so you want to give it a good scrub.  Cut the squash in half, scrape out the seeds and discard them.

Slice each squash half into strips (about 3/4" thick). 

Toss the squash with olive oil and season with salt and pepper.  Lay the slices out on the prepared baking sheet.

Lightly sprinkle each slice with brown sugar.  You can adjust this to suit your taste or omit it entirely.

Bake for 20-25 minutes until soft and starting to brown.  Remove the baking sheet from the oven and sprinkle slices with shredded coconut (sweetened or unsweetened).  Return the baking sheet to the oven for an additional 5 minutes or until coconut is browned.

Serve warm or at room temperature.

We'll be heading to my inlaws for our family celebration tomorrow.  I will be taking along my blue Alabama Chanin dress to work on.  I am about an hour away from completely finishing it, and I am so excited to finally get to share it with you.  Whether tomorrow involves a big family dinner, a quiet affair or a regular work day, I hope it is a great day!