


King Cake for Mardi Gras
Each year our church celebrates Mardi Gras with a music-filled party and King Cake. I volunteered to help make one of the cakes several years ago, and today found me in my butter- and flour-filled kitchen making another. The recipe I use is by John Folse and can be found on his website. It is rich and luscious with an easy-to-work dough. Here are some pictures of the process along with some of the changes I've made to the recipe.
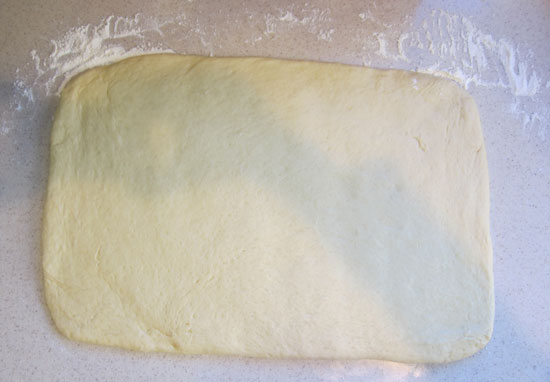
You begin by making a very soft dough with lots of butter and eggs. After rising for an hour you roll this out into a large rectangle.
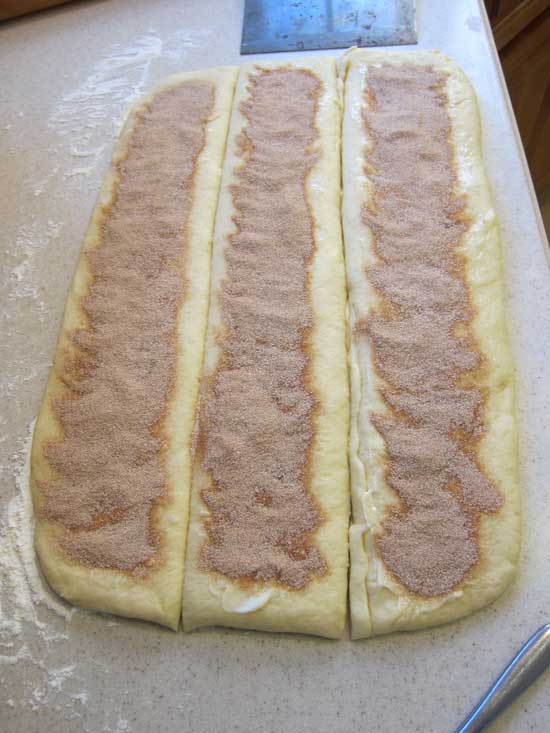
The recipe calls for brushing the dough at this point with melted butter and sprinkling on cinnamon sugar, then cutting into three long strips. Instead, I cut the three strips first, then use softened, but not melted butter, and spread a layer of butter onto each strip. I sprinkle on the cinnamon sugar keeping it away from the edges of the strips.
The long edges of each strip are now brought together and sealed, enclosing the sugar mixture. By keeping the edges free from melted butter and sugar, I have found it much easier to get a good seal along the seams. When I used the method described in the recipe I found the butter and sugar interfered with this goal.
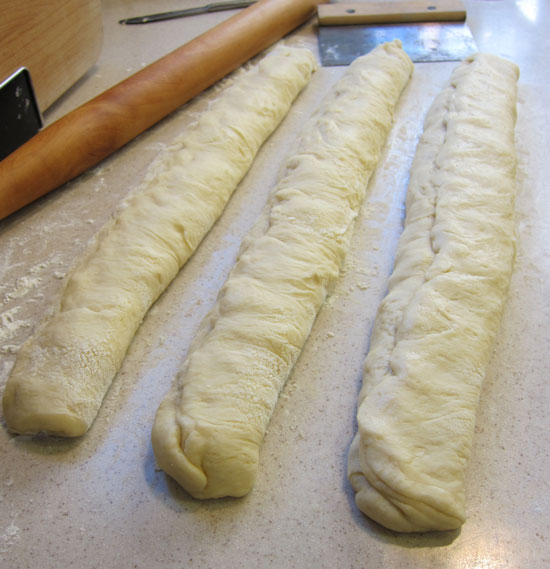
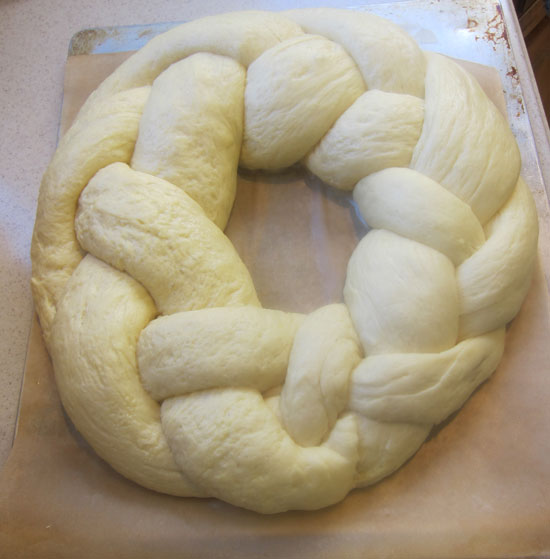
The next part is probably the trickiest but really is not all that difficult. The dough is very easy to work with. Begin by turning the seams to the bottom, then bring three ends together and begin braiding the tubes. Once the braid has some length, begin forming a circle. Continue braiding to the other end of the tubes and then bring all of the ends together. Don't worry if the join does not look perfect -- imperfections get lost in the rising and baking of the cake.

You will brush an egg wash over the dough now. You don't need to use two eggs as called for in the recipe. One egg is even too much. This would be a good spot to use some liquid eggs if you have them. Combine with about equal parts of milk. Now this undergoes another rising and then it is ready to bake. DON'T overbake!
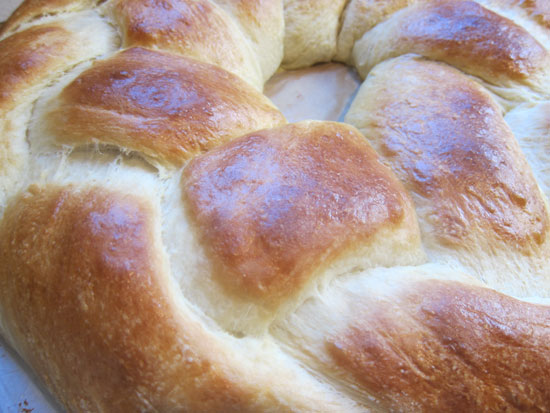
Fresh out of the oven:
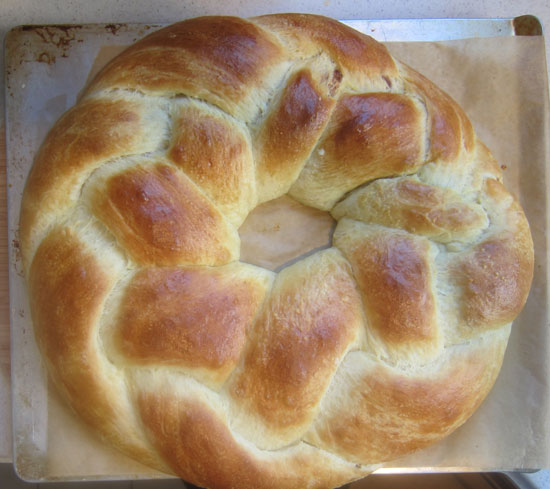
The final step is to apply a glaze and some "bling" (though I think the cake is at it's most beautiful at this fresh-baked stage). The glaze is another area where I divert from the recipe. First, the quantity that is made from the recipe is enough for a dozen King Cakes. I make a much smaller batch. I also omit the cinnamon after trying it both ways. The cinnamon makes for a very dark brown glaze that I think detracts from the colored sugar added at the end.

You'll need a really large serving plate -- I've covered a pizza box bottom with parchment foil to make a platter large enough to hold this colossus.
You've still got time to whip up one of these cakes in time for dinner tonight, or bookmark this for next year. This is a project that will give you a great sense of accomplishment, along with a really tasty treat. So, enjoy this last day of plenty before the start of Lent. Just remember, everything in moderation -- there's a reason it's called Fat Tuesday.
 Julie Bowersett
Reader Comments (4)
WOW! That is an amazing King Cake!! Thanks for the recipe - all mine have been cheaters made with biscuits (the refrigerator kind!). This looks like it is waaaay more yummy!
Oh you are a brave woman. You accomplish much. That is a gift. I leave yeast alone...all that doubling and waiting and rolling. I'm with you Daphne (a dough cheater). Actually, I am even worse, I ordered from the local bakery. This is a bookmark for next year. I may need to make a courage cape first. AC style, of course.
Love this post with helpful photos! Worthy of BonAppetite Mag.
Couple questions, on that first rise , I am finding my rise can take at least double the time. Could I be doing something wrong with the dough mixing? (I'm not so familiar with sweet yeast dough). Is the dough on the sticky side? I didn't use the whole 1 cup of water because the dough started getting too soft. Hmmm, maybe this is why the rise took so long?
The finished product was dense, a thumbs down. I don't think I've ever made a yeast/butter dough that turned out well.
The next time I try to make this, will you come over and supervise??
oxo
Pat, my first thought about the rising time is to inquire what kind of yeast you used? Was it instant (rapid-rise)? If not then it might take longer. The dough is super wet. I ended up adding an extra 1/2 cup flour to make it come together in the mixing bowl. But the high fat content makes it easier to work with, even wet, than a non-butter type of dough. I know you were thinking about making the dough and refrigerating it. That can definitely make a more dense end product. I'd love to come and supervise next year!