Julie Bowersett

juliebowersett{at}gmail{dot}com
Navigation
Search
Categories

Blog Writing Course Alumni

From Guide to Art Schools

CraftGossip

Entries in recipe (3)

Wednesday
Nov212012

Coconut Acorn Squash

For my readers in the US, happy Thanksgiving.  It's not too late to add this simple recipe to the menu for tomorrow though it is good any time.  I was certain that I had recently seen a recipe using coconut and acorn squash together, but a search through my cooking magazines and even an online search failed to turn up what I was looking for.  Sometimes, I like to blog about things I haven't been able to find online so the next person who searches for "coconut acorn squash" will find a hit or two. 

Preheat oven to 400 degrees.  If you have a silicone baking mat, line a baking sheet with it (this makes clean up a breeze and also keeps the coconut from burning).  You can also use parchment paper or simply oil the baking sheet.

Wash your squash well.  The skin softens enough during cooking to become edible so you want to give it a good scrub.  Cut the squash in half, scrape out the seeds and discard them.

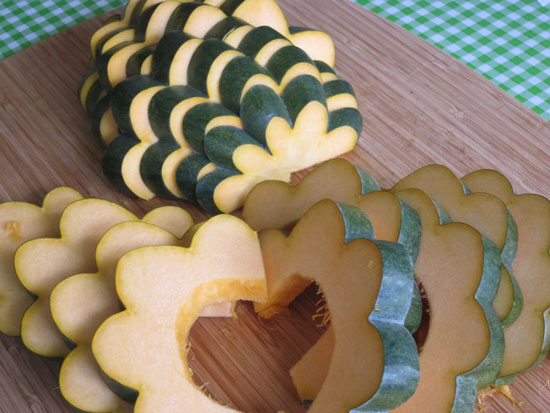
Slice each squash half into strips (about 3/4" thick). 

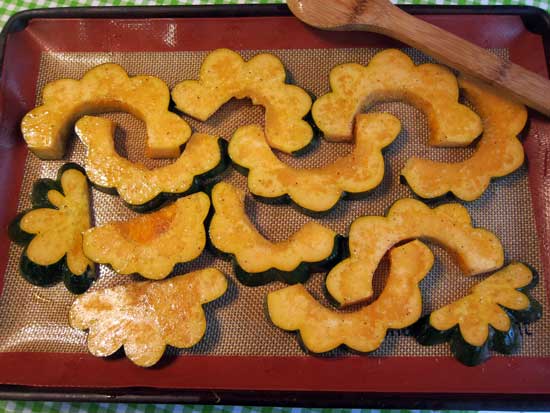
Toss the squash with olive oil and season with salt and pepper.  Lay the slices out on the prepared baking sheet.

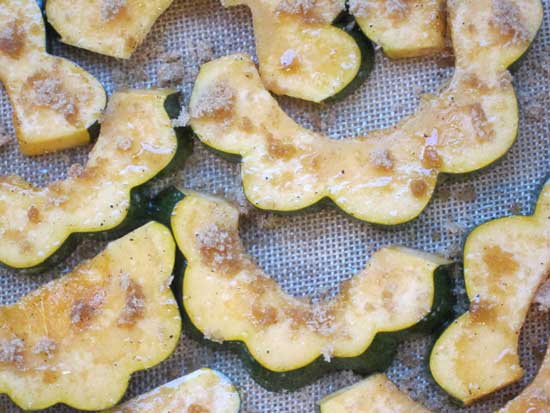
Lightly sprinkle each slice with brown sugar.  You can adjust this to suit your taste or omit it entirely.

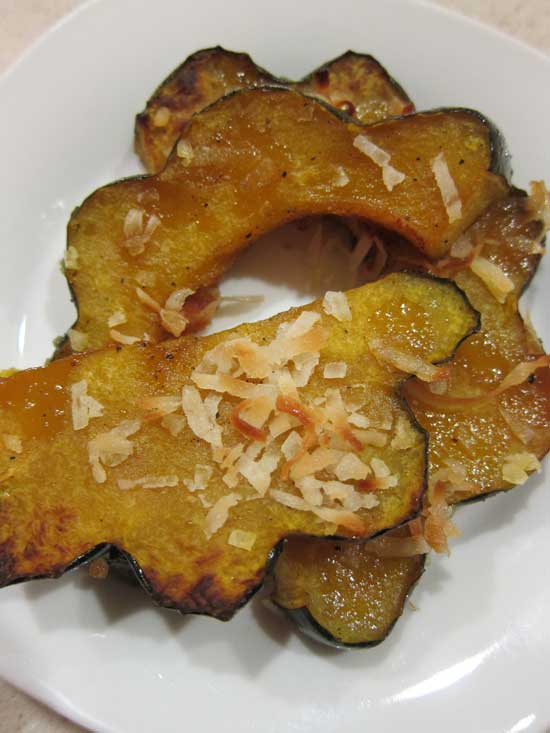
Bake for 20-25 minutes until soft and starting to brown.  Remove the baking sheet from the oven and sprinkle slices with shredded coconut (sweetened or unsweetened).  Return the baking sheet to the oven for an additional 5 minutes or until coconut is browned.

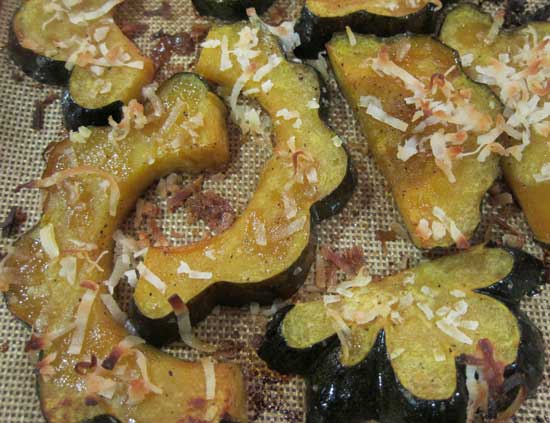
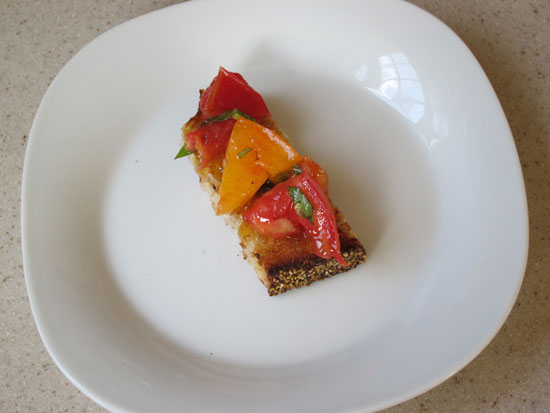
Serve warm or at room temperature.

We'll be heading to my inlaws for our family celebration tomorrow.  I will be taking along my blue Alabama Chanin dress to work on.  I am about an hour away from completely finishing it, and I am so excited to finally get to share it with you.  Whether tomorrow involves a big family dinner, a quiet affair or a regular work day, I hope it is a great day!

Monday
Jul302012

Summer in a Jar

Earlier this week I came across this recipe for Sunshine Tomatoes (which I like to call Summer in a Jar).  This technique could not be easier, and the results could not be tastier.  If you like fresh, summertime tomatoes, you will love this dish.

Start with a selection of tomatoes.  You can use all one type or mix and match as I did.  Roughly chop them and place in a glass jar.  Add garlic (chopped or pressed), minced basil, olive oil, salt and pepper.  The proportions are pretty flexible (see the original recipe here if you need specifics).  Once all of the ingredients are collected in the jar, give it a good stir and then cover (with the jar lid or plastic wrap).  Place in the sun for at least 2 hours. 

The flavors will marry together and you will be left with a delectable concoction that you can use in any number of ways:  mixed with pasta, over fish or chicken or topping grilled bread as bruschetta.  Today I prepared the latter, spreading butter on sliced sourdough bread and toasting on my gas grill until browned.

My tomatoes are just starting to produce despite the late date we got them planted.  This year we are once again using the Earthtainers that I posted about last year.  We get the most exuberant plants using this method!  I suggested this to a friend who tells me that this year's tomatoes are the best she has ever grown.

So, yay for summer and tomatoes!  Try this recipe and you'll be making it all summer long.

Saturday
Nov262011

Icing to die for

I've got a pile of projects that need to be photographed so I can write posts about them.  But that will have to wait until the sun is up again, so tonight I'm going to share with you an icing recipe I discovered this fall and used for my oldest son's birthday cupcakes.

First I should start by telling you that I don't typically like icing.  When I was a teenager I liked to decorate cakes and had my fill of buttercream frosting.  Most often when served a slice of cake or a cupcake, I will scrape the icing off and eat the cake.  The one exception to this is Italian Meringue Buttercream Frosting like I used on my wedding cupcakes.  But this icing is a lot of work and would surely be wasted on a bunch of 4- and 5-year-olds.  So I went looking for another icing recipe.  What I found surprised me.

This recipe is unusual because you begin by cooking a roux from flour and milk.   One of the things I like about the meringue icing is that it uses a sugar syrup made from white sugar instead of confectioners sugar which I don't like the taste of.  The recipe I found also uses white sugar.  The original recipe I started with can be found at this link, but it is buried in a lot of comments so I have rewritten it for you here.

The texture of this icing is almost like whipped cream (there is a grocery store chain in my area that makes a whipped cream frosting for their cakes and this icing is a lot like that).  It is not overly sweet but has the rich taste of butter.  I used a boxed mix for the cupcakes (my favorite is Duncan Hines Moist Deluxe Classic Yellow Cake and Moist Deluxe Devil's Food Cake) and piped the icing on in a swirl pattern using Pampered Chef's Easy Accent Decorator (like a pastry bag with a trigger).  The clown toppers came from Meri Meri.  The cupcakes were a big hit at the party, mostly with the grown-ups (one of my friends ate 4!)

This will be my go-to icing recipe from now on.  It is easy to make, most of the ingredients are always in my pantry and fridge, and the taste and texture are outstanding.  I think next time I make this I will use salted butter as I thought the flavor might be improved a bit with some salt.

Hope you enjoy this.  Some day I will dig out the pictures of my amateur cake decorating from my youth and we can all have a really good laugh.