Julie Bowersett

juliebowersett{at}gmail{dot}com
Navigation
Search
Categories

Blog Writing Course Alumni

From Guide to Art Schools

CraftGossip

Entries in sewing (68)

Thursday
Nov042010

Bag of the Week 44

Knitting Needle Case

I’m taking a little liberty this week with my definition of “bag”.  This is a knitting needle case that I made several years ago featuring the lovely embroidery of Evy Hawkins from A Bit of Stitch

I found directions on the internet and adapted them for my own use.  Here are two links that show you how to make a rolled up case that will hold knitting needles or paint brushes/tools.

Roll-up Knitting Needle Case

Paint Brush Holder

Tuesday
Nov022010

Halloween Around My House

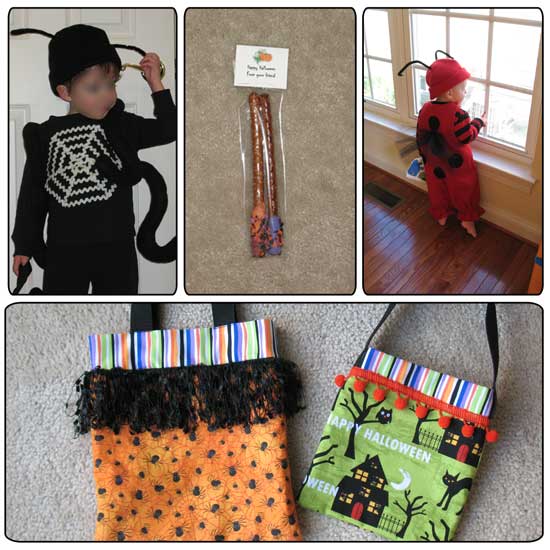
Here’s what has been keeping me busy in my sewing studio recently.  With two little kids in the house Halloween is becoming a bigger deal each year.  My four-year-old is finally old enough to remember that he got candy last year when trick-or-treating but my two-year-old is still just along for the ride.  I do like making costumes each year (my mom made mine for many years when I was growing up – thanks, Mom!)  This year I saw a pattern for a cute ladybug costume and thought it would be great for my youngest.  When I told older son about this he immediately said he wanted to be a spider which was convenient since that was another design in the same pattern. 

For the spider costume I purchased a black waffle-weave shirt and paired it with some already-owned black pants.  All of the costume details were added to the shirt.  The front features a rick-rack spiderweb.  I tried desperately to get glow-in-the-dark rick rack but evidently Wright’s has stopped making it.  I bid on numerous Ebay auctions for some of this stuff and was consistently outbid.  In the end I used some iridescent rick rack and stitched it down with glow-in-the-dark thread.  I made the spider legs from black fleece, stuffed them and stitched them to the shirt.  The pattern called for six legs but I reasoned that with my son’s own two arms and two legs he only needed an additional four.  The final element was a hat with little antenna (not sure what the pattern company was thinking here – I’ve never seen a spider with antenna but I went with the flow).

For the ladybug costume I used the pattern to create a little jumpsuit from red fleece.  The black dots are also fleece and stitched on.  The wings are made from black netting.  The hat with antenna is the same as the spider’s hat.  I had to have red shoes to complete the outfit but these proved hard to find (good thing I started looking back in September).  I was unwilling to pay $35 for a pair of shoes that would fit for only a few months but I eventually found a pair of Converse sneakers on craigslist for about $8 which turned out to be just right.

I think my little insect farm is just adorable.

The picture in the center is a treat my oldest son and I made for his friends at school.  We called them magic wands but they are simply a pretzel rod dipped in Candy Melts with sprinkles added.  We packaged them in pretzel bags and I created a simple tag that I stapled to the top.

You can read about the treat bags I made here.

Lastly, I just want to mention the great team at Blue Daisy Designs who created the photo template I used to showcase my pictures.  I love the work that these ladies put out and their reasonable prices.  They make putting together pictures for my blog super easy.  They are so generous, too – each Friday they post a freebie on their Blue Daisy blog so you can try out their products before visiting their Etsy shop.

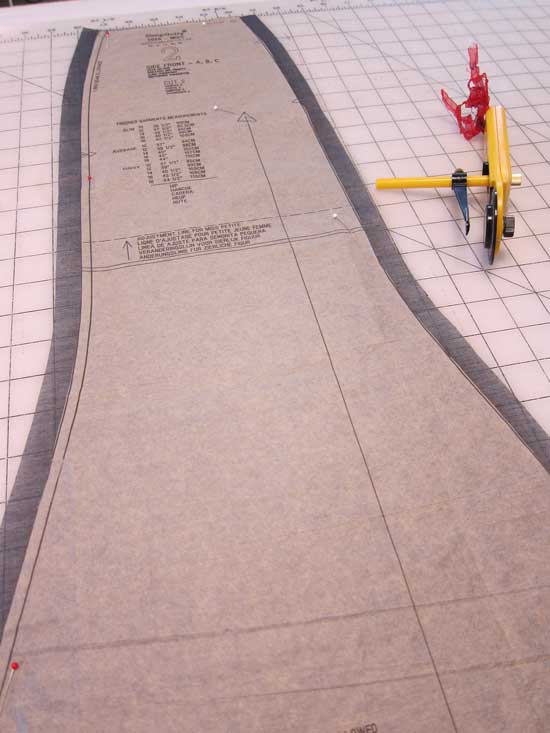
Now on to some new sewing projects!  Stay tuned!

Friday
Oct292010

Bag of the Week 43

Trick or Treat?

This past week has been Halloween central in my sewing studio.  Halloween is not a holiday I get into in a big way (no elaborate decorations, etc.) but I am enjoying making my kids’ costumes.  My oldest son is 4, just old enough to understand that Halloween means candy.  My youngest (2) just thinks the costumes are fun.  The great thing about kids this age is that two pieces of candy from six houses seems like a treasure trove. 

Last year my good friend Joyce brought my oldest a little fabric treat bag (she makes dozens of these each year, fills them with goodies and hands them out on Halloween night – lucky kids!)  We keep this bag on the top of the fridge with a few pieces of candy in it for special treats.  Since Son #2 needs his own treat bag this year I decided to make both boys new bags to use for our trick or treating on Sunday.  If you wait until right before Halloween you can get great deals on cotton Halloween fabric.   I used the same stripe for the lining of both bags and varied the outer fabric and trim.  I keep a roll of black webbing on hand and used that for the handles.

Come back on Sunday for a peak at the costumes I made.

Tuesday
Oct052010

Underlining and Seam Finish in One

The technique I am about to describe allows you to underline a garment and finish the seams in one procedure -- this makes the most beautiful seam finish and is not much more work than simply underlining (less, if you are planning to hand baste the layers together). This works on almost any vertical seam such as the side and center back seams of a skirt (or the seams on a gored skirt) as well as princess lines.  I cannot take credit for this idea.  The first place I learned about it was in a class with Cynthia Guffey but I believe the technique has been around for many years.

When cutting your underlining, add 5/8 inch to the seam allowances along the vertical seams. If you are using 5/8 inch seam allowances you'll cut them 1.25 inches wide. Place the underlining and fashion fabric RST and pin the vertical edges together -- the underlining will not lie flat as it is bigger than the fashion fabric. Sew these edges together with a 1/4 inch seam. Turn the panels right sides out. Press the edges so the underlining wraps around the edge of the fashion fabric and lies flat -- this looks a bit like a Hong Kong Finish. The following photo shows what this will look like.

The piece on the right is what the fabric piece will look like once the pressing is complete. The piece on the left is what the seam will look like once it is sewn and pressed open.

Once this part is completed you treat the two layers as one and complete your garment as usual. You can baste the upper edge together if necessary.

Here's a picture of the inside of a wool skirt where I used this technique, underlining with silk organza


This is a picture of a skirt made from sheer pink linen.

On this skirt I had planned to line but not underline. I discovered that the linen fabric was so sheer that the pressed seam allowances showed through unattractively. I used the lining fabric (bemberg rayon) to underline and finish the seams which also prevented any show-through of the seam allowances, a benefit lining would not have afforded.

This is an easy and elegant way to finish any vertical seam in a garment. It eliminates the need for a lining and gives a couture look to the inside of your garment. I don't think you will be disappointed in the results.

Sunday
Oct032010

Bag of the Week 39

Rooster Toile

For this week’s offering I am pulling out an old picture of a tote bag I made and donated to a silent auction.  The bag is a simple rectangular tote that I made fully reversible.  One side features a black and white toile farm scene complete with a rooster.  The reverse side features a red and white rooster print.  I used a matching red buffalo plaid as the top edge, bottom and straps.