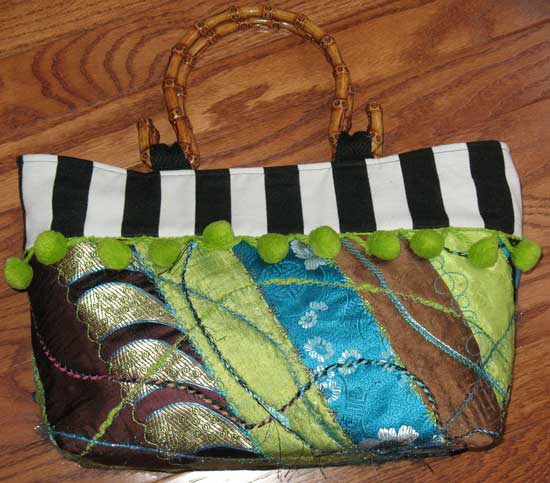
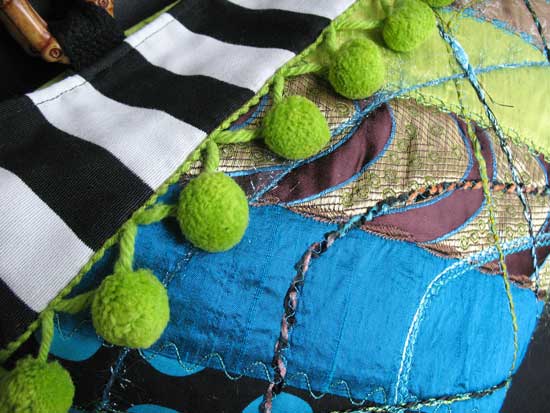
Julie Bowersett

juliebowersett{at}gmail{dot}com
Navigation
Search
Categories

Blog Writing Course Alumni

From Guide to Art Schools

CraftGossip

Wednesday
Mar102010

Bag of the Week 10

The Picksac

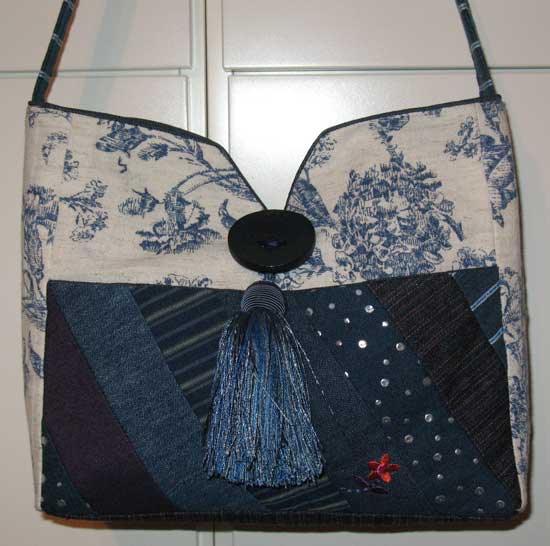
Like last week’s bag, this week’s selection was designed by Barbara Randle and is called the Picksac.   The instructions and pattern for this bag can be found in Barbara’s book Crazy Quilting with Attitude

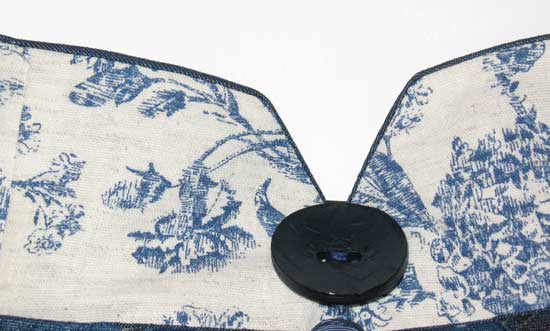
The body of the bag is created from a solid piece of fabric, in this case, an ivory and navy toile.  The front and back of the purse have pockets that were pieced from a variety of denim prints.  A single handle, large button and tassel complete the bag.

The bag is lined with a medium weight denim, and the difference between the weight of the inner and outer fabrics created a neat piping effect along the top edge.  In fact, this look was created simply by favoring the heavier lining fabric slightly when pressing the edge.

After writing about Barbara’s two books last week I noticed one for sale at one of my favorite discount book sites, www.hamiltonbook.comMore Crazy Quilting with Attitude  is on sale here for a mere $4.95.  This is a beautiful and inspiring book, one you will be pleased to add to your collection.

Monday
Mar082010

Making Whoopie Pies

When my oldest son finally went back to school after weeks off due to snow his class had a Valentine’s Day party and they decorated cookies.  Being the Martha Stewart wanna-be that I am, I made homemade buttercream icing for the event (which, I realize, was totally wasted on three-year-olds).  Afterwards I had quite a bit left over and wanted to make some confection that I could use it on.  I found this recipe for mini whoopie pies and decided to give it a try.  The cake portion of the recipe is low in fat, a good foil for the loaded-with-fat icing.

For those unfamiliar with the Whoopie Pie, these cake-like chocolate confections filled with vanilla cream originated in the 1920s.  The first versions probably came from the Amish though they quickly spread north and Maine also likes to claim these treats as their own.  My version is not authentic since the original filling was made with Marshmallow Fluff but it was a delicious way to use up some extra icing.

Here are the ingredients you will need for the cake portion.

Adding the dry ingredients to the wet.

The completed batter.  The recipe calls for rolling out the dough into balls and flattening with a glass.  My batter was far too moist to roll out so I used a cookie scoop which made nice uniform cakes.

After baking.  Make sure you don’t overbake these.  The ones I baked for four minutes were much better than the ones I baked for six which were, frankly, dry.


The finished product.

These were so good I had to “hide” them in the freezer so I wouldn’t eat them!

Friday
Mar052010

Love my new Threads

The current issue of Threads (No. 148) really wowed me.  For a while now, the creators of this magazine have been trying to settle into a niche that appeals to both novice and veteran sewers alike.  They went through a period where many long-time subscribers gave up on them as the focus shifted from advanced sewing subjects toward something that would appeal to the huge new group of sewers coming onto the scene.  They have finally really hit the perfect balance, in my opinion.   There are articles in this current issue that really enthrall me and have me wishing I could start on a new project right this second.  There is also material that is helpful to new sewers while acting as a fine refresher for the rest of us.

It is hard to choose my favorite articles – they are all wonderful.  In Seam Challenge by Sarah Opdahl, the winners of the 2009 Threads Challenge to the members of the Association of Sewing and Design Professionals (ASDP) (formerly known as PACC) are revealed along with their STUNNING creations.  This challenge invited ASDP members to explore the possibilities of seams in any way they chose.  The results are fantastic, and as an added bonus, Judith Neukam shares with us the techniques used for creating these unique seams.

Next on my fav list is Mirror-image appliqué by Kathy Barnard and Amelia Johanson.  Kathy and Amelia are the editors of Sew Beautiful magazine, put out by the Martha Pullen Company.  You may have noticed from some of my previous posts that I am a huge fan of Martha and Co. (the other Martha).  This article details how to create a perfectly symmetric mirror image appliqué and applies the result to a stunning black and white halter dress with delicate machine embroidery.  I can imagine using the techniques shared in this article for so many projects.  It also reminded me of a jacket that has been on my to-do list for years now which incorporates some of the same techniques.  Maybe it’s time to once again pull out that project and get started on it.

Claire Shaeffer has come up with a winner, a cardigan jacket which looks like your comfiest sweater mated with a boutique stunner.  This versatile little number is crafted from wool gauze, and Claire walks you through the entire process from creating the pattern to the simple construction techniques that pull this beauty together.  I love the feminine ruffle that finishes all edges and hems and am already plotting which piece of fabric in my stash I should use.

I could go on and on:  the pattern review full of new ideas for spring; the article on machine embroidery cutwork using FiberEtch; choosing colors with Mary Ray (one of my favorite teachers); ombré dyeing; Kenneth King’s fitting instruction; even the tips mailed in by readers seemed particularly clever in this issue.  I could go on but I think you should get your own copy and see for yourself.

Wednesday
Mar032010

Bag of the Week 9

Gondola by Barbara Randle

The vernal equinox might be another two weeks away but I am sure wishing for a little breath of spring.  So I pulled out one of my cheeriest purses for this week’s bag.  This is one of several designs I have made by Barbara Randle.  

Barbara is best known for her modern take on crazy quilting.  She is the author of two books, Crazy Quilting with Attitude and More Crazy Quilting with Attitude, and offers classes throughout the country as well as from her home in Birmingham, AL.  Her designs are fresh, modern and full of color.  She likes to use a black/cream colored print in her work which really makes the colors POP!  Her technique is not hard to master and the embellishing portion is loads of fun.  Barbara also has several patterns available through the Vogue Pattern company.

This bag is similar to Barbara’s Gondola Purse.  I made this bag while attending Martha Pullen’s School of Art Fashion.  Barbara designed this bag for the event and came with lots of kits in all sorts of color choices.  I chose colors that I love but that were a little outside of my comfort zone just to challenge myself a bit.  The fabric pieces, largely silk, were pieced onto a canvas foundation and then embellished with couched fibers and decorative stitches.  The lining, in two cheery colors, lime green and turquoise, has lots of pockets for organization.

This was a really fun purse to create and is also fun to carry.  It gets lots of attention!  Watch for several other B. Randle Designs to show up as a Bag of the Week in the future.

Friday
Feb262010

Little Boxes

This week I’ve been putting the finishing touches on a few items I am donating to a silent auction.  I previously posted about a scarf that I made (which, by the way, sold for $110 at the auction!) but since then have also added some of my kanzashi flower pins to the mix. 

I bought some plain white boxes to put them in so they would be protected while transporting.  Looking at the boxes they seemed so plain so I decided to dress them up a bit.  I applied a stamped frame and used embossing powder and a heat gun to give the design some texture and interest.  I hand wrote my name in the middle of the frame.  I then used some thin satin ribbon to form a little closure for the box.  The way I did this was to tie a bow in one end of the ribbon, wrap the ribbon around the box and cut it long enough to leave the other end extended an inch or two.  I then used my hot glue gun to attach the male end of a snap to the underside of the bow.  I wrapped the ribbon around the box, rubbed the nub of the snap on some white chalk and pressed it against the ribbon to see where the female end should be glued.  I also used a dab of glue on the bottom of the box to hold the ribbon in place so it won’t get separated from the box.  A very quick and easy addition to a gift box.