Julie Bowersett

juliebowersett{at}gmail{dot}com
Navigation
Search
Categories

Blog Writing Course Alumni

From Guide to Art Schools

CraftGossip

Entries in crafts (7)

Sunday
Dec052010

Yoyo Ornament and Giveaway

This little ornament is simple to make and would be a nice gift for a friend who sews or does other needlework.  My mom made one of these ornaments for me a number of years ago, and I think of her every time I clip it to my Christmas tree.

I’ve written a tutorial with pictures, though it really only entails gluing a thimble on top of two yoyos and embellishing as desired.  The yoyos are glued to a mini clothespin that you can use to clip to a package or onto a tree.

If you would like a chance to win this ornament in my weekly giveaway leave a comment on this post and I will randomly select a winner next Wednesday morning.  Comments must be received by no later than 6 a.m. EST on Wednesday morning.  Comments are moderated, so don't be alarmed if your comment doesn't immediately appear, as I have to review it first.

Monday
May312010

Mini photo albums

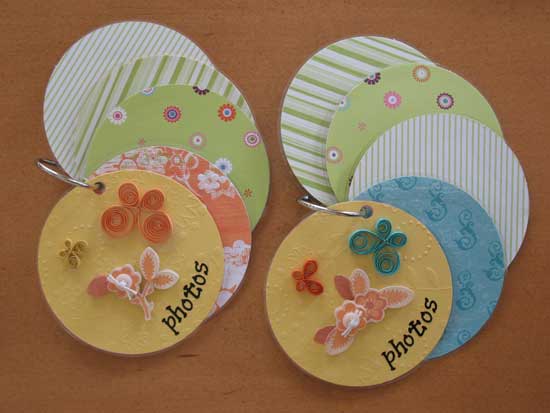
I was trying to think of a small gift for my son’s two teachers and came across acrylic photo albums at the craft store.  These albums consisted of five 4” acrylic circles held together with a metal ring.  I first cut circles slightly smaller than the acrylic pages from decorative paper, punched a hole with a hole punch and glued them onto the pages, front and back.  My original plan was to make some tiny kanzashi flowers to put on the cover but once they were made I couldn’t get them to look the way I wanted without a lot of extra fussing that I did not have time for.  Instead I decided to use some purchased self-stick embellishments from the craft store.  I added some stickers that read “photos” on the cover and was finished.  With some extra time some of the pages could be pre-embellished.  The recipient can add their own pictures to the album and end up with a small, portable brag book.  One of these would make a great gift for a grandparent.   I am already planning to make several more of these.  I saw these flowers the other day and fell in love with them, particularly the ones called Gallery Roses (toward the bottom of the page).  I think the creative possibilities are limitless.

I teach the crafts each year at my church’s Vacation Bible School.  Each year one of the crafts is a picture frame into which I insert a picture of the child’s class.  While trying to come up with ideas for this years’ crafts I came across some acrylic frames at Oriental Trading Company.  Since I had just been working with one of these albums I was struck with the idea to let each child make one page and attach the class picture to this page.  My plan is to provide paper circles, markers, stickers and the like for each child to decorate the page as they wish and then attach the picture as well as a hanging ribbon through the top hole.  These albums are 6” circles, slightly larger than the ones I have been working with.  I’ve ordered several extra for my own use and will post pictures in the future when I get those albums created.

Wednesday
Mar312010

Arts and Crafts

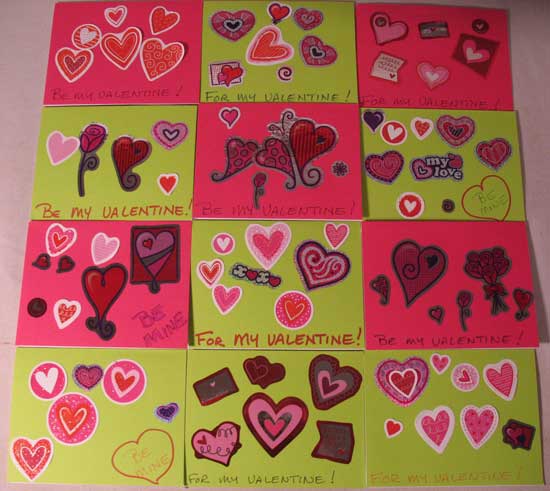
One of my favorite things to do these days is to sit at the kitchen table with my budding artist (BA) and create together.  Before he started preschool last September he was not too interested in arts and crafts but now he leaps at the chance to do “a project” (the title they use for their daily craft project at school).  I’ve learned that he is a master when it comes to applying stickers, and every so often I will get out the supplies to make cards.  We did this for Valentine’s Day and I was amazed at what he created.

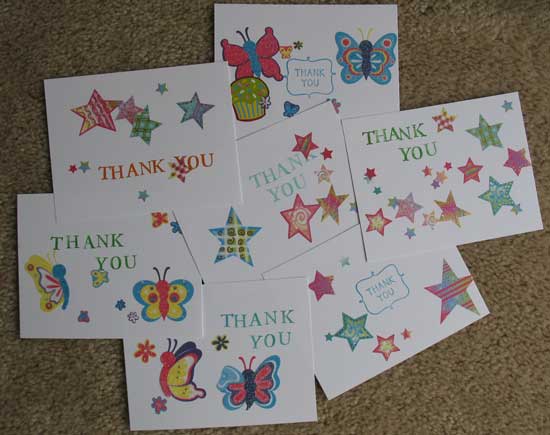
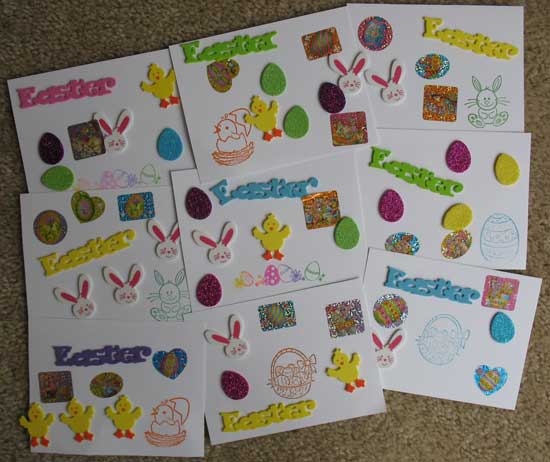
This week, during his spring break, we made several different types of cards:  one get well card for my dad who is in the hospital, some long overdue thank you cards for Christmas gifts and some Easter cards.  I usually do the writing or stamping and then hand over the card to BA to put his own personal mark on the card with his stickers.  I TRY to limit the amount of guidance I give because left to himself he will usually create something much better than I would have.  Here are the results of our time spent together.

Friday
Mar192010

Bag of the Week 11

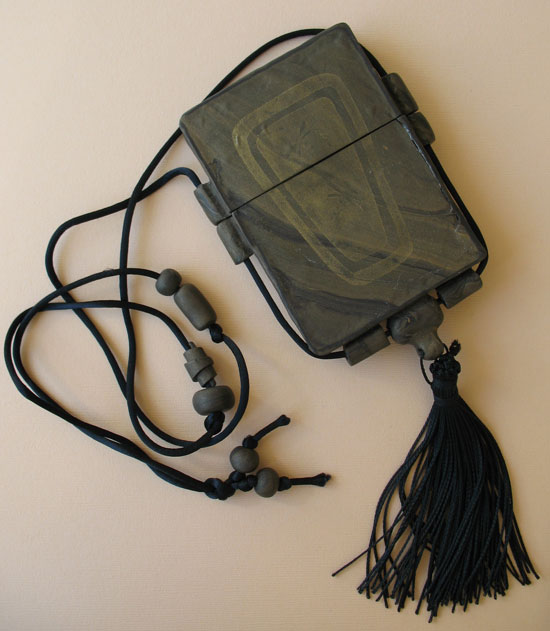
Polymer Clay Necklace Purse

Here’s something a little different this week.  I made this little necklace purse a number of years ago when I was experimenting with polymer clay.  The instructions were published in Belle Armoire magazine, published by Stampington & Company.  Unfortunately, I have gotten rid of all of my old Belle Armoire’s and cannot find information about this article online.  If anyone has old issues and finds the reference I would be grateful if you would share the information in a comment.

The purse was constructed from sheets of polymer clay rolled out with a pasta machine.  These sheets were then molded around a form which was created from layers of corrugated cardboard wrapped in aluminum foil.  Several colors of clay were kneaded together to give a mottled effect and the front and back were stamped with a rubber stamp using metallic gold ink.  Clay beads were added along the sides and bottoms and then the box was cut complete around to form the purse opening.  After baking (the clay is left on the form until after this step) a rattail strap strung with more beads was added.  Lastly, a black tassel was threaded through the bead on the bottom.

This is a unique purse that can be worn like a piece of jewelry.  It is very delicate and fragile so care must be taken when wearing it.  It is 3” by 4”, large enough to hold ID, credit card, money, lipstick and maybe even an iPhone.

Things have been very busy around my house recently.  I am currently working on a long-term home dec project and I am hoping to have a series of posts with pictures coming soon.

Friday
Feb262010

Little Boxes

This week I’ve been putting the finishing touches on a few items I am donating to a silent auction.  I previously posted about a scarf that I made (which, by the way, sold for $110 at the auction!) but since then have also added some of my kanzashi flower pins to the mix. 

I bought some plain white boxes to put them in so they would be protected while transporting.  Looking at the boxes they seemed so plain so I decided to dress them up a bit.  I applied a stamped frame and used embossing powder and a heat gun to give the design some texture and interest.  I hand wrote my name in the middle of the frame.  I then used some thin satin ribbon to form a little closure for the box.  The way I did this was to tie a bow in one end of the ribbon, wrap the ribbon around the box and cut it long enough to leave the other end extended an inch or two.  I then used my hot glue gun to attach the male end of a snap to the underside of the bow.  I wrapped the ribbon around the box, rubbed the nub of the snap on some white chalk and pressed it against the ribbon to see where the female end should be glued.  I also used a dab of glue on the bottom of the box to hold the ribbon in place so it won’t get separated from the box.  A very quick and easy addition to a gift box.