


Yoyo Ornament Tutorial
Here is a quick and cute ornament to give your sewing friends.
Materials
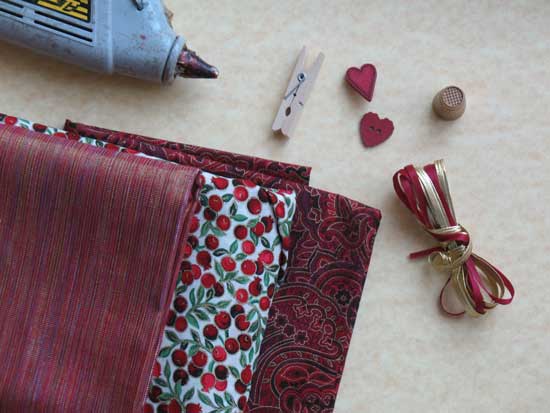
• mini clothespin
• two coordinating fabrics
• Clover yoyo maker (optional)
• hand needle/thread
• small thimble (I spray painted mine gold to match my fabrics)
• ribbon
• button or other embellishment
• glue gun and/or Jewel It glue
I used Clover brand yoyo makers to make the yoyos for this project. They are wonderful to use, fast and easy, producing a beautiful finished product. You can, easily, make yoyos “from scratch” if you prefer.
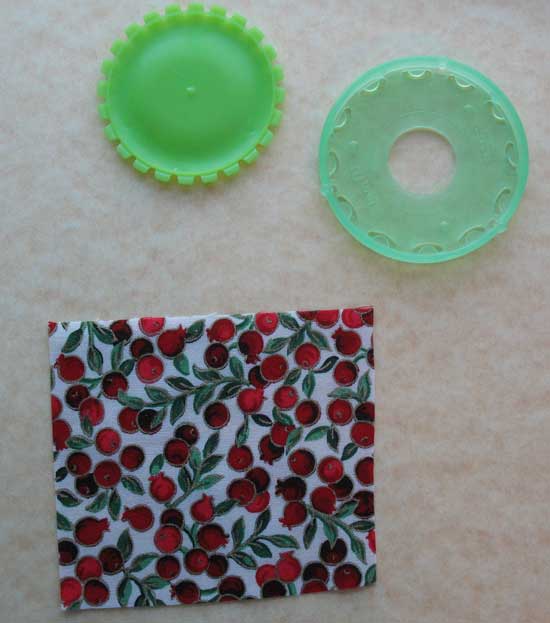
Choose the size yoyos you want to make and the appropriate fabric. I used the small (1.25” ) and large (1.75”) yoyo maker for this project. [In retrospect I think the bottom yoyo should be smaller as it is a little floppy on the clothespin. Strive for 1.5” and 1.25” yoyos.] The yoyo makers consist of two parts which snap together. Essentially, you place your fabric between the two halves and cut out a rough circle.
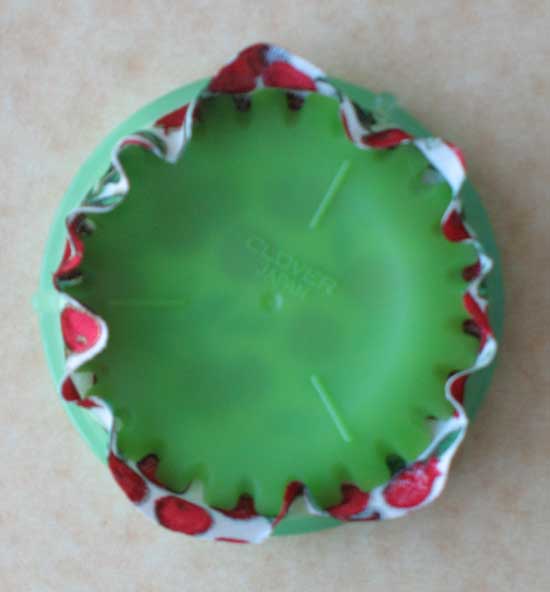
Holding the seam allowance flat against the plastic parts you stitch through the slots on the maker making a nice, even stitch all the way around. When you are finished you simply draw up the thread to close the yoyo. If using the yoyo maker, follow the instructions included with the product.
If you are making the yoyos by hand, begin with a circle of fabric about twice the desired finished size (3” circle for a 1.5” finished yoyo). Turn under 1/8” along the perimeter of the circle and stitch a running stitch through the seam allowance all the way around the circle. Draw up the thread to close the yoyo and tie off. There are plenty of tutorials on youtube demonstrating the technique for yoyo making if you need some guidance.
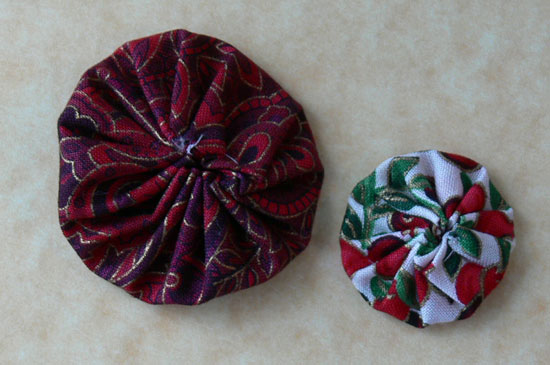
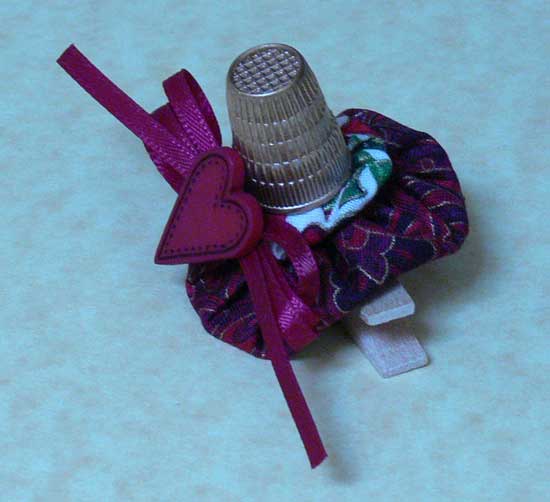
Here are my two completed yoyos.
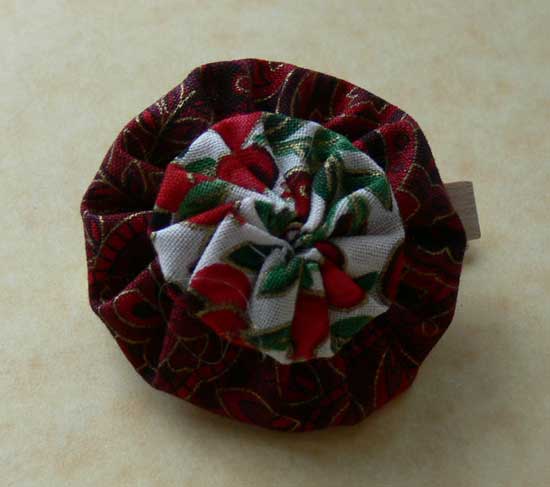
Glue the largest one to the clothespin with the glue gun. (Helpful hint: leave a little opening at the center of the largest yoyo to insert some glue between the layers. This helps stabilize the yoyo on the clothespin a bit.) Glue the smaller yoyo on top of the larger.
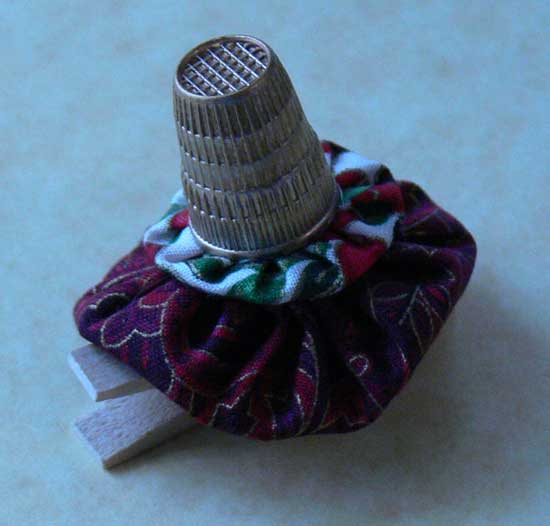
Glue the thimble on top of the yoyos. I decided to use Jewel It glue to attach the thimble as sometimes hot glue does not adhere very well to metal or other slick surfaces and tends to pop off. If you use a glue like Jewel It allow for longer drying time.
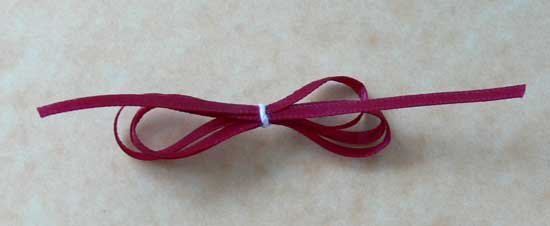
Tie a loopy bow with the ribbon. I secured the center with a small piece of wire. You could also tie a conventional overhand bow or use some other pleasing design.
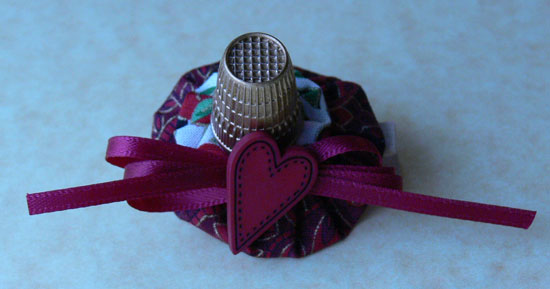
Glue the bow to the side of the ornament. Glue a button to the center (or use another embellishment such as a ribbon rose).
 Julie Bowersett