Julie Bowersett

juliebowersett{at}gmail{dot}com
Navigation
Search
Categories

Blog Writing Course Alumni

From Guide to Art Schools

CraftGossip

Entries in t-shirts (5)

Monday
Jan232012

Thrifty Finds

Ask Natalie Chanin about the early days of her business and she will recount how she used to purchase recycled t-shirts by the pound in huge boxes, shirts that then had to be sorted, cleaned and, in many cases, over-dyed to achieve enough matching fabric for a garment.  This process somewhat reduced the “green” value of using recycled clothing for her garments.  Eventually she made the business decision to source her own organic cotton yardage and gave up on using recycled shirts.  She does admit that using easily attained used clothing that needs minimal processing may be just as green an option as the organic cotton route (for more on the organic cotton industry read Natalie’s article for EcoSalon here).  I was pleased to hear this since the thrill of the hunt is part of the fun for me.

My love of thrifting goes way back, probably to my childhood when I loved going to yard sales in my neighborhood and when we visited my brother and sister-in-law each summer (my sister-in-law Sue is a pro at yard sale-ing).  One of the first things I do when settling in a new town is to search out the various thrift stores in the area.  Over the years I have found some truly amazing buys (though the prize probably goes to the store in Charlottesville that periodically provided shoppers with a black plastic trash bag, the entire contents of which was a mere $5).  Over time I also started seeing used clothing as raw material to create new designs. 

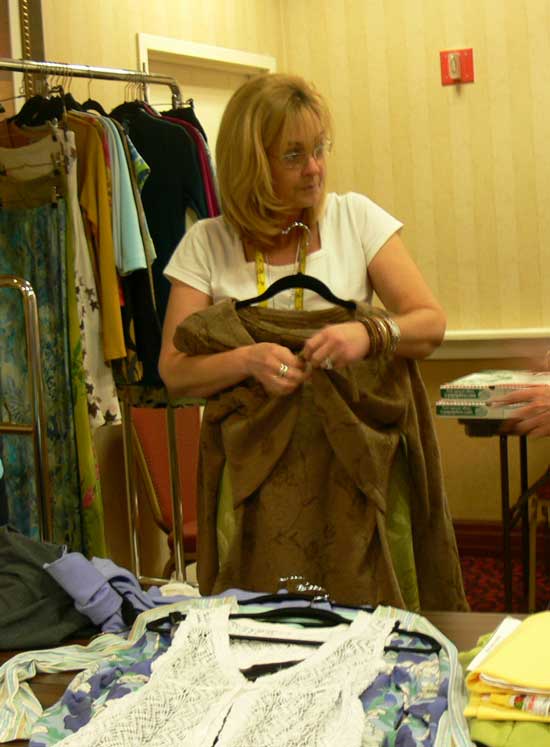
Today I visited one of my favorite thrift stores (a Salvation Army) looking for t-shirts for a number of projects I’ve been planning and journaling about.   I hit the jackpot.  Here’s a look at my finds, what I hope to use them for, and some hints to help with your own thrift shopping.

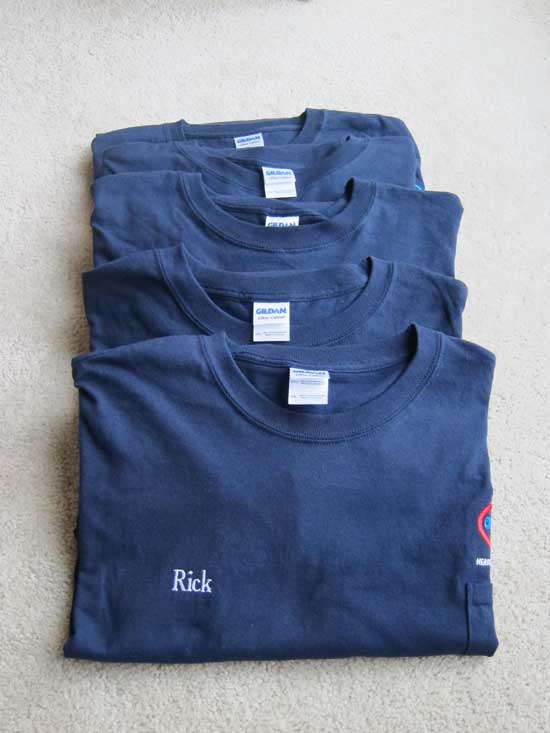
I don’t know who Rick is but I’m grateful he didn’t show up for his new job and that he wore a size 3XL.  These five, new, long-sleeved t-shirts will yield a lot of yardage – the back is free from any design and the lower part of the front (even the sleeves!) can be used.  These shirts will probably ultimately become a dress.

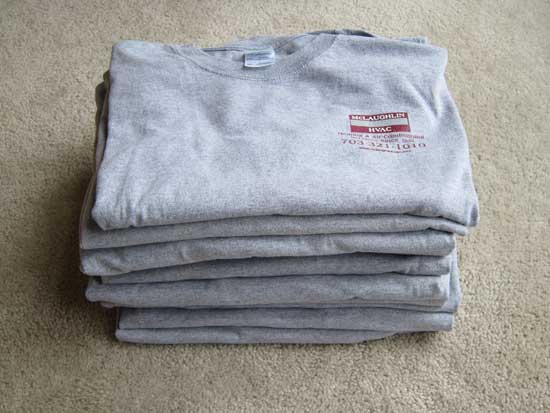
As with the previous shirts, these are identical, new 3XL shirts with lots of useable material (eleven of them).  This stack will provide me with lots of projects, and I will probably overdye some of them. They were $0.99 each.

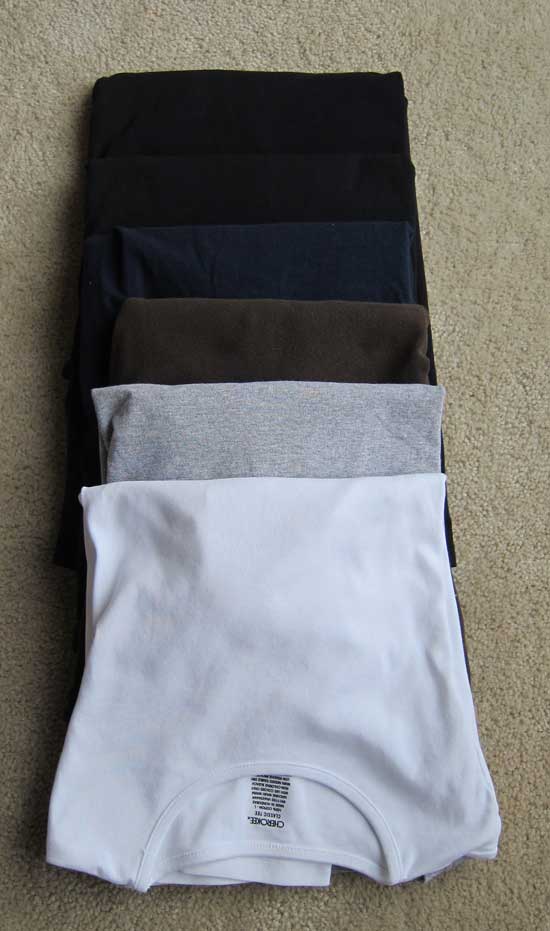
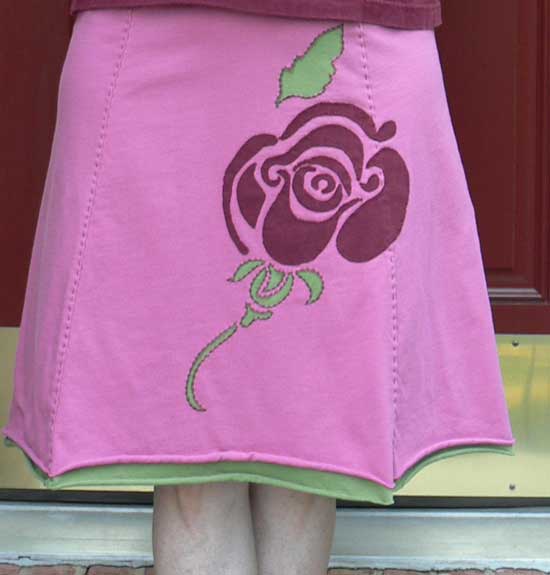
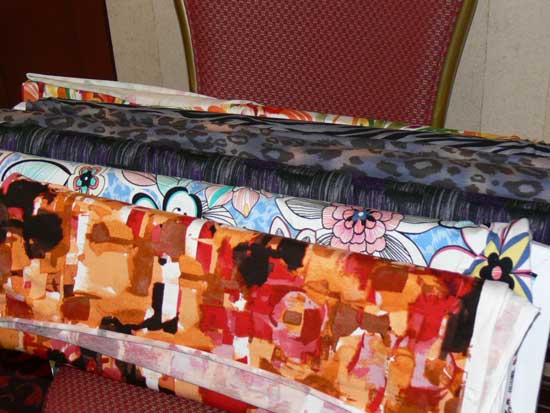
These are all long sleeved neutral colored shirts.  I will use the navy, brown and white for a t-shirt project I’ve got planned.  The two black shirts will be cut up for a skirt.  These shirts are all without designs or logos. 

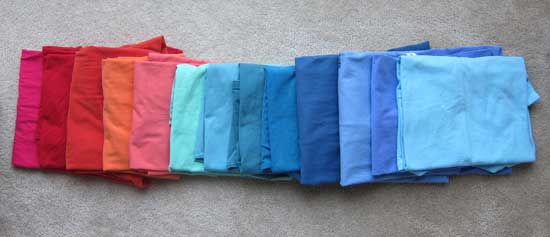
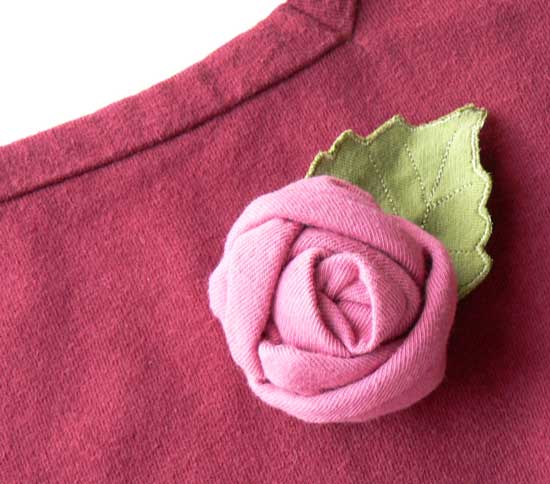
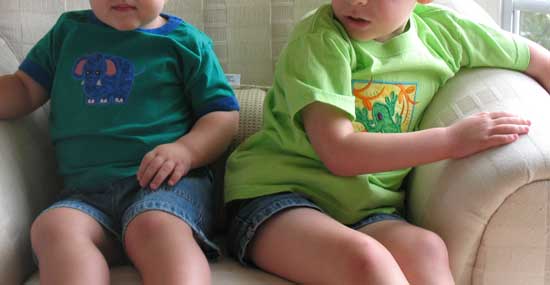
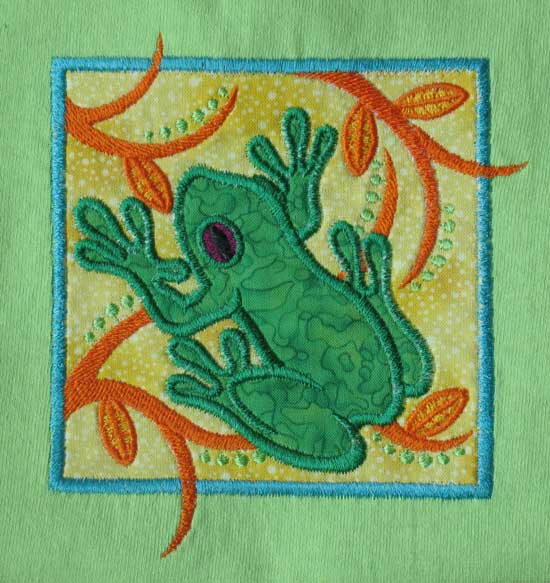
My rainbow assortment of short- and long-sleeved shirts.  Some of these have logos or designs on them, others are plain.  All of my projects will consist of a double layer of fabric.  Sometimes the top layer is cut away to reveal the inside layer, other times not.  I’m planning to use the logoed part of the shirts in areas where the top layer won’t get cut away, like the back of a t-shirt.  Some of these shirts will be used as-is and appliquéd or embroidered on, others will become “raw materials” for other projects or appliqué fabric.

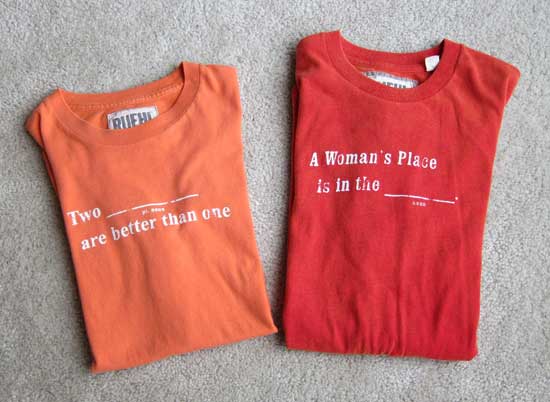
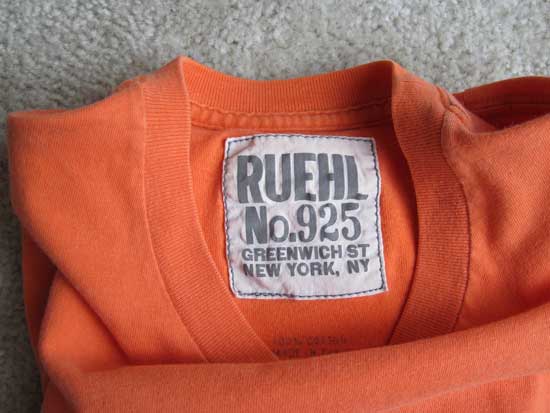
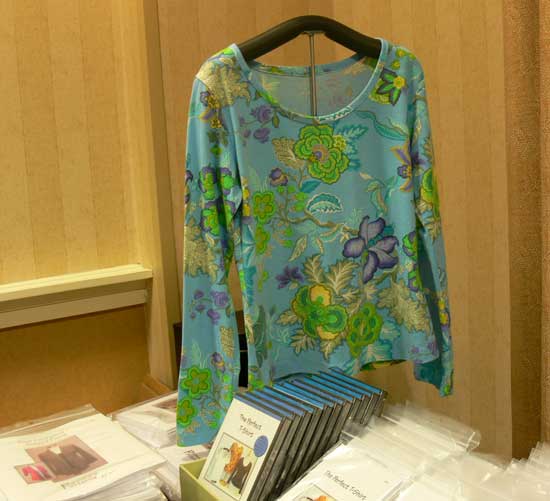
I also came across these two t-shirts today.  The name Ruehl No. 925 did not mean anything to me but I sensed that these were not your run-of-the-mill t-shirt.  They are very well made, and the texture of the cotton is really striking.  I’ll put an appliqué over the text on the front.

So, what do I look for when shopping?

  • Heavy-weight, 100% cotton t-shirts
  • One side with no design or logo
  • Multiples of the same shirt which ensures matched dye lot and plenty of fabric to work with.  Oftentimes a batch of shirts has been donated from an event or business.  If you find a batch of shirts in a light color you can always overdye them.
  • Shop for the largest size you can find.  3XL shirts are great.  Even the sleeves, if long, can provide you with enough fabric to cut a skirt panel at times.
  • Consider buying a shirt in your size if you want a simple project that only needs embellishing.
  • Good quality shirts in a color you don’t care for can always be used for the underlining of a project.
  • It goes without saying to check for stains and holes, though sometimes they can be worked around.
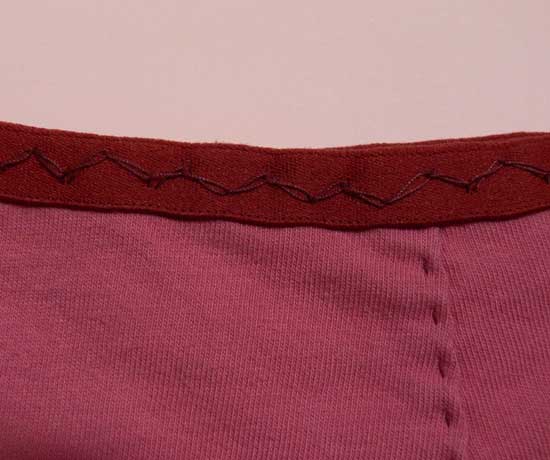
  • Garment-dyed shirts are particularly lovely.  They usually have a soft, muted look, and often the tag has been dyed the same color as the shirt.  Watch for these gems.

Embrace the “reduce, reuse, recycle” mantra and give new life to some old clothes.  Your pocketbook and your design sense will thank you.

Friday
Nov042011

Reworking a t-shirt, and learning something along the way

This t-shirt originated at Kohls.  But after taking Pamela’s Patterns' t-shirt workshop, I decided to buy an XL size and remake it to better fit my body.  I had hoped to use my Perfect T-Shirt pattern and recut all of the pieces from the existing shirt.  After deconstructing the t-shirt a bit, I discovered that I really couldn’t fit the pattern pieces on the fabric I had to work with.  I then turned to two other patterns in hopes that one of those would work.  One of them is Burda 3197 (available here) that I made years ago and perfected the fit with Sarah Veblen.  The long-sleeved tee I made from this pattern is one I wear often, and each time I think “I should make another shirt from this pattern”.  The original pattern does not have a bust dart but Sarah helped me add one (coming from the armhole as that is where the extra fabric was), and the shirt fits much better because of it.  However, when that pattern also did not fit onto my cut-up store-bought tee, I decided I should look at another of Pamela’s patterns, T-Shirt Makeover.  This pattern is designed to re-shape commercial t-shirts to a size and shape that is more flattering for a woman’s body.  After I made the necessary alterations to the pattern, I placed it on the deconstructed t-shirt.  Luckily I had not cut apart the t-shirt at the shoulders so I was able to forego any changes in that area or to the neckline.  Pamela’s instructions say not to worry if there isn’t quite enough fabric at the underarm and, in my case there wasn’t.  I hoped she was right as I had to fudge this part quite a bit.  In turn, I was left with an armhole that was larger than the pattern, requiring I “reverse ease” the sleeve into the armhole.  When I looked in the mirror I had what I expected, a large fold of material in the front armhole area (the dart that wants to be sewn). 

It was only then that I remembered that Burda t-shirt pattern I had just looked at with the armhole dart.  I took apart the front part of the sleeve seam, sewed a dart into the armhole and re-inserted the sleeve.  What a difference! 

The fold of fabric was gone and the shirt looked much neater.  I will definitely keep this in mind when I sew dartless shirts in the future.

One other note – one reason I had so much trouble fitting a small sized pattern onto an XL t-shirt is that the shoulders of the store-bought t-shirt were very narrow, leaving me barely enough fabric to cut out my new pattern.  For you ladies out there who wear a larger size but are always discouraged by the large and droopy shoulder area of commercial clothing (the designers of which must think that as you go up in size your shoulders also grow longer?), you might check out Croft & Barrow brand shirts from Kohls to see if my experience is standard across their clothing line.

One week from today I leave for my weekend workshop at Alabama Chanin.  I can hardly contain myself.

Tuesday
Jun212011

Rose Skirt and T-shirt Fabric Roses

Last week I wrote about the lecture I attended at the Textile Museum by Natalie Chanin of Alabama Chanin.  I made an outfit to wear to the event, a pull on skirt and tee shirt with a fabric flower embellishment.  The skirt pattern is Natalie’s and comes from her Alabama Stitch book.  The pink fabric I used for the top layer is the organic cotton sold in the Alabama Chanin online store.  The green underlayer is a recycled t-shirt and was cut about an inch longer than the pink so it would peek out.  My artist friend Cyane drew the rose design for me which I enlarged and hand cut a stencil from.  The leaves are reverse appliqué and the flower is appliqué with a parallel whip stitch.

This skirt is cut from four gores, and the only thing I did not like about it was the way the center front seam laid along my tummy;  I felt it was not very flattering.  I had an “aha moment” the next day when I was hanging the skirt up.  I rotated the skirt so that one panel was centered at the front and one at the back, leaving the other two as side panels.  I’m much happier with how this skirt hangs now.

The foldover elastic waistband was stitched on by hand (the entire skirt was also constructed with hand stitching).  This zigzag chain stitch is taught in the Alabama Stitch book.  It makes for a very nice, stretchy stitch, with a lovely appearance.

The t-shirt was my second one using Pamela Leggett’s Perfect T-shirt pattern (you can see my first one here).  I used two recycled t-shirts for this project, cutting the sleeves and body from the fabric in a way that utilized the existing hems which saved a lot of time in finishing.  This time I used the square neckline which is available as a template from Pamela in her New Necklines and Sleeves pattern.   I felt the top needed something to pull it together with the skirt so I used some of the leftover pink scraps to make a fabric rose to wear.  The leaf is some of the leftover green fabric and is embroidered using a free-standing leaf design by A Bit of Stitch.

I’ve written a tutorial on making these fabric roses which you can find in my tutorial section.  I like the idea of using a removable embellishment to help tie two pieces together.  It makes the outfit looked coordinated while still allowing the top to be worn with something else if desired.  I’d love to see what you create with these instructions.  Perhaps an entire bed of roses.

Sunday
Jun052011

Pamela's Patterns: A T-Shirt Workshop

I waited until today to post my weekly garment as I wanted to write about a great workshop that I took yesterday and about the top I created.  My local American Sewing Guild Chapter sponsored Pamela Leggett from Pamela’s Patterns to come and teach a t-shirt fitting workshop.  The event started on Friday night with a trunk show where Pamela shared her garments along with lots of useful tips about garment fit and construction.  The next morning about 20 of us gathered, and Pamela walked us through the measuring, layout and construction of our own t-shirts.  Most of Pamela’s designs are exactly the kind of clothes that I wear and like to sew:  simple, stylish, easy to sew, well fitting and comfortable.  She works with a lot of knits and has patterns for tops, jackets and skirts.  What makes her patterns unique is that she incorporates a lot of the common pattern alterations required by women (forward shoulder and rounded back, shorter shoulder seam length and others) and provides easy to understand instructions for making other necessary changes for a custom fit.  The 20 women present represented a pretty wide range of figure sizes and shapes, yet each of us was able to leave the workshop with a finished (or nearly finished) t-shirt that fit us much better than any ready-to-wear garment and for many, a better fit than we’ve been able to accomplish with commercial patterns.  Here’s my plan:  using some of the huge volume of knits in my stash, cut out about six t-shirts with various necklines and sleeve finishes and have them ready to sew when time allows.  I’m willing to bet I can sew one of these in less than an hour if it is cut out and ready to go.

Here’s a picture of my final t-shirt.  It fits great and is comfortable and stylish.

The rest of these pictures are shots of some of Pamela’s garments and her products.  She was a great teacher and has a true talent for drafting great patterns.  I can’t wait to try her pencil skirts.  I had a super time yesterday, the best part of it being time to see my fabulous sewing friends and spend a whole day together doing what we like best.  When you are done reading this post hop on over to my friend Jane's blog to read another one on this workshop (and you will see why Jane and I get along so well.)

Fabrics, waiting to become t-shirts

A Rack of Pamela's Garments

The Perfect Tank Top

Pencil Skirt from stretch lace

Bias skirt made from a vintage tablecloth

Pamela with a selection of her garments

Patterns

Tuesday
Sep142010

Back to School

I vividly remember getting new clothes to wear on the first day of school when I was little.  I also seem to remember they were always inappropriate for the weather – corduroy and velveteen even though the thermometer indicated it was still summer.  My boys are too young to appreciate news clothes (oh, wait!  They are boys.  They will probably NEVER appreciate new clothes) but nonetheless I made them something new to wear for their first day at school yesterday.  Last year I made my oldest a little outfit of shorts and matching shirt and he wore it to school that day and never again so this year I took a little different approach.  I used purchased t-shirts and embroidered on each and that was that.  It took little time and they turned out cute.  Plus they can wear them for a while until the weather turns cool.  For my oldest I used an appliquéd tree frog design (his class this year is the Frogs)

and for my little guy I made an appliquéd elephant.  Both designs are from Embroidery Library

Since someone has already asked I will tell you I used Floriani No Show Nylon Mesh Fusible on the back of the design.  I also fused a second layer over the back of the stitched out design on my fussy older son’s shirt to prevent any scratchiness.  This stabilizer works really well on knit t-shirts and keeps everything nice and stable for stitching.