Julie Bowersett

juliebowersett{at}gmail{dot}com
Navigation
Search
Categories

Blog Writing Course Alumni

From Guide to Art Schools

CraftGossip

Entries in ornaments (5)

Tuesday
Jan112011

Buttons, Bells, Beads and Bows

A couple of weeks ago I wrote about using my dad's old sweater to make Christmas stocking ornaments for some of my family members.  I also made some ornaments shaped like Christmas trees for my siblings (and myself) but didn't want to post pictures until I had given these gifts around New Years. 

I used a cookie cutter as my template and traced the shape onto a piece of the felted wool.  I then embellished the tree by needlefelting various yarns onto the front.  I layered the shape on another piece of sweater and stitched around the traced design.  After cutting around the edges with pinking sheers I further embellished the trees with buttons, bells, beads and bows.

My hope is that each year when the recipient hangs their ornament on their tree they will remember my dad and me.

Tuesday
Dec212010

Felted Wool Sweater Stockings

Some of you may know that my dad passed away earlier this year.  One of the things I took as a memento was an old dirty, moth-eaten and much-mended wool sweater that he used to wear.  I brought it home and threw it into the washer and dryer and felted it.

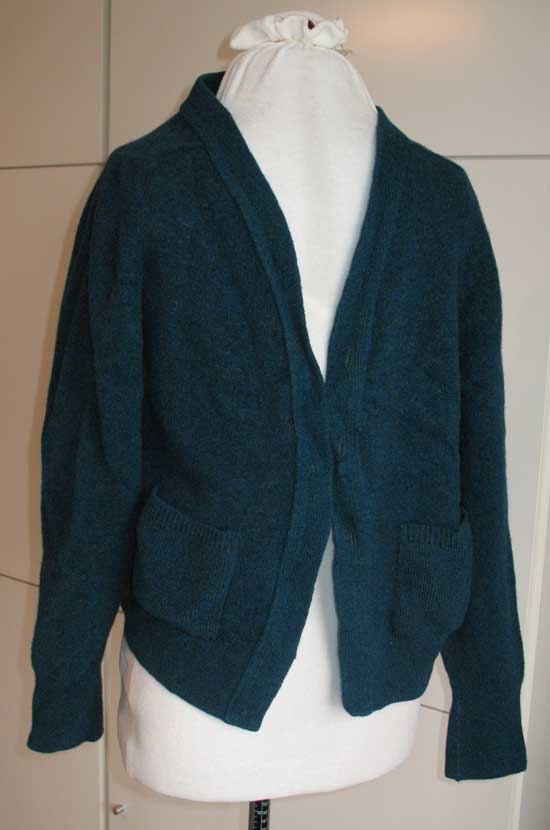
Next, I took it apart as carefully as I could.  I particularly wanted to remove the front band and pockets carefully (I put them aside for other projects).  Several years ago I downloaded a free machine embroidery design from Embroidery Garden for little Christmas stockings made from a sweater, and I knew this would be the perfect project for my dad’s sweater. 

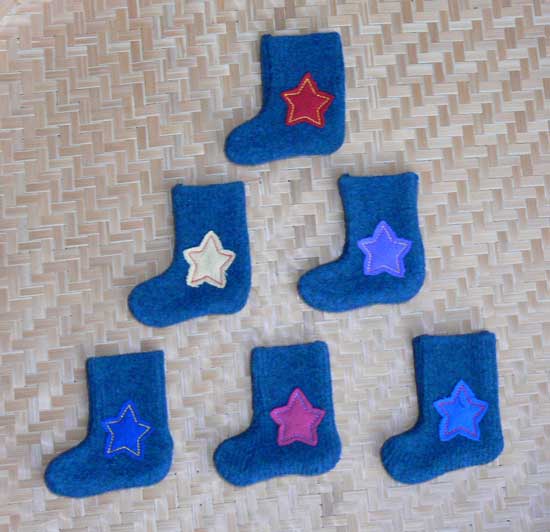
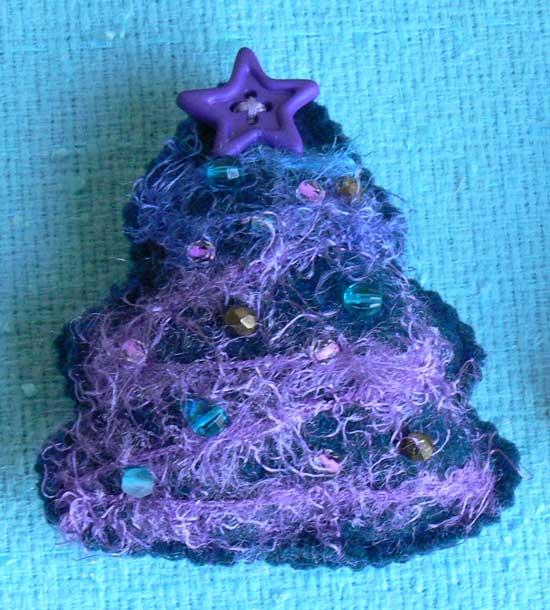
I created a total of six stockings, each with a different color wool star (which is part of the embroidery design) on the front.  I made one for each of my dad’s grandkids (my two boys will share one) as a memento and will tuck a little note inside the stocking telling the story behind them.

This design was originally a limited-time freebie offered to members of Embroidery Garden’s Yahoo group.   Often, after the time limit for the freebie has expired, Reen will put the design on her regular site for sale.  When I was preparing this post I went looking for the design but couldn’t find it.  I sent Reen an email and she did the most awesome thing!  She posted this design (in THREE sizes) as a freebie on her site!  Thanks so much, Reen, for your generosity.  I know everyone will enjoy using this design.

The stockings are stitched using the ribbing from the sweater as the top of the stocking.  The embroidery design also lets you insert a piece of ribbon for hanging.  I forgot to do that on the first one I made so I thought I would just add the hangers later by hand.  Well, if you want a loop hanger add it as instructed.  I found it impossible to add one later in a way that looked good.  Instead I used a piece of fishing line and made a hanger so these can be used as Christmas ornaments.  (Also, note that I mirrored the design before stitching out my stockings).

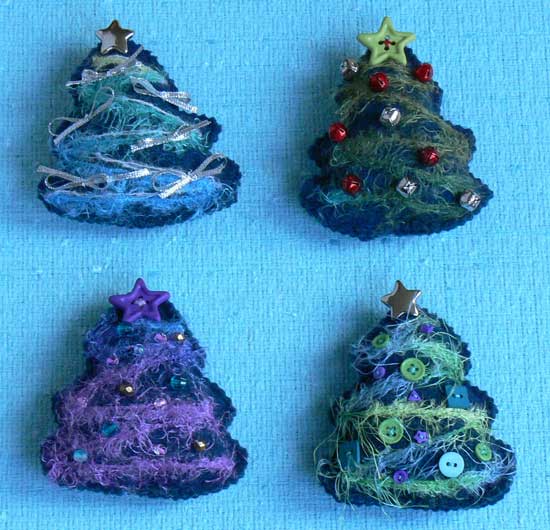
I still have a lot of the sweater left and, if I can just find a few more hours this week, will be making some other little ornaments for my siblings.  When those are finished I think I will STILL have some wool left.  I’d like to think that my frugal dad would be happy to see how his old, much-loved sweater is being put to use.  My dad instilled a love of craftsmanship in me and for that I will always be grateful.  I miss him, but hope that these little tokens will help keep his memory alive for me and my family.

Sunday
Dec192010

Woodland Nature Clip Ornament and Giveaway

The last of the advent ornaments brings a super quick and easy but lovely-to-look-at clip that can be used to adorn gifts as well as your tree.  Once you have your materials gathered, you can put one of these together in less than 15 minutes.  I love to wrap my packages in brown kraft paper and tie them with jute cord then clip this on.  A little spray glitter adds some sparkle.  After the package is opened the decoration can be clipped onto a branch of the Christamas tree. 

I also created a smaller version of these clips on mini clothespins and used them as package toppers on the gifts I made my boys' teachers.

I've written a tutorial that gives you all the help you need in crafting one for yourself.  And, if you leave a comment on this post, I will pick one winner randomly and send the winner this ornament for their own tree.  Comments must be received by 6 a.m. on Wednesday morning to qualify, and the results will be posted on Wednesday morning.

This is the last of my advent posts but watch for my Bag of the Week post later this week.  Sharing this with the folks at Today's Creative Blog on their Get Your Craft On Feature.  Head over that way to see lots of creativity.

Tuesday
Dec072010

My Luxe (and Costly) Holiday Wreath

Every now and again a project comes along that seems like a good idea at the time but about midway through I start to wonder what I am doing.  This wreath was one of those projects.

The idea came from my sister, actually my sister’s son-in-law’s sister (got that?) who brought the supplies to make one of these when she came for Thanksgiving.  My sister said it was turning out really cute but more bulbs were going to be needed to finish it. 

I thought I would try to make one myself.  I started with an 18” straw wreath form (from the local craft chain), some plastic Christmas ornaments of various sizes and colors and some floral pins.  Seemed simple enough.

I pushed the floral pins through the bulb hanger into the wreath.  For a while things went fine but after the wreath filled up with bulbs it was pretty difficult to fill the remaining holes without popping off some of the already-placed bulbs.  Plus, this took A LOT of bulbs.  I thought I was forewarned with what my sister told me and bought many more bulbs than I thought I would need.  I still had to go back for more.  TWICE .  Also, using the floral pins meant the bulbs could shift around a bit and things were pretty unstable until the very end (not to mention the blister on my finger from pushing them in).  Eventually I pulled out my glue gun, secured a few bulbs to the wreath form and each other and glued smaller bulbs in place to hide the remaining holes.

I think this wreath turned out beautifully but it definitely took more time, money and effort than I thought it would.  It also weighs a ton.  My sister had suggested that a wreath like this could be used on the front door one year, hanging inside one year and as a centerpiece another year (my mom’s hurricane lamp would look great in the center). 

In the end I used over 120 large/medium sized bulbs and another 30 small bulbs.  I spent well over $50 for the bulbs and another $15 for the other supplies.  Here is what I learned from this project and what I would suggest if you want to make your own:

  1. Use a 12” wreath form.  18” is really too big.  By the time you place all of the ornaments, the wreath weighs a lot.  Plus you will use fewer bulbs with the smaller size.  The finished wreath will end up much bigger than the underlying form.  Mine grew to almost 26” across.
  2. Buy your floral pins at Walmart.  I bought my first batch from the local craft store and paid $3 for a box of 50 (I bought two).  When I needed more I checked Walmart and found packs of 100 pins for $1.
  3. Shop around for ornament selection.  I bought my bulbs at both Target and Walmart.  If you are willing to be flexible with your bulb color, Target had sets of 8 bulbs for $1.  $15 would buy you enough bulbs for this project, but they will all be the same size, and the color selection is limited.  Or do as another friend suggested and pick up ornaments on sale after the holidays and plan ahead for next year.

My wreath is hung, the blister on my finger is healing and I am already forgetting about the troubles I had.  All's well that ends well.

I'm sharing today over at Today's Creative Blog and their Get Your Craft On feature.  Lots of great ideas over there.

Saturday
Nov202010

A Month of Tutorials and Giveaways

It’s the most wonderful time of the year!  With presents to buy, gifts to wrap, food to prepare, decorations to hang, songs to sing, friends and relatives to visit, and traditions to share, the next few weeks will be some of the busiest of the entire year.

In the Christian calendar, the period leading up to Christmas is known as Advent, a time of preparation for “an arrival that has been awaited”.  The season begins on the 4th Sunday before Christmas (this year, November  28th) and lasts for four consecutive Sundays.  To celebrate and prepare for the Christmas holiday, each Sunday of Advent I will be posting a tutorial for a simple Christmas tree ornament, some of my favorites from years past.  And, since this is the season of giving, I will be giving away the ornament each week as well.  Simply leave a comment on the Sunday post or tutorial and I will randomly pick a winner on the following Tuesday. 

I also have some special Bags of the Week to share with you, in keeping with the Christmas spirit, and another tutorial for a Santa-inspired tote bag.  I will be posting lots of gift ideas as I make my list and check it twice, as well as another giveaway or two.  I am going to be a busy little elf in the month of December and I am planning to share it all with you.  Check back often.  Or even better, subscribe to my RSS feed which will send you an email each time I post something new.  Click on the link on the right side of this page to subscribe.