Julie Bowersett

juliebowersett{at}gmail{dot}com
Navigation
Search
Categories

Blog Writing Course Alumni

From Guide to Art Schools

CraftGossip

Entries in machine embroidery (24)

Friday
Sep242010

Bag of the Week 38

Fall Leaves

Fall arrived at 8:09 p.m. on Wednesday but here in Washington, DC it felt more like the height of summer with temperatures this week in the 90’s.  Hopefully those of you reading this post in cooler parts of the world will fully appreciate these little wool bags with appliquéd fall leaves.  For those of us still sweltering, may they bring hope that cooler weather is just around the corner.

Each of these bags is made from a variety of wool, many of which were repurposed from thrift store finds.  The bag design is a simple lined pouch.  The machine embroidered leaf designs, made from cotton batik fabrics, are from Kathleen Parman’s Herky Jerky line.  I featured other designs by Kathleen in my January 20th and February 10th posts this year.  Each bag was finished with an I-cord made from a novelty yarn (or two) and each has a twisted yarn strap.

Happy Fall!

Tuesday
Aug312010

Machine Stippling

I recently finished a very large project, large both in the actual size of the item and the time it took me to complete.  I have been working on a 4-foot by 6-foot banner for a group holding a religious retreat weekend and it has taken me about two months to finish.  I was given a picture of the design that I was being asked to recreate and had fun putting together lots of brightly colored fabrics.  I can’t show you a picture of the completed project just yet – it wouldn’t be fair to post a picture on the internet when no one involved in the weekend has had a chance to see it.  But I will show you a little piece of it because I want to explain how I did the stipple stitching on it.
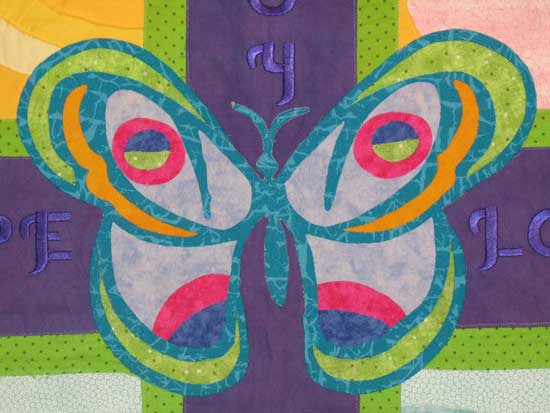
At the center of the design is a large butterfly.  After fusing the various pieces in place I thought it needed some stitching to add some detail.  Let me tell you right now that I am a lousy machine quilter.  I try, I really do.  I’ve created dozens of projects with free motion quilting but I am never really happy with my work.  I even used to practice by making quilts to donate to charities who gave them to children because I figured the kids didn’t mind if my stitching was not perfect.  I love the look of stippling but again, have never mastered it.  I certainly wasn’t going to attempt it on a 4x6 piece of heavy, pieced canvas.  Instead I used a machine embroidery stipple design (you can find one similar to mine here) and let my embroidery machine do the stippling for me. 
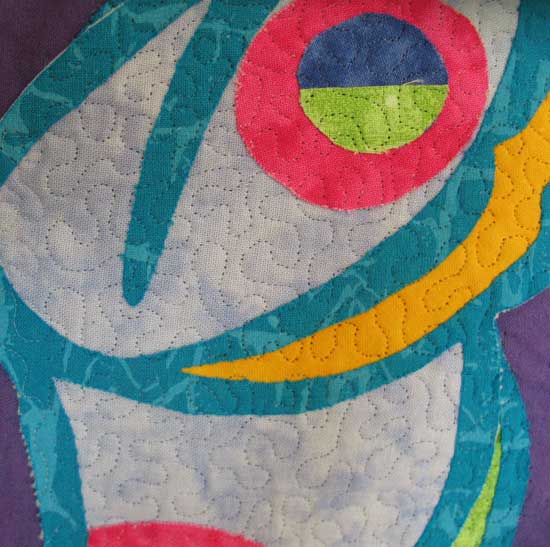
I have used this design so many times and on so many different projects.  This time I had to apply a little creative thinking since I wanted to embroider a butterfly-shaped area instead of a rectangle.  I set up my machine as usual and began by walking through the first several stitches of the design, advancing one stitch at a time to ensure that the stitches fell within the area I wanted to stitch.  I started stitching the design and whenever I got to an edge of the design where I wanted the stitches to stop, I stopped the machine and manually advanced the design a few stitches at a time until the needle was once again within the area I wanted to stitch.  This sounds time consuming and tedious – I certainly thought it was going to be – but I was surprised at how quickly I was able to complete the task.  I had to stitch the design twice, once on the left side of the butterfly and once on the right.

I’m pleased with the way this stitching turned out and am going to store away this idea to use on other projects.  I really have found so many uses for this stippling design – it is probably my most-used file.  Give it a try.

Friday
Aug132010

Bag of the Week 32

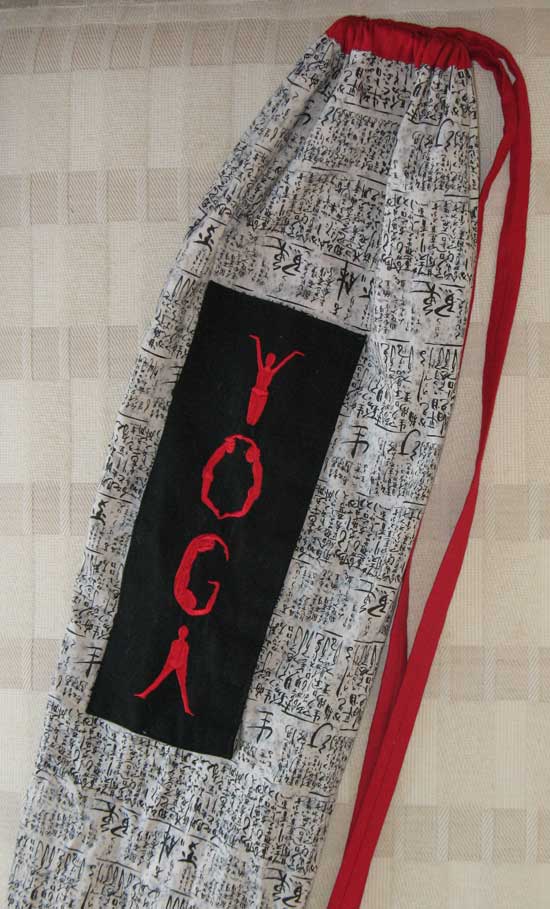
Yoga Bag

I created this bag to store my yoga mat in many years ago.  I fell in love with the yoga font from Embroidery Arts and had to have it.  I had grand visions of making customized yoga bags for people and using this font to monogram them.  Who was I kidding?  I think I made a total of 5 bags (which brings the cost down to about $2.50 per letter).  But I still love this design.

The bag has a carrying strap which also forms the drawstring closure.  The monogrammed bellows-style pocket is large enough to carry a water bottle.  I created my own pattern for this bag but have long forgotten how I did it.  Luckily, Amy Butler has a free pattern for her Nigella Yoga Bag with wonderful illustrated instructions.

Thursday
Jul082010

Bag of the Week 27

Shoe Bags

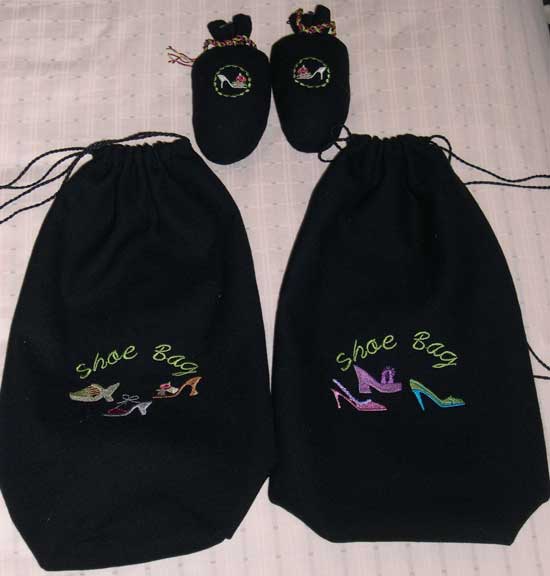
Summer is the time to travel and these handy little shoe bags will make traveling easier.  They are designed to hold a pair of ladies shoes and, when packed into a suitcase, will keep dirt away from clothing.  I made these bags from wool crepe and embroidered a few shoes on the outside along with some text.  The embroidery designs are by Evy Hawkins of A Bit of Stitch

I began with these basic instructions from Embroidery Arts

Instead of the buttonhole described I used metal grommets as the opening for the ribbon or cording to run through.  I used two separate ribbons, looped in opposite directions, so the bag can be closed securely.  I also created some scented shoe stuffers to go along with two of the bags I gave as a gift.  These were also created from the same black wool crepe.  The design is another of Evy’s, one of her Spring Buttoncover designs

I will see if I can find the instructions for making the shoe stuffers and post them as a tutorial.  They were simple to make and the combination with the shoe bags makes a nice gift.

You can modify the shoe bags for men’s shoes.  Each bag will fit one man’s shoe.  A monogram on each would be a nice touch.

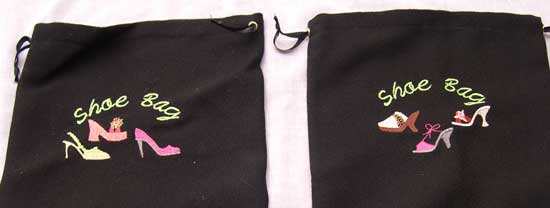
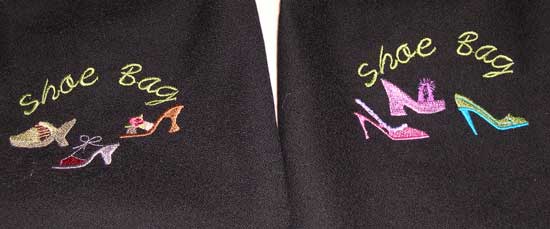
Here are some pictures of the various designs I used on some bags.

Friday
Jun182010

Bag of the Week 24

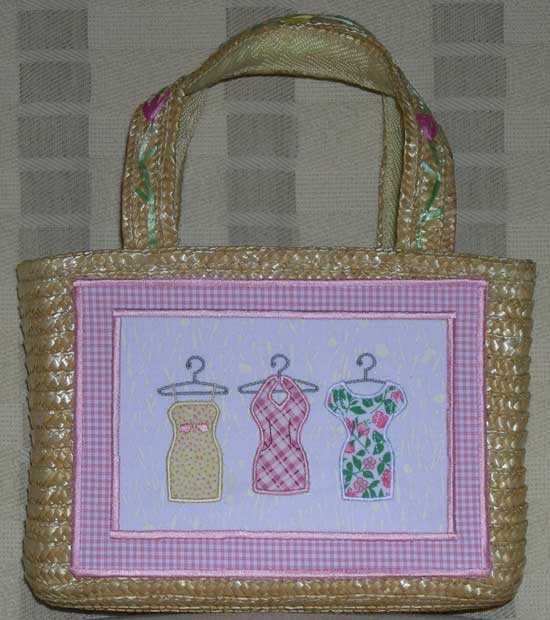
Dress up a straw purse with dresses!

Here is a simple way to embellish a summery straw bag.  I created a panel of embroidered designs and attached it to a purchased bag.  I first embroidered the dress designs onto a white background and then satin stitched that rectangle onto a larger checked fabric piece.  I created a satin stitch frame around the outside by stitching through tearaway stabilizer.  When the panel was complete I glued it onto the outside of the purse with fabric glue.  If your bag is unlined you could also stitch the panel onto the purse.  Then use some of the fabric from the project to make a lining for the bag.

These designs come from A Bit of Stitch’s Appliqué Fashion Dresses.  I have used these designs on all sorts of projects and I love them.  Wouldn’t it be cute to make a dress to wear and then use the same fabric in the appliqué for a matching purse?