Julie Bowersett

juliebowersett{at}gmail{dot}com
Navigation
Search
Categories

Blog Writing Course Alumni

From Guide to Art Schools

CraftGossip

Entries in home dec (3)

Tuesday
Aug102010

Window Treatments for a Nursery, Part 3

The Roman Shade

The last two weeks I have written about creating a cornice board on which to hang a valance.  Today I will discuss the Roman Shade that became part of this window covering. 

I began with instructions I had saved from a 2006 Martha Stewart Living magazine (you can find this article online here) and made modifications to suit my own style. 

I cut the lining fabric the same length as the outer fabric but 2” narrower.  I matched the long edges, right sides together, and sewed with ½” seams.  When the shade was turned the side hems automatically turned under 1” on each side.  I made the bottom hem by turning up both layers together and topstitching.  The top edge was turned under to form a casing – I waited to do this step until the very end, after installing the cornice board and measuring for a final length.

I used Martha’s instructions for measuring and placing the rod pockets.  To simplify the construction I folded the fabric strips in half lengthwise and serged the long cut edges together.  I then pressed under the serged stitching and topstitched that edge to the shade.  One end of the strip was closed with a machine hem; the other was left open until the dowels were inserted and then closed by hand.

I marked the center of each rod pocket and matched that mark to the center eye hook on the cornice board.  This allowed me to mark the location of the two outer eye hooks on the top rod pocket.  These marks were duplicated on all of the pockets.  I then hand sewed plastic curtain rings to these marks, three on each pocket.  These will be the channels for the cording that will raise and lower the blind.

Next week I will share the final installment on this project when I show how I installed the various elements to complete the project.  See you then.

Wednesday
Aug042010

Window Treatments for a Nursery, Part 2

The Valance

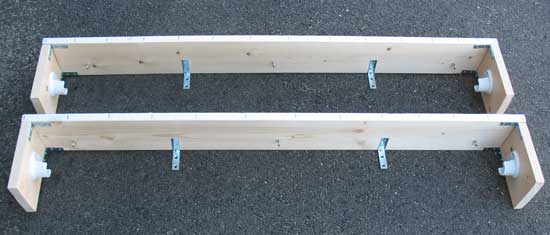
In Part 1 I showed you how to make a wooden cornice board and now it is time to create the valance.  The fabric I worked with is a lovely drapery weight dobby, a microcheck print with a woven diamond pattern over top.  The fabric was easy to work with and the pattern easy to match.  In fact, I let the pattern dictate many of the design decisions such as where to place the pleats, choosing a spot that would allow for easy matching.  "Length" and "width" are confusing terms on something like a valance.  I will use length to refer to the longer measurement, the "running length", if you will, and width (or sometimes drop) to refer to how long the valance is from top hem to bottom hem.

I began by measuring the top edge of the cornice board from where it meets the wall, around the front and to the other wall.  This will be my finished valance length.  I determined how many and what depth of pleat I wanted (3 pleats at 3-inches each).  I added the extra length needed for each pleat to the total length of the measured cornice and added 2” for seam allowances.  (PS:  it helps to draw diagrams of this as you go along, listing the various lengths).   I wanted my finished drop to be approximately 9 inches.  I cut the fabric that width plus 1” for the bottom hem, ½” for the top hem and 1” for seam allowances.  I adjusted this width slightly based on the pattern repeat – I wanted the top and bottom edges to fall along a repeat line.

Cut your lining the same length as your outer fabric but cut the width 1.5” less than the width of the outer fabric. 

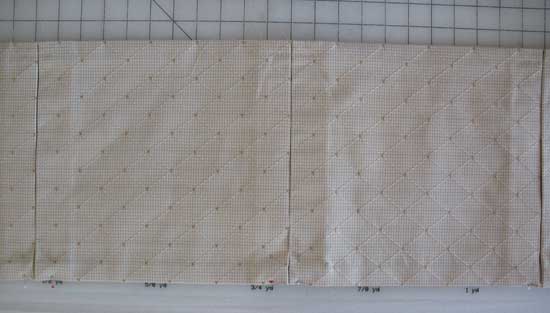
Before I cut the fabric I checked my plan by folding a pleat in the fabric.  I found that I would need to adjust the pleat width just a fraction to accommodate the pattern repeat.  In the end I cut the fabric pieces longer than I needed so I could determine the finished length after the pleats were installed.  If possible, cut your fabric on the lengthwise grain (railroading) to avoid piecing; if this is impossible then piece the fabric so the join falls inside one of the pleats and is therefore unnoticeable. 

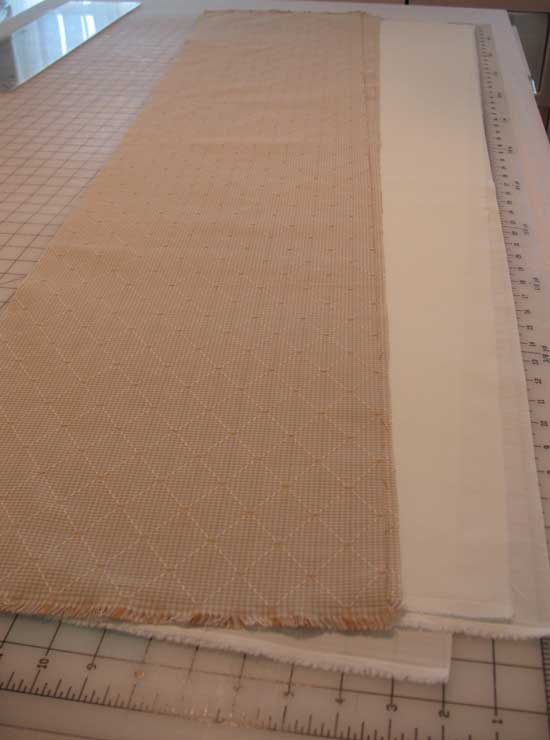
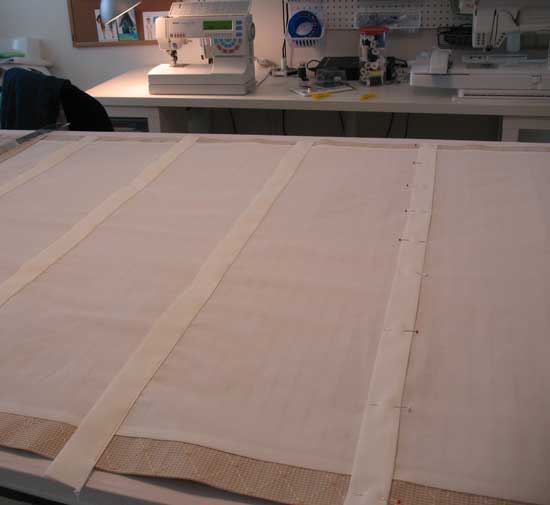
Here are my outer and lining fabric pieces laid out on my cutting table.

Align the long edges of the lining and outer fabrics and stitch together with ½” seam.  When you turn the fabric right side out the hems will turn up to accommodate the shorter width of the lining fabric.  I pressed a 1” hem at the bottom edge and a ½” hem along the top edge.

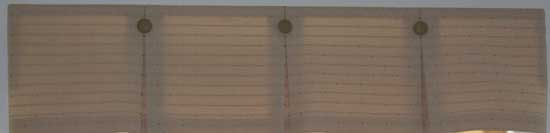
I measured the front edge of the cornice board and found the center, marking it with pencil for ease of installing the valance later.  I drew a diagram of the valance and labeled the front part with this measurement.  I found the center and marked it (pleat #1) and then placed the two other pleats equidistant on either side of the center, approximately centering them on the remaining width.  Again, I adjusted these dimensions slightly during construction to accommodate the pattern repeat.  

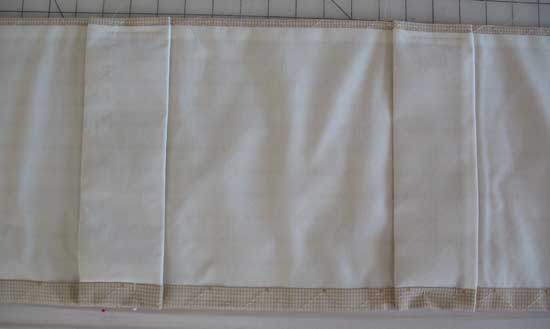
I made the first pleat in the center of my fabric strip, marking the placement with one of my favorite notions, Clo-chalk.   

I carefully pressed this pleat and basted the top edge.  I then marked, pressed and basted the other two pleats.


Once the pleats were in place I could measure from the center to both ends and mark the final, total length, allowing 1” on each end for the side hems.  I folded in each end ½ twice and top stitched.

I applied the loop side of a piece of Velcro (the hook side had been applied to the cornice board previously) along the top edge, topstitching through all layers of the pleats. 

I covered  three 1-1/8” buttons for each valance with contrasting fabric and hand sewed them to the front of each pleat.


Next week I will write about the Roman shades I made to accompany this valance.


Tuesday
Jul272010

Window Treatments for a Nursery, Part 1

The Cornice Board

I have been working on completing some window treatments for my great-niece’s nursery.  It was a long project and an even longer story.  You see, my sister originally started working on the various aspects of her granddaughter’s nursery and got some of the elements completed.  Then she broke her leg.  Yep, that little accident seriously set her back in the sewing department.  So, I offered to help and finish what I could.  Which is how I came to be working on these window treatments.

The project can be broken down into various elements and, over the next four weeks, I will be sharing each of these parts:  cornice board construction, valance, Roman Shade, installation.

I will begin with the cornice board as that is the foundation I needed before I could create the valance and the shade.  I have written a tutorial about how to create one of these for yourself.   I have used a cornice like this several times in my own home, and I find them attractive and versatile, providing some display space above a window.  It is a fairly easily and straightforward project, and you do not need fine woodworking skills (mine are rudimentary, at best).  The project can be quite crude as it will be covered with lovely textiles and no one will ever see it.

Here is a picture of the completed cornice, ready for hanging on the wall with wall anchors.  I have applied Velcro (the hook side) along the top edge, wrapping around the sides which will be used to hang the valance.  I have also used closet pole brackets and screw eyes which will both come into play when it is time to hang the Roman shade.

Check back next week as I show you how I created the valance.