


Window Treatments for a Nursery, Part 3
The Roman Shade
The last two weeks I have written about creating a cornice board on which to hang a valance. Today I will discuss the Roman Shade that became part of this window covering.
I began with instructions I had saved from a 2006 Martha Stewart Living magazine (you can find this article online here) and made modifications to suit my own style.
I cut the lining fabric the same length as the outer fabric but 2” narrower. I matched the long edges, right sides together, and sewed with ½” seams. When the shade was turned the side hems automatically turned under 1” on each side. I made the bottom hem by turning up both layers together and topstitching. The top edge was turned under to form a casing – I waited to do this step until the very end, after installing the cornice board and measuring for a final length.
I used Martha’s instructions for measuring and placing the rod pockets. To simplify the construction I folded the fabric strips in half lengthwise and serged the long cut edges together. I then pressed under the serged stitching and topstitched that edge to the shade. One end of the strip was closed with a machine hem; the other was left open until the dowels were inserted and then closed by hand.
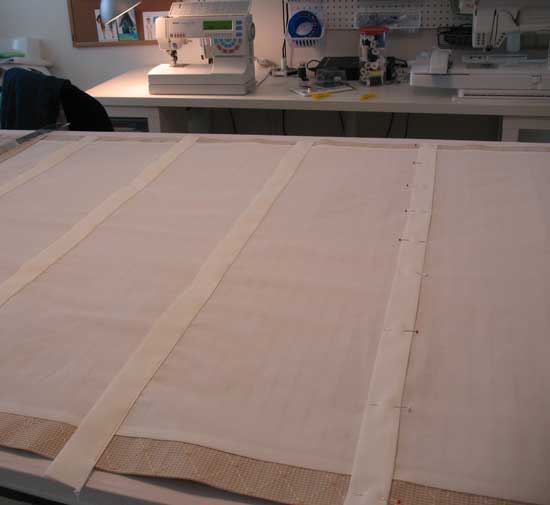
I marked the center of each rod pocket and matched that mark to the center eye hook on the cornice board. This allowed me to mark the location of the two outer eye hooks on the top rod pocket. These marks were duplicated on all of the pockets. I then hand sewed plastic curtain rings to these marks, three on each pocket. These will be the channels for the cording that will raise and lower the blind.
Next week I will share the final installment on this project when I show how I installed the various elements to complete the project. See you then.
 home, sewing
Reader Comments