


Maia Jacket: A Journey
I had the most fabulous day yesterday; I got to spend it with Sarah Veblen. My dear friend Joyce opened up her home to about 10 of us, all sewing fanatics, and we came together to learn from Sarah. I have taken classes with Sarah in the past and have always left feeling renewed, inspired and a little more knowledgeable about my favorite pastime. I haven’t had the chance to work with Sarah for several years now – I’ve been busy raising little boys – but this chance to was too fine to pass up. The three-day event was more than I could commit to but I was able to spend an entire day with the group.
The project I wanted to work on was the fitting of a fairly complicated jacket pattern, the Maia Jacket, by La Fred. I had attempted to fit this pattern myself a number of years ago but gave up. I needed professional help. Here I will outline the process I went through for completing a muslin, or mock up garment. The construction of the jacket will have to wait for another time.
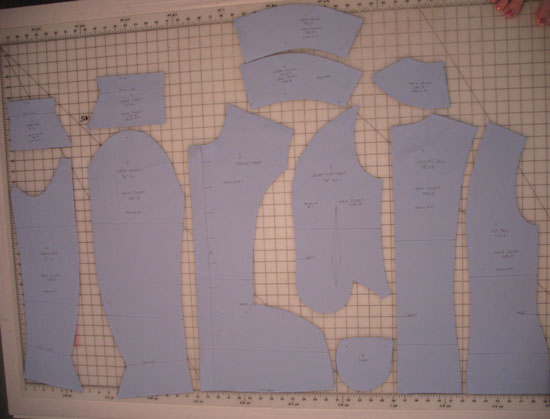
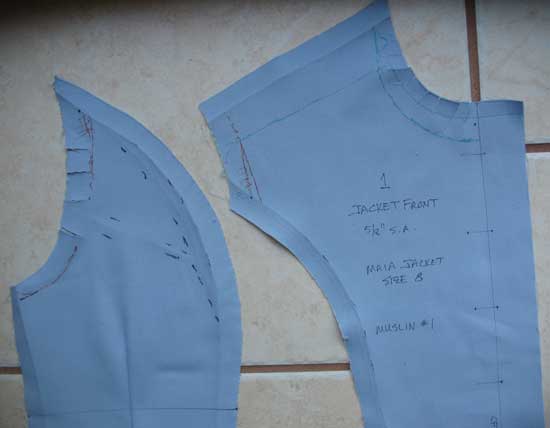
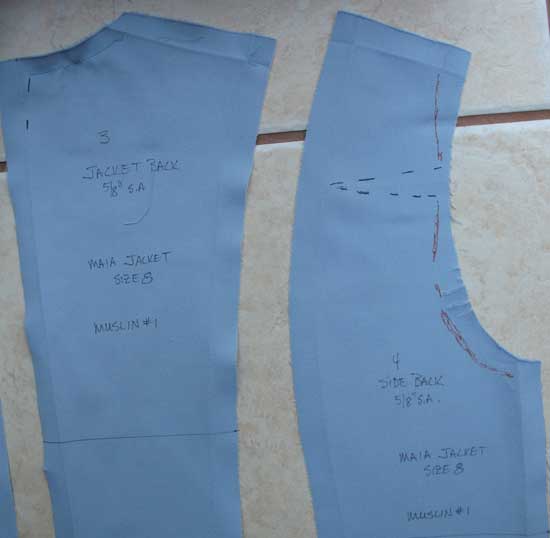
I began by tracing off the necessary pieces of the pattern, twelve pieces in all. I then cut these pieces out of an inexpensive twill fabric. I had decided to use a fabric with a bit more weight than muslin to simulate the heavier fabrics this jacket would be constructed in. I used a Sharpie marker to label all of the pieces and draw the necessary lines and markings. Here are all of the pieces on my cutting table.
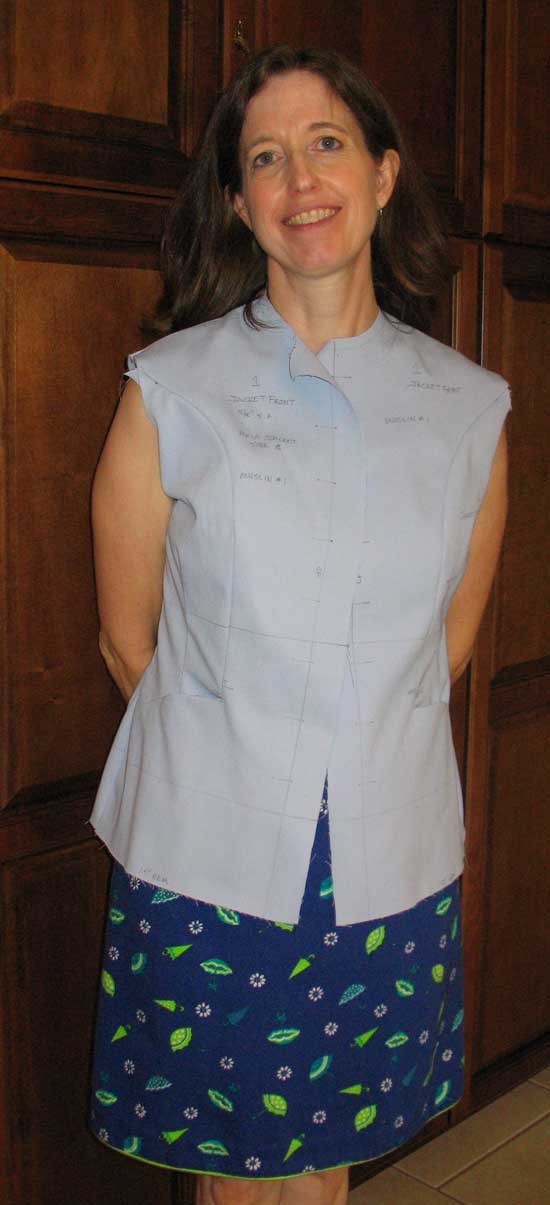
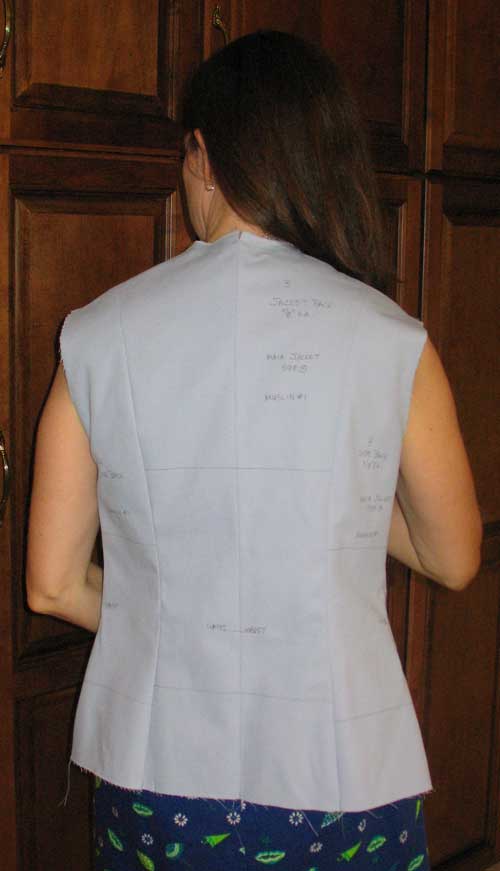
The next step was to construct the jacket. I sewed the bodice pieces together and took the time to construct the pockets and the cuffs, which, though not necessary for fitting, were fairly complex pieces, and I felt I would benefit from going through the process a couple of times before actually sewing my garment. Here are a couple of shots of the first completed bodice.
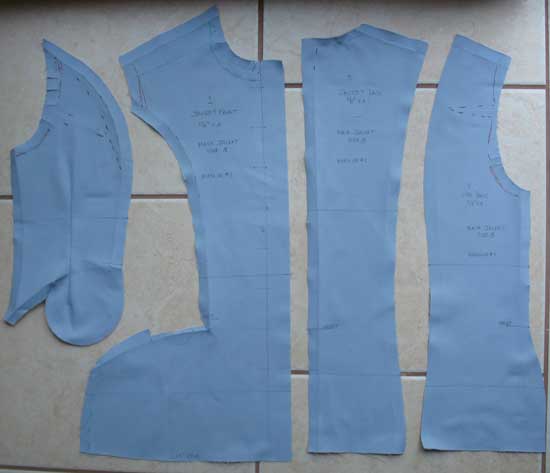
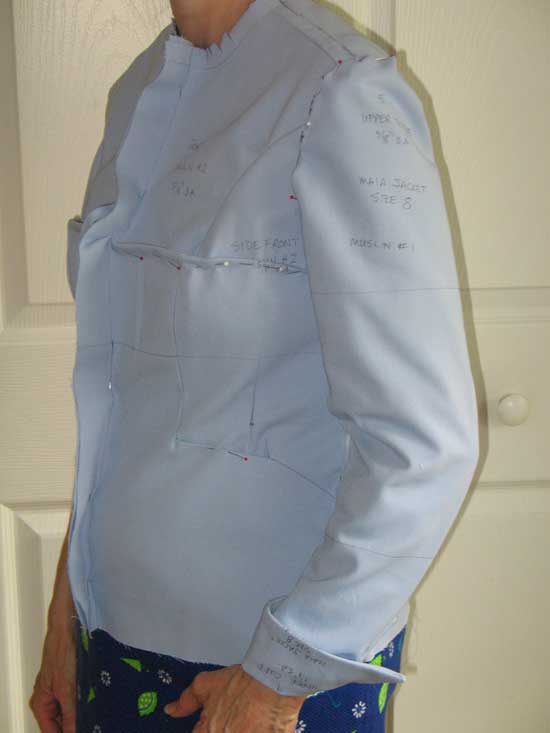
Now it was Sarah’s turn to work her magic. She began by pinning the jacket closed along the center front and then pinned out the various folds that indicate a garment isn’t correctly fitted. My bust point is quite low and she had to pin out quite a bit of fabric on the side front piece to make it fit correctly. In addition, I have a very forward shoulder so the shoulder seam line needed to be moved forward. She curved the upper part of the center back seam to fit my upper back a bit better and drew in the neckline and armhole seams where they should fall on me. After she had all of the pins in it was my job to mark the pins and transfer those changes to my paper pattern. Here you can see the pieces which have been separated and laid out with their various markings.
Once all of these changes were made on my paper pattern it was then time to cut out and construct muslin #2. Sarah made several additional changes to this muslin as well, moving the shoulder seam back in the original direction a little bit and pinning out some length in the front bodice. She also pinned the sleeve in place on this muslin and added a little extra room across the center back for ease of arm movement. Once again I used the pins to mark the fabric and then transfered these changes to my paper pattern. Sarah felt that at this point the pattern was close enough to make up in real fabric, what she calls a “wearable mock up”. She recommends that you not use your best fabric in case there are changes that still need to be made. Here is a picture of the second muslin with the sleeve pinned in waiting to have the changes marked.
I am fortunate – my body shape is not that different than most commercial patterns so I can usually get by with one or two muslins for fitting. Some of my friends know they have “5 muslin bodies” and have just come to terms with the fact that that is what it will take to have clothes that fit them. But there is nothing better than a custom made garment which fits perfectly. In my opinion it is worth the effort. I am not great at fitting; it is definitely not my strong suit. I am very grateful to have someone like Sarah to work with who is a true expert.
As if the day wasn’t perfect enough already it got even better. I went back to Joyce’s house last evening for a presentation by Sarah and a trunk show of her beautiful garments. There were about 30 of my sewing friends there, and we had a wonderful time eating, drinking and watching Sarah spin her magic. She began by telling us something I have heard time and again but have yet to embrace: spend the time to fit a basic pattern and then sew it again and again with simple changes that give each garment a unique look. This makes so much sense when you think of what it took to get my one jacket pattern fitted. If I have to do this with each garment that I make I am wasting valuable time that I could be using to create. Sarah showed us jacket after jacket that were made from the same pattern but with a unique look to each one. She changes the fabric, collar, cuffs and trims to make a one-of-a-kind garment. I fell in love with each one and couldn’t take notes fast enough. Then she showed us how to create dozens of looks with a yoked skirt. She begins by fitting a yoke made from a knit fabric which is very comfortable to wear. The skirt portion which hangs from this yoke can take on numerous looks. She used velvet, wool plaid, novelty knits, wovens and also varied the design and shape of the skirt to give lots of unique looks. In addition she shared with us a number of her knit garments and some special occasion pieces. Some of Sarah’s past students also shared the garments they had made. All were truly inspiring and wonderful to see. I left at the end of the evening with my head full of ideas and a commitment to try out some of them that had been shared with me.
I highly recommend that you consider taking a class with Sarah. She is a very kind and nurturing teacher who will help you every step of the way. She can help fit patterns or brainstorm the best use of a special piece of fabric. Or help you with any other sewing related project you might dream up. She offers classes in her hometown of Sparks, MD and will travel to teach classes where there is enough interest (our American Sewing Guild Chapter had her come and do a two-day workshop for us a few years ago). She also teaches online at PatternReview.com and writes extensively for Threads magazine.
 garments, reviews, sewing
Reader Comments