Julie Bowersett

juliebowersett{at}gmail{dot}com
Navigation
Search
Categories

Blog Writing Course Alumni

From Guide to Art Schools

CraftGossip

Entries in jacket (8)

Tuesday
Apr192011

Pieced Kwik Sew Jacket, Part 2

Last week I featured a jacket I made from Kwik Sew pattern 3236, and this is another jacket made from the same pattern.  I used five different fabrics: one windowpane linen, two silk-linen burnouts, and two plain linens. I could not find one fabric I envisioned, linen with a small pink and green print, so I embroidered my own. I also embroidered the buttonholes and the inserts in the sleeves.

I did not use the applique design included in the pattern though I originally thought I would do so. I added lime green piping in the yoke seam and fabric covered buttons.

I wore this jacket with a pink linen skirt and shell for Easter the year I created it and think I will do so again this year.  I feel that the delicate colors are just perfect for early springtime.  And I even have pink shoes to match!

Happy Easter!

Friday
Apr152011

Pieced Kwik Sew Jacket, Part 1

This jacket is part one of a two-part post.  I’ll share the second one next week.  I made this jacket a few years ago, based on Kwik Sew pattern 3236.  The fact that this pattern is still available speaks to its design and appeal.  The pattern description reads, “Misses' lined straight jacket has yoke, panel seams, full-length sleeves, and front button closure. Jacket is made from five different fabrics and has optional applique and trim embellishments.”  It is sized from XS to XL. 

I re-created the pattern for this jacket using Wild Ginger's Pattern Master Boutique software. I bought the Kwik Sew pattern and used it to draft my own which I knew would fit better. I measured the various pattern pieces and then created my own. I used the Kwik Sew directions, which are excellent, to construct the jacket. I like how the instructions have great illustrations on how to lay out all of the varied pattern pieces once they are cut so there are no mistakes. One thing that might not be apparent from the pattern picture is that all of the pieces are cut out individually and sewn together rather than piecing a panel of fabric and cutting out, say, a jacket front. One excellent feature about this pattern is that you can get away with a very small amount of an exquisite fabric by selecting the smallest pieces for that fabric. I also liked how the front placket was cut with its own facing and the insert band on the sleeve.

I chose five different fabrics, most of them linen, for this project.  The black background piece is embroidered with vines and flowers.  The micro check is the only non-linen piece.  I created an origami flower for one of the blocks and tacked down the points with beads (the smaller kanzashi flower in the center is not original to the jacket but was added later).  The buttonholes are embroidered and the buttons are fabric covered.  The same fabric from the buttons was used as piping in the yoke seam.

My style has evolved over time and I find this jacket a little bit “loud” for my current taste, but whenever I wear it I get lots of comments on it.  This pattern is well drafted, the instructions are great and the design offers lots of creative possibilities.  Check back next week when I will show you my other version, a pink and white number that is perfect for Easter.

Thursday
Mar312011

Black and Blue Boucle

I was really hoping to post a springtime garment this week but the weather just isn’t cooperating.  So instead, I’m going for warmth and comfort.  I drafted the pattern for this jacket using Pattern Master Boutique software.  It has shoulder princess seams and closes with a button and loop.  The fabric is wool boucle lined with Bemburg rayon.  I tried several different contrasting fabrics for the trim before I settled on stretch velvet.  I like the soft, slightly shiny finish of the velvet against the nubby texture of the boucle.  This is a very comfortable jacket and I wear it more than any other in my closet.

Tuesday
Mar222011

Contemporary Sashiko Jacket

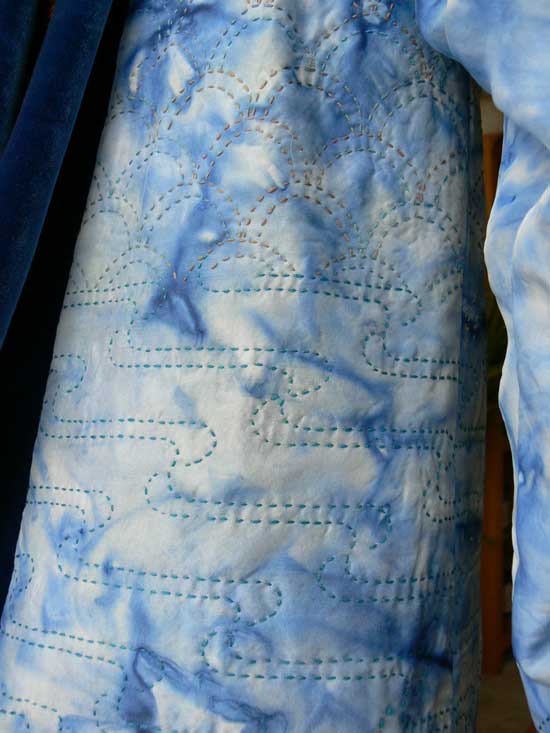
Nancy Shriber is one of those teachers with the unique capacity to inspire, nurture and instruct in a way that always leaves her students wanting more.  I had the good fortune to take one of Nancy’s Contemporary Sashiko classes a number of years ago.  In this weekend-long workshop I learned to paint silk, and then transform that fabric, through hand stitching, into a unique work of art.  The weekend began on Friday night when all of us gathered with our wet silk and applied textile paint and just a sprinkling of salt to create the canvas for our project.  Almost immediately I learned a “Nancy-style” lesson:  when the fabric I had intended for the lining turned out to be the more beautiful of the two pieces I painted,  I changed tack and used it, instead, for the outer fashion fabric.  

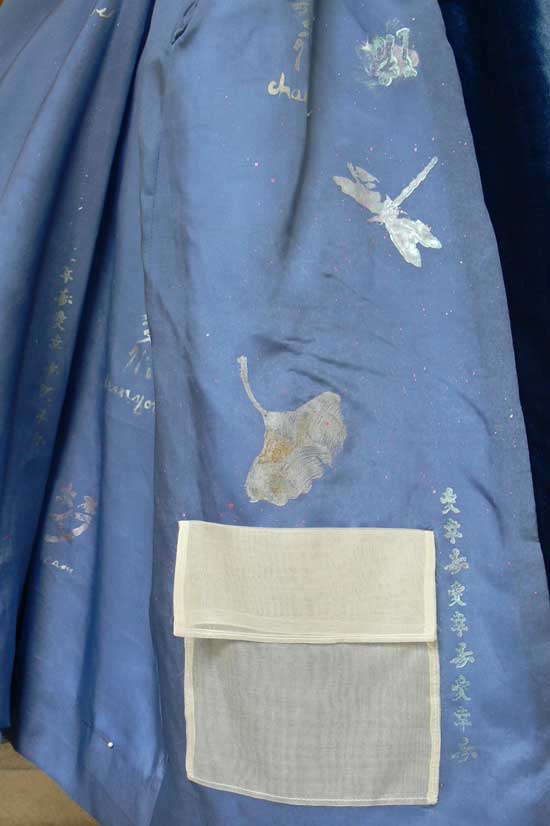
The rest of the weekend was spent designing our garment, cutting our fabric, layering it on flannel and finally, stitching by hand our chosen design with lovely hand dyed threads.  Nancy also encouraged us to make the interior of our garment as beautiful as the outside.  Out came more paints, stencils, stamps and lots of creative ideas.  At the time I was taking this class, my husband and I were (somewhat desperately) trying to have a baby.  I decided I would use this jacket as a positive affirmation project.  When I created the lining (the inner life of my garment, as Nancy would say) I stamped Asian characters with a positive message and hand painted the words they represented (hope, believe, change, dream, transformation).  At Nancy’s suggestion I also added a little treasure pocket made from organza.

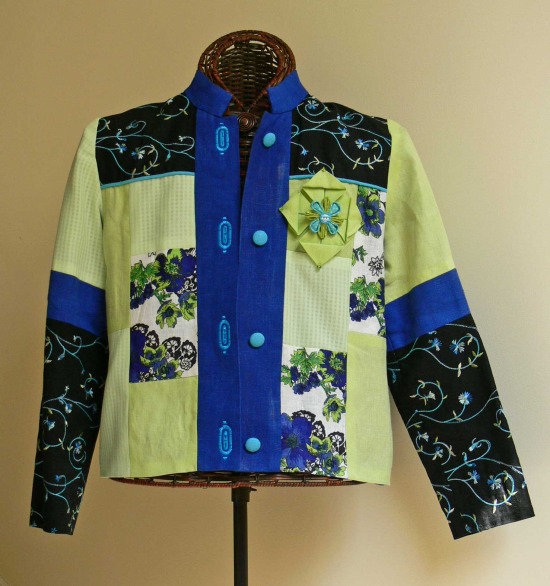
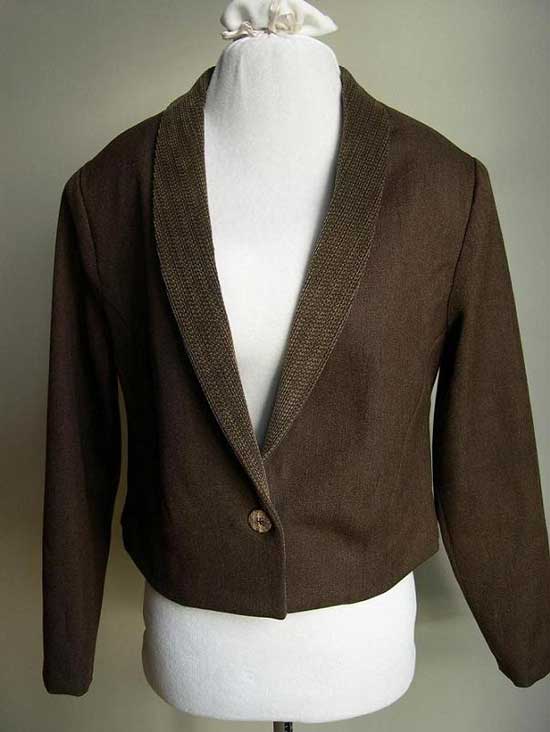
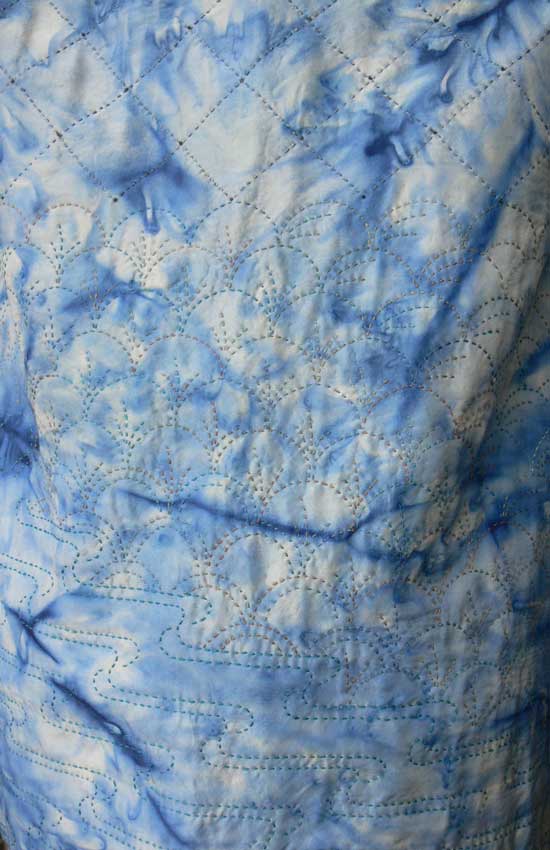
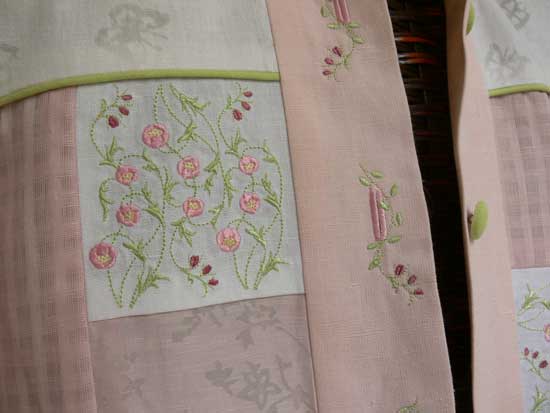
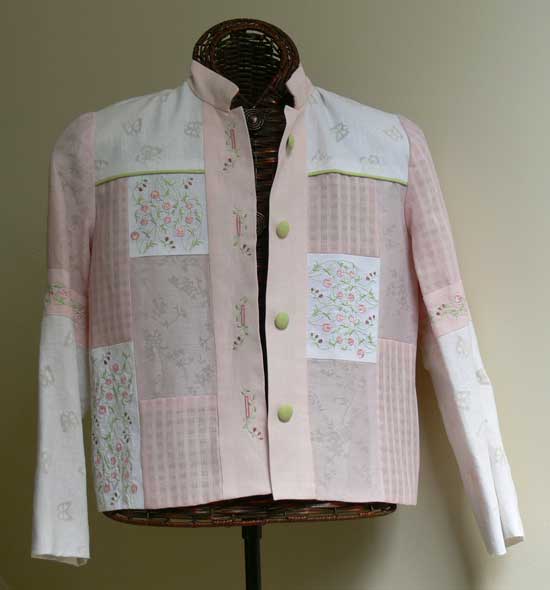
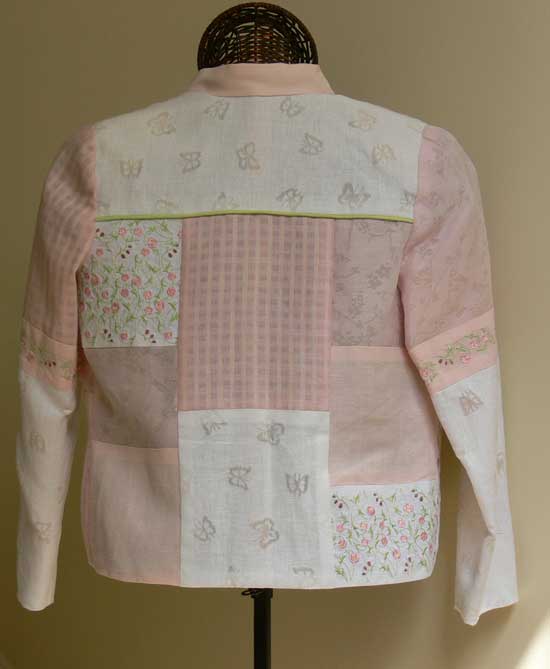
I chose Loes Hinse’s lovely Kimono Jacket as my pattern.  I carefully marked the sashiko design that I wanted to stitch on the flannel side of my project, matching the patterns across seam lines.   I created a sort of landscape effect, with water along the bottom topped by rocks and grass and finally a geometric pattern for the sky above. 

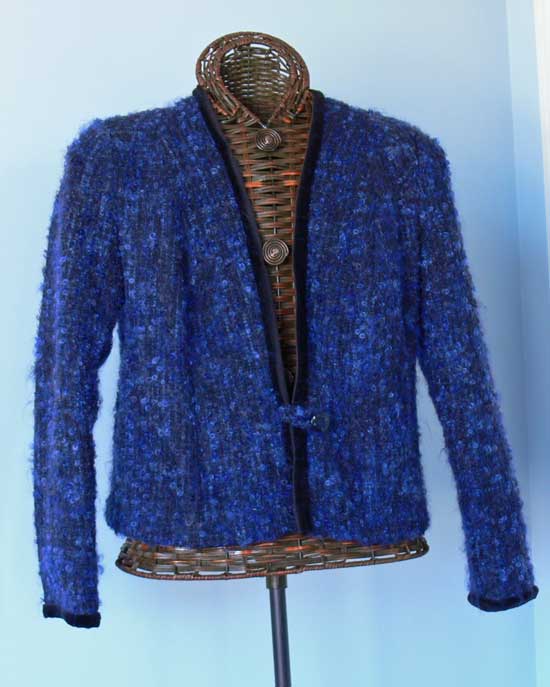
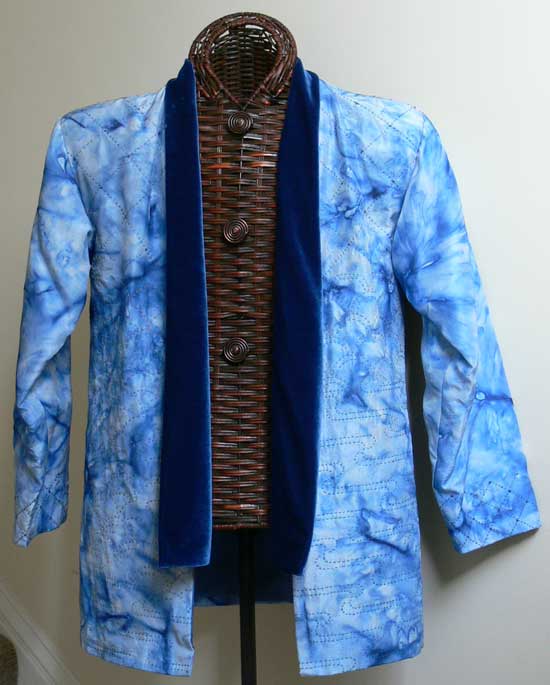
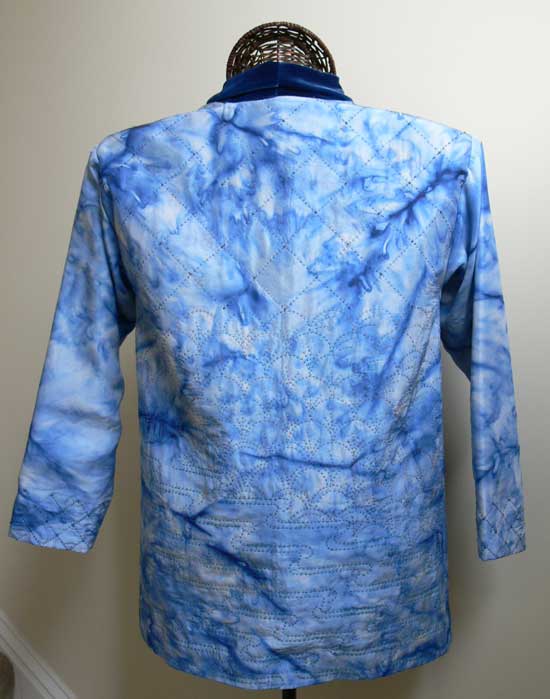
For the next several months I carried my jacket pieces with me and stitched at every opportunity.   I added metallic thread and beads to portions of the stitching.  When I was finished I constructed the garment, adding velvet lapel bands in a matching blue color.

Here’s my confession:  I’ve never worn this jacket (in fact, there are still pins holding the lining hem in place).  This is a great example of making a garment that is the wrong style for me.  I will probably finish it one day and wear it – it is the sort of garment that you can’t get away with wearing too many times as it is pretty memorable.  I put many, many hours of work into this jacket but I don’t feel at all sad that I have not worn it.  I view it as a piece of artwork that I made with my own two hands.  I loved every single minute I spent creating it and every single stitch I put into it.  It was the process, not the result, that was truly the prize.

Sharing today over at Today's Creative Blog's Get Your Craft On Tuesday.  Come check out all of the great inspiration.

Wednesday
Feb232011

Cynthia Guffey Shawl Collar Jacket

This week’s featured garment comes from a pattern by Cynthia Guffey, #5010, Shawl Collar Jacket.

This short jacket with shawl collar ends with one button at the waist line and four curved bust darts that originate in the armscye in the front and back.  Cynthia's instructions are pretty bare-boned and assume a certain level of sewing expertise. These were fine for an intermediate to advanced sewer (which is who this pattern is rated for).

Things I particularly like about this jacket:   It is a great short length (my favorite), is well-drafted, has attractive and unusual curved darts in the front and back and a shawl collar that goes together perfectly and is very flattering.

I also loved the hem finish which, by the way, has no instructions other than "Hem the jacket". There is a cut out along the CF hem so the facing can be folded to the right side and sewn with a seam, then the rest of the hem turned up. You would have to know what to do here since the instructions don't tell you. If I were to make this jacket again I would line it.

Fabric Used: The jacket is made from a brown wool with a twill weave. The collar is made from a plush corduroy (almost chenille-like) both purchased from Guss Woolens in Baltimore.

I particularly like that Cynthia's patterns fit me very well with almost no altering.  Several years ago I spent a week with Cynthia in Louisiana learning her pattern alteration method. I used that technique to alter this pattern. I increased the shoulder slopes and added a small upper back curve. I shortened the length of the sleeves. I redrew my own facings rather than make the alterations to those pieces, too.

Conclusion:  A great little short jacket with lots of style and good drafting.