Julie Bowersett

juliebowersett{at}gmail{dot}com
Navigation
Search
Categories

Blog Writing Course Alumni

From Guide to Art Schools

CraftGossip

Entries in lace (3)

Friday
May042012

A Highly Underrated Seam Finish

Back in the day, humble lace hem tape was the popular way to attractively finish hems.  That technique has largely been replaced with super-fast clean finishing with sergers.  While I was finishing up my most recent garment, a skirt, I was reminded why this lovely finish was at one time so popular.  After turning up a narrow hem I wanted a way to cleanly finish the edge without adding the extra bulk that a double fold would have made.  I contemplated binding the edge but chose, instead, to cover the raw edge of the skirt with lace.  I didn't have in my stash any packaged lace hem tape but I did have some pretty cotton lace edging that I bought in bulk several years ago.  I thought it would do the job nicely.

I sewed the lace header to the skirt by machine and finished the hem by hand sewing the delicate, picot-like edge to the skirt's underlining by hand.  I think this makes for a lovely, feminine finish, and reminds me of the beautiful lace-trimmed undergarments once worn by women.  It feels like a little secret but adds an element of surprise if the hem is exposed during wearing.

This got me imagining all of the fun things you could use to finish your hems, including little bits of vintage lace edging.  I'm sure I've got some in a box somewhere.

I have, at last, finished this skirt that I've been working on for weeks now.  I'm working on a post for next week to share that with you.  You can have a little sneak peak of some of the details in the picture that opens this post.  Till then. . . .

Tuesday
Oct262010

Bag of the Week 42

Wash and Wear

Today’s post is actually last week’s bag.  I wrote about this project here, about the frustrations I was having.  Sigh.  I was so enjoying making this bag until I hit a snag.  It is now finished but so are some of the grand plans I had for this bag, too.

I fell in love with this little travel lingerie bag the first time I saw it in Stitch magazine (Spring 2010).  It is designed as a flat pouch with zippers at either end, divided in the middle to form two separate areas, one for clean items and one for dirty.  I used the template provided on the Stitch website and followed the author’s instructions for appliquéing the garments onto the light aqua linen I picked for the body of the bag.  The fabrics and laces are fused onto the bag before they are stitched down.  The instructions call for hand stitching with a running stitch but I used a small zigzag (1.5 mm x 1.5 mm) and monofilament thread.  The clothesline is pearl cotton couched on with more of the monofilament.  I chose to machine embroider the words instead of hand stitching them.  I found a great floss-stitched font at Jolson’s Designs (for a mere $3 – quite a bargain).  I even stitched a little monogram on the purple shirt.

I really enjoyed the project to this point.  When it came time to put the bag together I ran into trouble.  There is nothing wrong with the written instructions; I just couldn’t make my chosen supplies come together.  First, the linen I was using is fairly bulky.  I tried an old trick of using a longer zipper than necessary, planning to cut off the extra.  The bulk of the zipper coil added to the linen made it impossible to get a cleanly turned corner.  I also realized I was going to have trouble hand sewing in the lining and making it fit correctly with the awkwardly turned corner.  I unstitched the entire thing and started over.

After much trial and error what finally worked for me was to sew the lining pieces together into a tube and the outer fabric into another.  I placed the lining inside the outer sleeve, serged the raw edges together and treated it as one.  I sewed in about 1.5” on each end of the top opening and set a smaller zipper into the remaining opening.  The zipper is stretched out flat and is merely topstitched into place.  The zipper tape hides the serged fabric edges.

I thought perhaps I could sell bags like this in my (coming soon) Etsy store.  I imagined they might make great gifts for bridal attendants.  But I will have to come up with a much more streamlined design for the bag if that is going to work, as the amount of time I spent just constructing this bag makes it impractical as a commercial item.  This was a good lesson that dreams need to be tested out in reality to make sure they will work.

I'm sharing this post today with the folks over at Today's Creative Blog on their Get Your Craft On feature.  Check them out.

Monday
Feb152010

Heirloom Treasures

My sister and I both love heirloom sewing.  We have attended Martha Pullen’s School of Art Fashion a number of times together and have created many lovely things (some of which are still unfinished in my closet).  My sister has always had the dream of making a grandchild’s christening gown, and, with the birth of her first granddaughter last August, it seemed likely this dream would come true. 

A date was set for the christening and Jane got to work on the gown.  She had a head start as some of the elements of the gown had been completed previously at a Martha Pullen school.  Jane has also been spending a lot of time recently caring for my elderly parents (and did I mention she broke her leg in September and has been recovering from that, too??).  As the date for the baptism drew ever nearer she was really working under the gun.  I offered to make the slip that would go under the gown to help clear off her plate a bit (and, as the mother of two boys, I don’t often have the chance to sew frilly little things anymore).

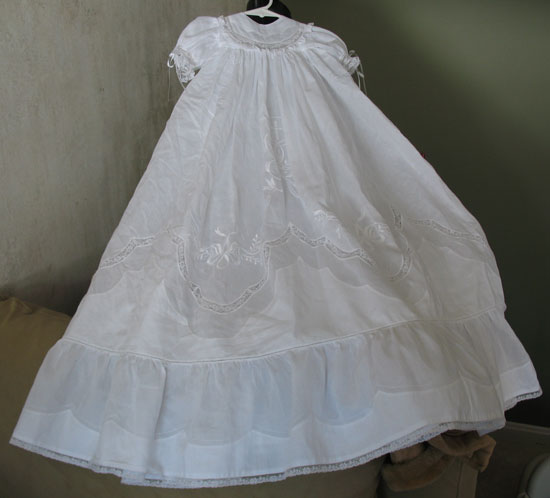
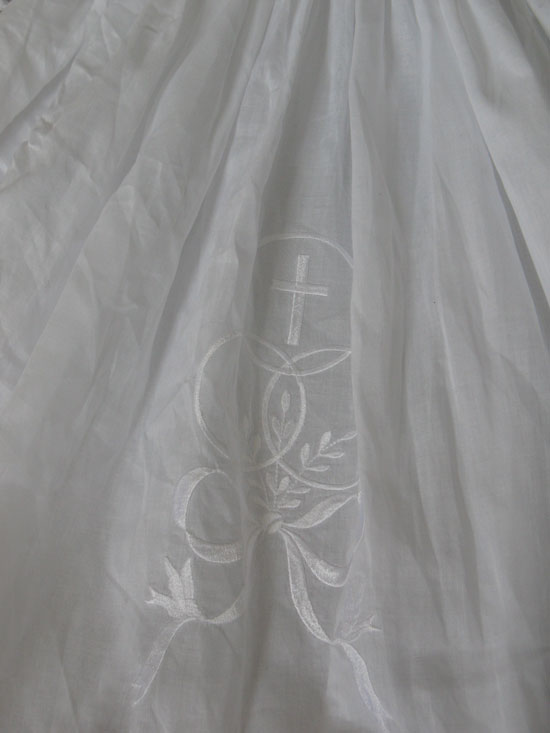
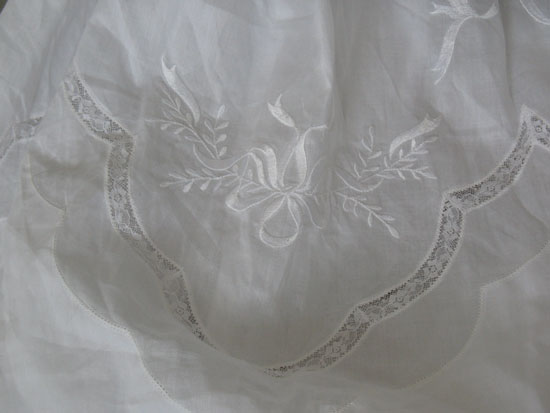
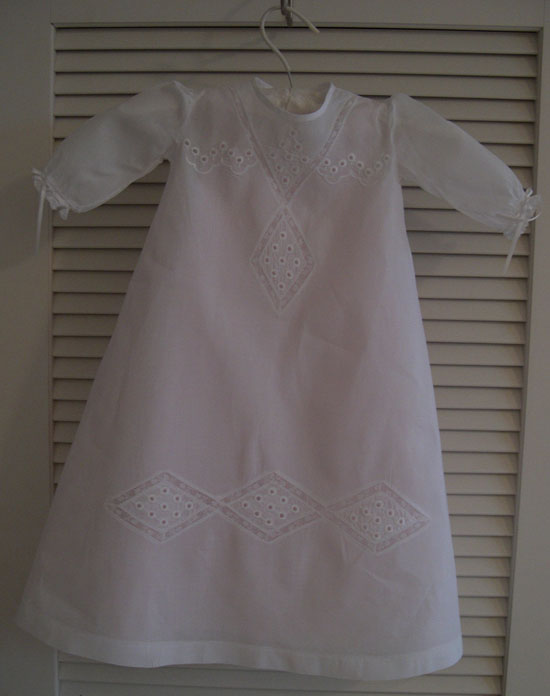
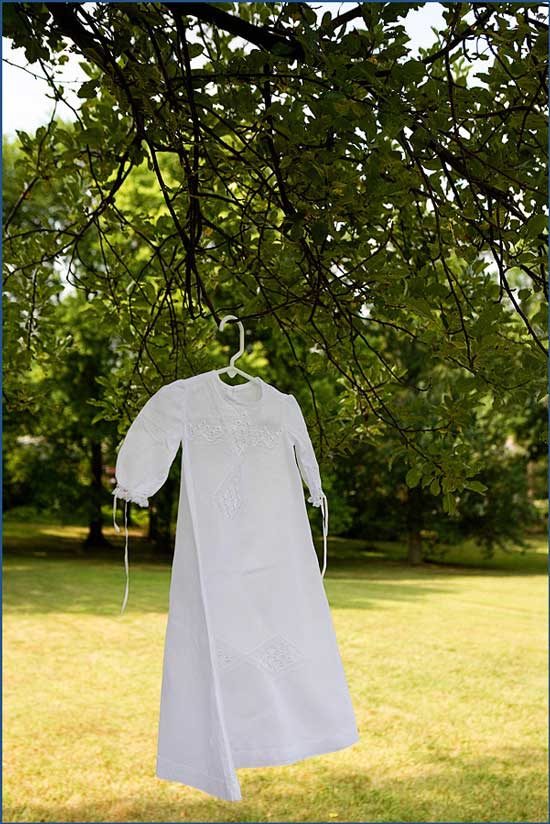
The slip and the gown are both based on the same Martha Pullen pattern, the Heirloom Party dress.  The gown, made from Swiss Nelona, has a high waist with Madeira appliqué scallops around the neckline, lace insertion, and gathered lace framing the rounded yoke.  The skirt features machine- embroidered motifs of ribbons and bows on each side of the central motif of entwined rings enclosing a cross, ribbons and bows.  Lace shaping and Madeira appliqué form the bottom of this panel.  An 8" ruffle with Madeira appliqué scallops outlined in featherstitch embroidery and finished with flat lace complete the bottom of the gown. Pin stitching was added to each side of the lace shaping and to the top edges of the Madeira appliqué.  The dress design is by Sue Pennington Stewart, as taught at Martha Pullen School of Art Fashion several years ago.

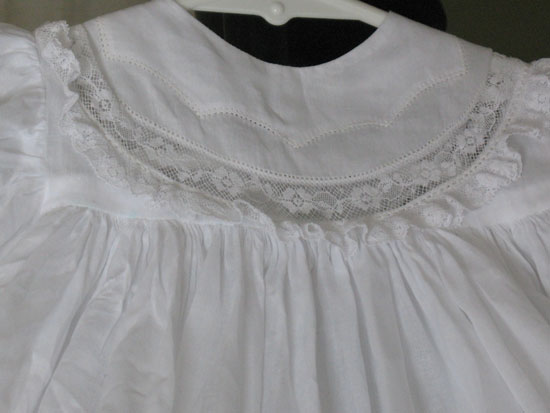
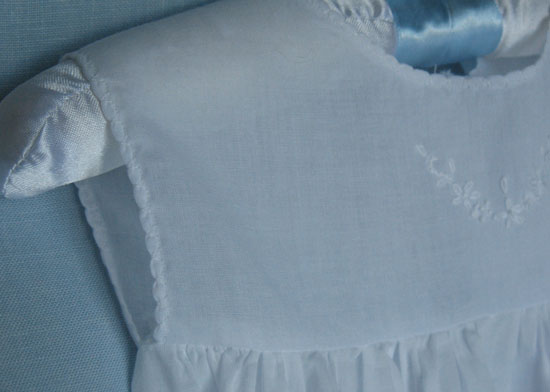
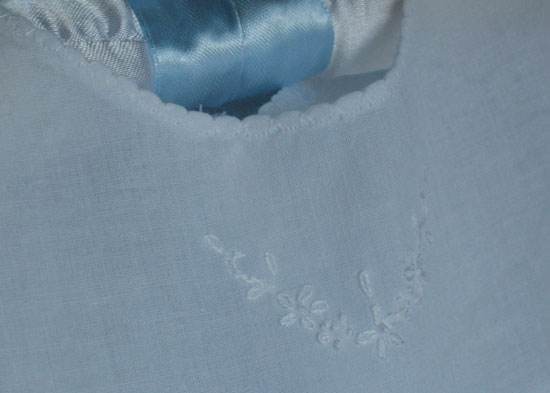
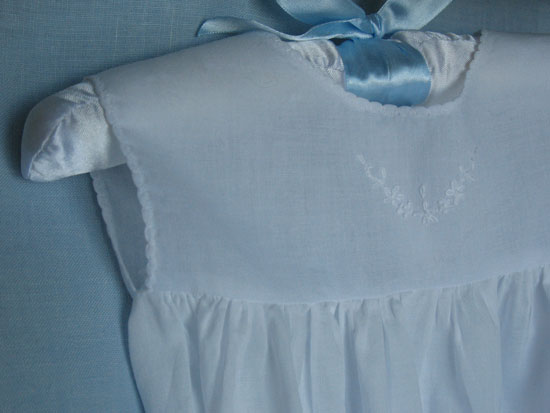
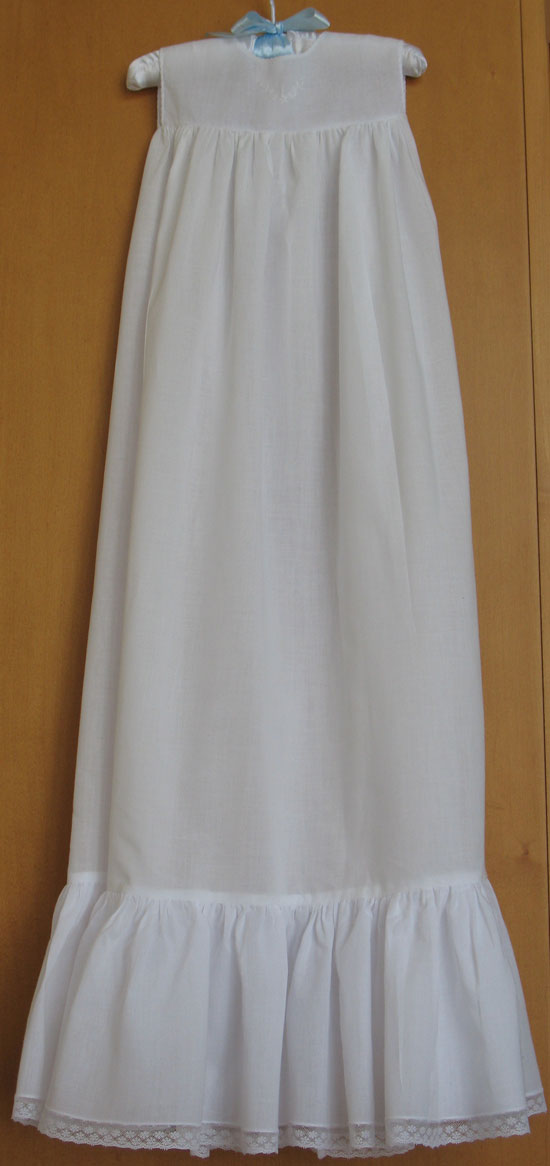
The slip is made from Victorian Batiste with a square yoke, gathered skirt and gathered self ruffle.  The hem is trimmed with French cotton lace (purchased at Hollin Hall Variety Store for the Virginia locals), and I machine stitched a shell stitch border around the neck and armholes.  I thought the slip needed “a little something” so I hand embroidered a dainty little floral spray at the center of the yoke just below the neckline.  The embroidery pattern I used was from Jeannie Baumeister’s Old Fashioned Baby line.  I really love doing delicate hand embroidery like this.  It works up SO fast and looks darling.  I think it really adds a nice touch to a baby’s garment.

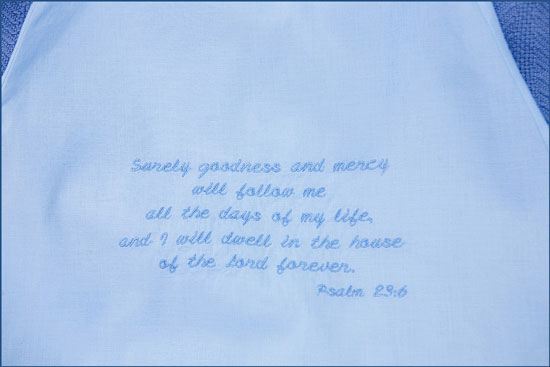
It seems only fitting that I made this slip.  After all, my sister made the slip that my boys both wore when they were christened.  I had made a little white daygown at one of the Martha Pullen schools and Jane suggested I use that for my baby boy’s christening gown.  I had also made a pink slip to go with this dress but that really wouldn’t do (making a boy wear a dress to be baptized is one thing; making him wear a pink slip is another entirely).  So Jane stitched up a darling little blue slip and embroidered a favorite bible verse, baby’s name and birthdate on the skirt.

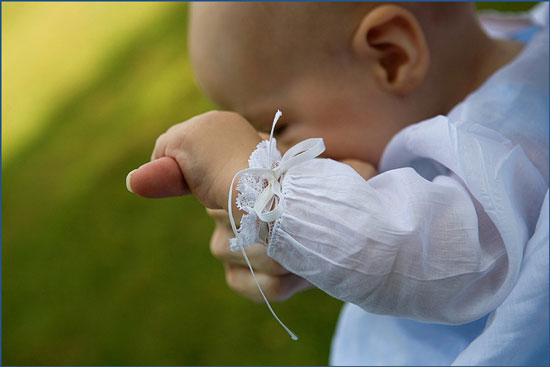
The Eyelet Daygown, designed by Connie Palmer, features machine-embroidered eyelets and pin-stitched lace shaping on the bodice and skirt.  The long sleeves are finished with beading and gathered lace and tied with silk ribbon.

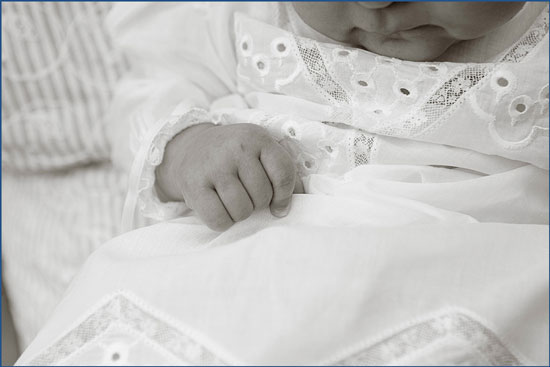
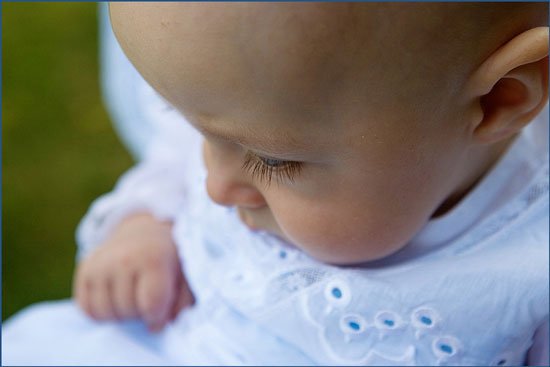
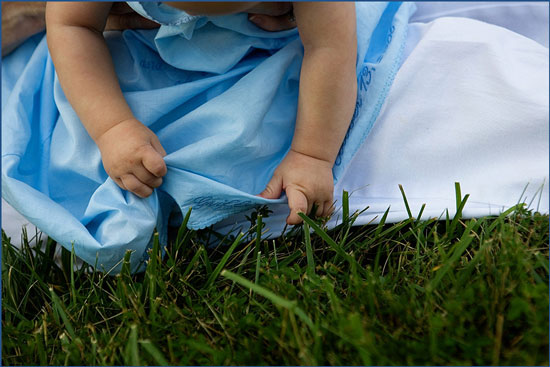
The following pictures were all taken in July 2009 by Sally Brewer of Sally Brewer Photography.  We spent a fantastic morning with Sally and she captured pictures of our family that we will treasure always.  I asked her to get some special shots of my littlest guy in the gown.  You can also see the blue slip that Jane made.

So much love has gone into each of these garments.  I love how this story blends generations of my family with the love we all have for creating beautiful things.  My sister was 15 when I was born and helped care for and raise me as a baby.  Her daughter was born when I was only 10 so I grew up alongside of her children.  Now her grandchildren and my children have come into the world and are growing up together.  Sometimes it gets a little confusing figuring out how each player is related to the next but it forms a lovely woven tapestry of family love.