


Window Treatments for a Nursery, Part 4
This is the final of four posts on the window treatments I made for my great niece’s nursery. The first week I covered making your own cornice board. The second week showed how I constructed the valance which attached to the cornice board. Last week I shared how to make a Roman shade. And today I will talk about how I installed each item and put it all together.
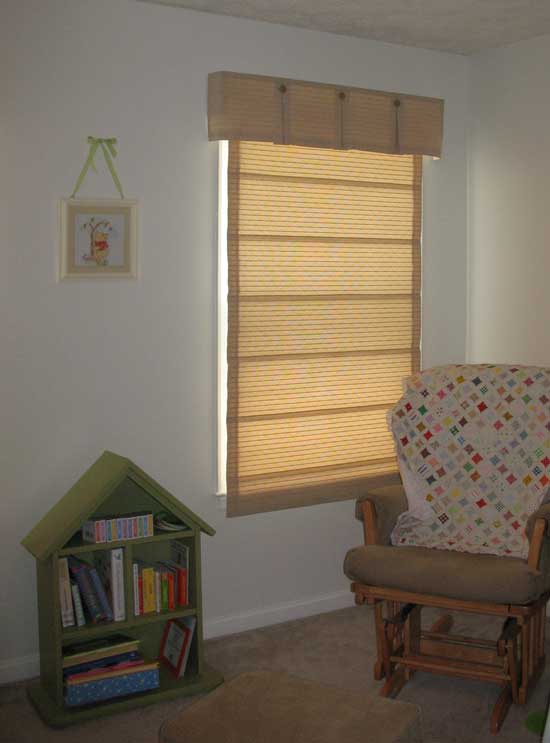
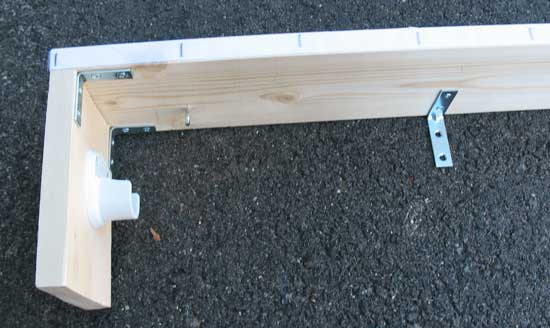
The first step was to install the cornice board and this step was completed before I determined the final length for the Roman shade. Use the angled brackets attached to the bottom of the cornice and drywall anchors to fix the piece to the wall above the window. I allowed the bottom edge of the bracket to rest on the top window trim which raised the cornice just slightly above the window. Once it was in place the final shade length could be determined by measuring from the hanging bar to the desired length.
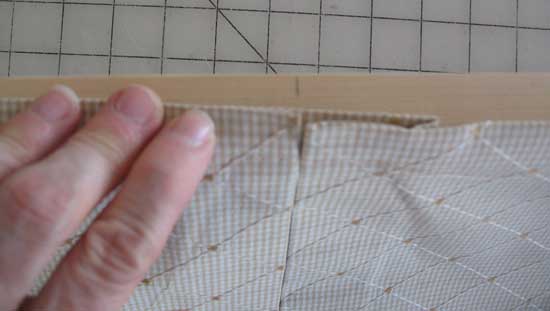
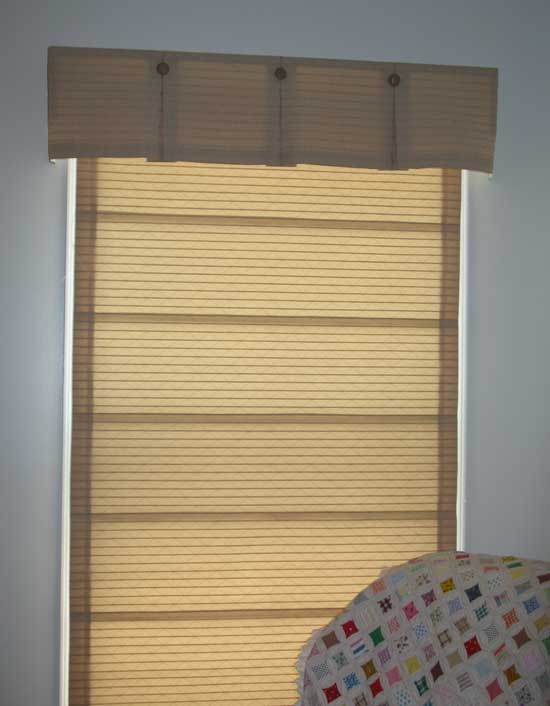
Next came hanging the valance from the cornice. As you can see in the picture above, the hook side of Velcro has been applied to the top edge of the cornice. The corresponding loop portion was sewn to the top of the valance. Hanging is a simple matter of matching the center pleat to the mark made at the cornice center and pressing the valance in place from the center out. This allows for easy removal of the valance for cleaning.
Finally, the Roman shade is put in place. Determine which side of the window the cord will draw from and install a cleat on the wall (you may want to wait until after the shades are hung to determine the location of the cleat). Insert the hanging rod through the casing at the top of the shade and hang in place. Tie one end of thin drapery cording to the lowest curtain ring on the far side of the shade (the side away from where the draw cord will hang). The cord is run up through each curtain ring, through the eye hook on the cornice above those rings and then through the other two eye hooks on the cornice board. Allow a length of cord to remain for pulling the curtain up and cut off the remaining cord. Repeat this process with each of the rows of curtain rings. The row furthest from the draw cord will run through 3 eye hooks; the middle row will run through 2 and the row closest to the draw cord will run through only one eye hook. Pull all of the cords taught and tie together in an overhand knot. Determine the length of cord needed for drawing and cut off remainder. Wrap cords around cleat to secure shade in the open position.
I have purchased most of my drapery supplies from Drapery Sewing Supplies. They have an excellent selection of notions and supplies as well as lots of helpful resources about sewing window treatments.
Moving on to new projects now!
 home, wood
Reader Comments