Who knew that paisley + houndstooth is a match made in heaven? Here’s the story of my discovery.

Photo from Alabama Studio Sewing + Design
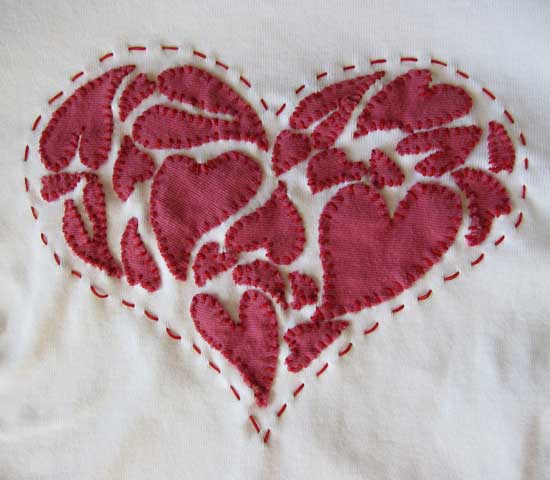
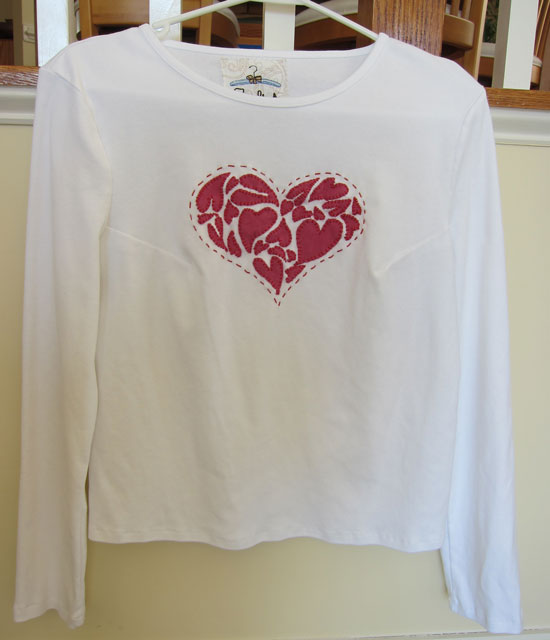
I waited (notice that I did not say patiently) for many months for the release of Alabama Chanin’s latest studio book, Alabama Studio Sewing + Design. When it arrived it was even more beautiful than I thought possible. In this third book, Natalie Chanin and her staff have truly given away all of their secrets. The book is a compendium of all of the various techniques used to create the lovely line of clothing they produce from their workshop in Florence, Alabama. This latest in the series is meant to complement the other two books though it can easily stand on its own as the only resource you need. Inside the cover you will find details on the materials and tools needed, eleven stencil designs, a myriad of stitches with illustrations, full-sized patterns for 4 garment pieces that can be constructed in a number of ways plus several accessory pieces, and enough embellishment ideas to keep you busy for the rest of your life. Even if you have no intention of using the book to make garments or accessories, the photographs alone make this book worthy of the coffee table. It is, in short, 175 pages of pure inspiration.
 Photo from Alabama Studio Sewing + Design
 Photo from Alabama Studio Sewing + Design
This book arrived while I was working on my blue wool crepe dress. As sometimes happens, I start thinking about my next project while I’m still working on an unfinished one. This time I dreamed of using more wool crepe from my stash since the current piece I was working on was such a dream to sew. My mind was also busy mulling over all of the possibilities opened up for me from reading Sewing + Design. What came out of that brainstorming is this skirt.
My fingers were busy with wool while I was thinking about organic cotton appliqué. Why couldn’t I substitute wool felt for some of the appliqué designs from the book? Wool felt has a lovely weight and doesn’t fray; it would make the perfect embellishment for my wool skirt. I found some loosely woven black wool crepe in my stash and threw it in the washer and dryer a couple of times. It felted up very nicely. I also decided on the Paisley design that is include as one of the stencil patterns in the book.

Photo from Alabama Studio Sewing + Design
First I started with the skirt. The pattern is Simplicity 2058 from the Amazing Fit series. After fitting my muslin I cut the skirt from a loosely woven wool houndstooth check in classic black and white.

I knew the fabric would need to be underlined if I was going to apply appliqué so I cut the underlining from charcoal gray silk organza. I used the technique of underlining and seam finishing all in one that I’m fond of. It makes for a beautifully finished garment interior.

Once the skirt was constructed (I left one seam unsewn, allowing for a flat panel to work on) I started the hand appliqué. Alabama Chanin’s techniques include using stencils as the means of transferring designs to cloth. Several ways to accomplish this are included in the book but I tried something different for this project. First, I printed out the paisley design from the full-sized download available on the Alabama Chanin website. I then copied it onto freezer paper and cut out the stencil with an Exacto knife. This left me with both a positive and negative stencil.

I used the positive stencils, shown above, to cut out the black wool felt.
Next, I took the negative stencil, centered it on one skirt panel and ironed it into place. I removed the paper backing from the black felt appliqué pieces and positioned them in the openings of the negative stencil. The photo below shows one of the appliqué pieces pinned in place.

After all of the pieces were placed I carefully removed the negative stencil paper and hand stitched each appliqué in place with a parallel whipstitch and black buttonhole craft thread. (I quickly discovered it was easier to work with small safety pins rather than straight pins to keep the appliqués in place; this also led to less bloodshed while stitching).

Taking a tip I learned from Sarah Veblen, I constructed the waist facing from interfaced silk dupioni which I bound with a strip of white china silk. This makes a really nice facing: the silk feels more comfortable than wool and there is no bulk.

I finished the hem with some cotton lace from my stash (you can read more about the hem here).


I’m really pleased with this skirt and am sorry I finished it so late in the season that I will have to wait until next fall to wear it. I think it will look great with black boots. I particularly love the juxtaposition of contemporary vs. traditional in this garment. The modern version of the paisley is a nice contrast to the more classic look of the houndstooth. I also love that I can take an idea and tweak it to make it my own. I think this new book in my library will offer lots of opportunity for that sort of thing in the future.

I came across some pictures I took back in January when I first started on this skirt. These show the easiest way that I have found to add the seam allowance to the underlining fabric I used on this skirt.

After I cut out my fashion fabric I place the pattern on the underlining fabric. I attach a Removable Rotary Guide Arm (made by Olfa) to my rotary cutter and set the distance from the blade to 5/8".

It is then a simple task to guide the arm along the edge of the pattern while the blade cuts 5/8" away from the edge.


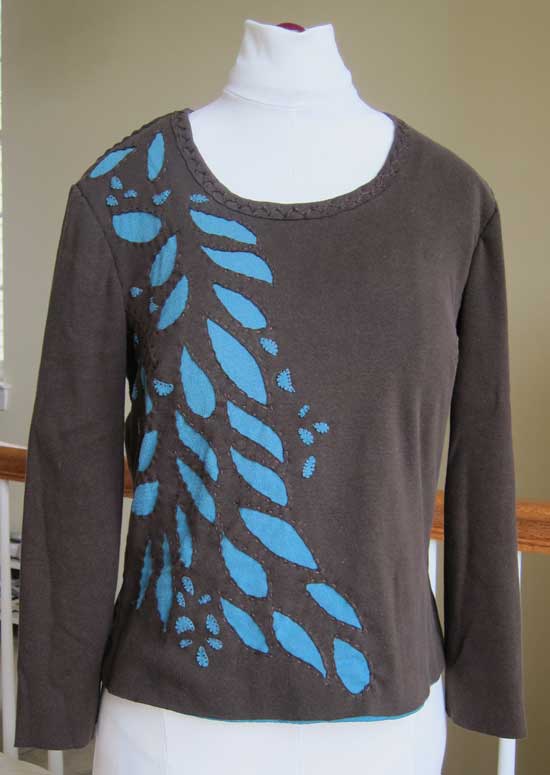
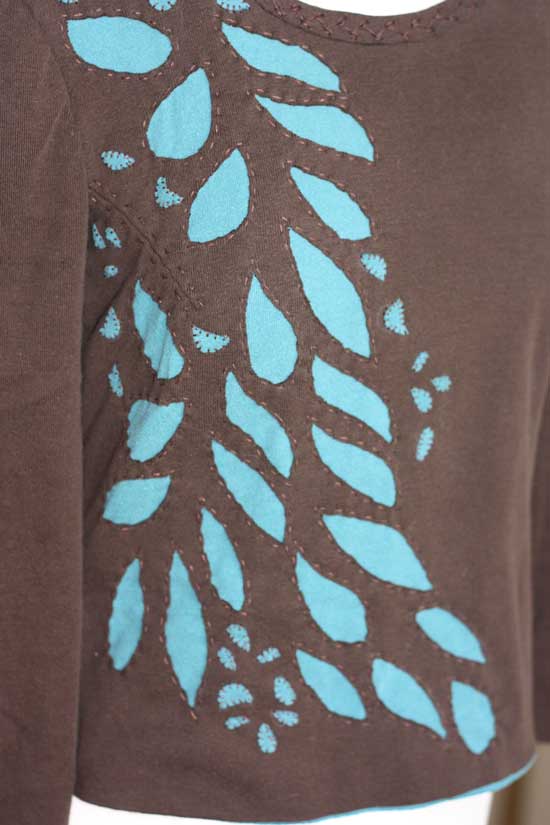
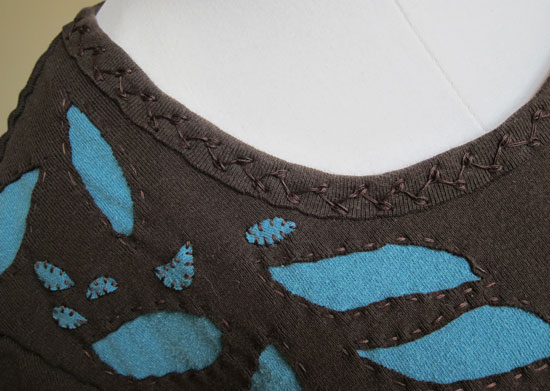
 I have been plugging along on some hand sewing projects and recently finished one that I can share with you. This is a sleeveless bolero that I made using the pattern in Alabama Chanin's third book, Alabama Studio Sewing and Design. (This book is currently on sale on the Alabama Chanin site). The stencil design is Angie's Fall worked in the Special Angie pattern. The large floral designs are worked in the Relief Applique technique where the appliqued pieces are cut larger than the space where they are to appliqued. The extra fabric creates a beautifully textured surface that I really love. The other elements were backstitched before being filled in with black beads. I love this bolero pattern. It is so quick to stitch up, the surface embellishment notwithstanding.
 Alabama Chanin,