


Cornice Board
I have used this sort of cornice board a number of times in my home. I find it attractive and functional, providing a shallow shelf above the window on which to display objects. This project is easy to put together with minimal tools and woodworking skills. Here’s how:
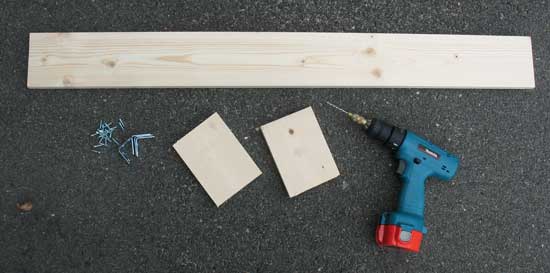
Materials:
- 1”x5” lumber (you can use wider lumber for a wider shelf, if desired)
- L-shaped corner braces
- Screws
- Wall anchors
- Closet pole bracket set (optional)
- Dowel or curtain rod (optional)
- Velcro (optional)
- Screw Eyes (optional)
Tools:
- Saw
- Drill
- Drill bit
- Screwdriver
- Tape measure
- Pencil
Begin by measuring the width of your window, measuring to the outside of any trim. Cut your board that width plus 3” Cut two smaller pieces 6” long. These dimensions are not critical; you can adjust slightly larger or smaller to suit your needs.
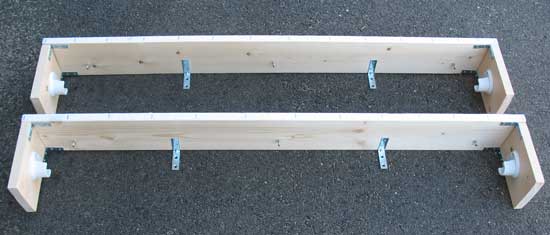
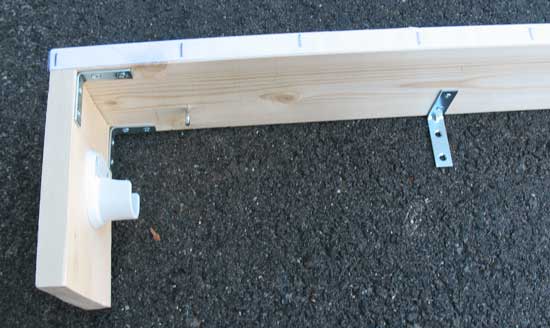
Using the corner braces as shown in the following picture, attach the two small boards to the ends of the larger board. Pre-drill the holes for accuracy.
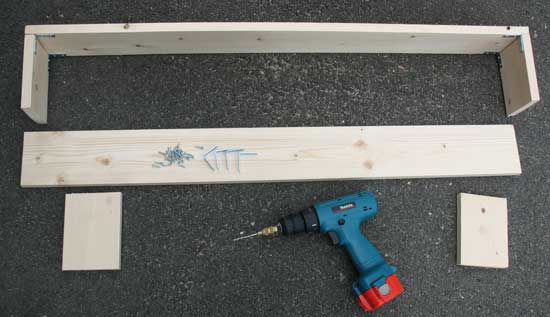
Attach two additional corner brackets to the back of the cornice. These will be used to mount the cornice to the wall over the window using the wall anchors.
You can add additional hardware to your cornice to suit the various types of window treatments you plan to use. In my example I have installed a closet pole bracket which will hold a dowel cut to length as a curtain rod. My curtain will hang from this rod.
I have also stapled Velcro (the hook side) along the entire top front edge of the cornice, wrapping around the sides to the back. My valance has the loop side of the Velcro sewn to the top edge, allowing me to easily install it on the cornice and remove it for cleaning.
Lastly, since the curtain I am using is a Roman shade, I have installed a row of screw eyes toward the back edge of the cornice. This is the hardware needed for the cords of the Roman shade. By using this cornice configuration I do not have to screw the eyes directly into the window sash.
 home, tutorial