Julie Bowersett

juliebowersett{at}gmail{dot}com
Navigation
Search
Categories

Blog Writing Course Alumni

From Guide to Art Schools

CraftGossip

Wednesday
May212014

Graduation Cap Treats

Tomorrow is my youngest's last day of preschool, so in honor of his "graduation" on Friday I made these graduation cap treats.  They were super simple to put together.  Here's how I did it.

I started with chocolate graham crackers (seriously, the hardest part of this entire project was getting the graham crackers to break into proper squares.  I ended up cutting them with a big knife.)  I "iced" each square with melted semi-sweet chocolate and topped them with an M&M.

Once the chocolate hardened (I put them in the fridge for 30 minutes) I piped yellow icing to resemble a tassel on top.

Previously, I had baked some brownie bites using a boxed mix (do yourself a favor and subsitute melted butter for the oil called for in the mix directions -- heavenly!) and my mini-muffin pan.  Place the brownies with the flat bottom side facing up.

I used this Cookie Icing and placed a dollop off-center on the bottom of the brownie bites

then placed the graham cracker pieces on top of the icing, pressing them down so they were slightly slanted.

Monday
May122014

New Space

Contrary to all appearances, I have not fallen off the face of the earth.  I have, in fact, managed a sewing project or two in the last couple of weeks (though no pictures to prove it).  However, I don't think I will be getting much done in the next couple of weeks.  Well, I'll be getting a lot done (hopefully) but not much sewing.

Some of you who know me personally know that my family will be moving this summer.  I am very excited about this big change in our lives.  We have purchased a beautiful property near Charlottesville, Virginia and have been working on some improvements before we move.  The biggest project, and the one that will certainly have the most impact on me, is the second story addition we have built over our garage.  That space will house my sewing studio and an office for my husband with workshop space below in the garage.  It has been very exciting to design and build a studio from the ground up.  The final work is being done this week, and we will have the chance to see it in two weeks.  Also at that time we will be moving a portion of our furniture and lots of possessions to prepare our current house for sale.  So, I will be spending the next two weeks packing up most of my sewing room along with other areas of the house in anticipation of this move.

My new studio is large and airy with lots of windows for natural light and good storage.  My hope is that I can use this new space for classes or workshops once I am settled in my new location.

Here are some of the pictures of the place during the construction phase.

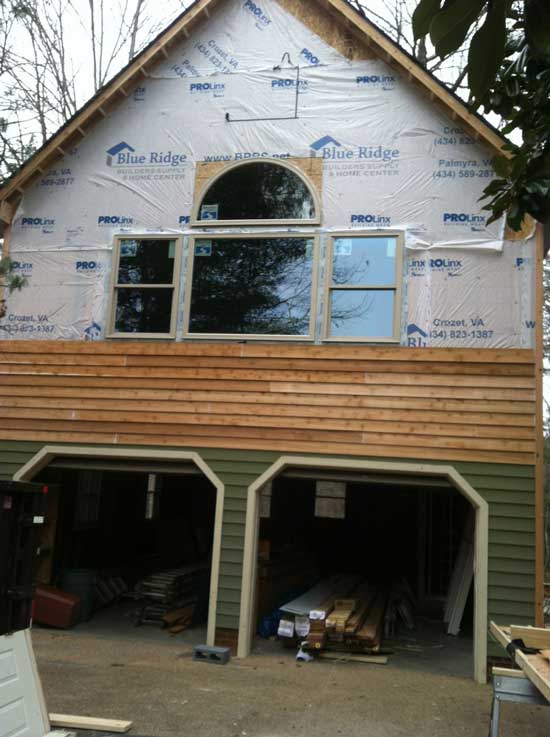
Toward the beginning of the process.  These south-facing windows open into my studio.
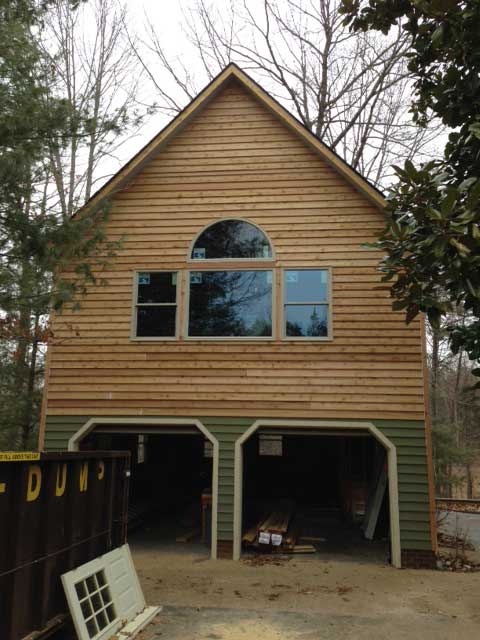
Siding complete.

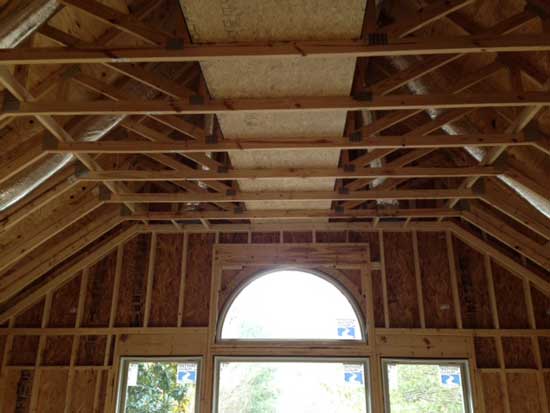
The same windows from inside the space.  The studio will have a partially vaulted ceiling.

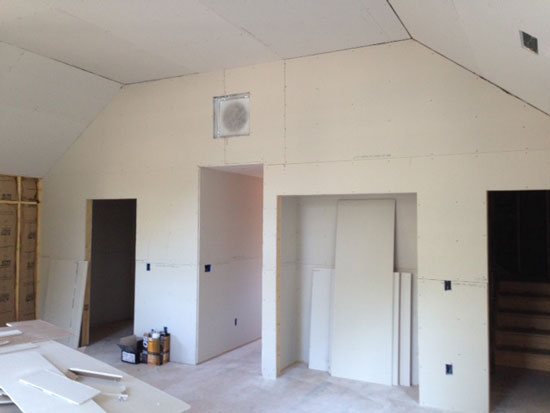
The interior wall.  From left to right, a large storage closet, hallway, hanging closet and stairs to the attic.

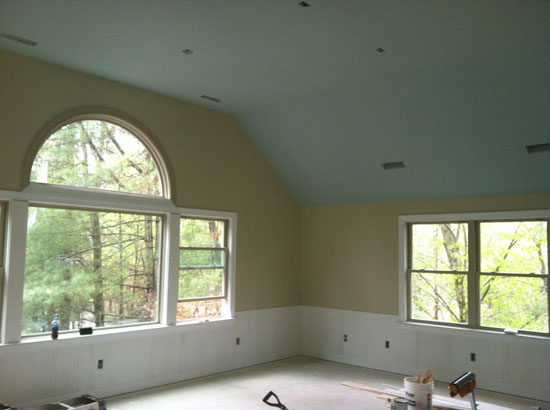
Paint and wainscoting.
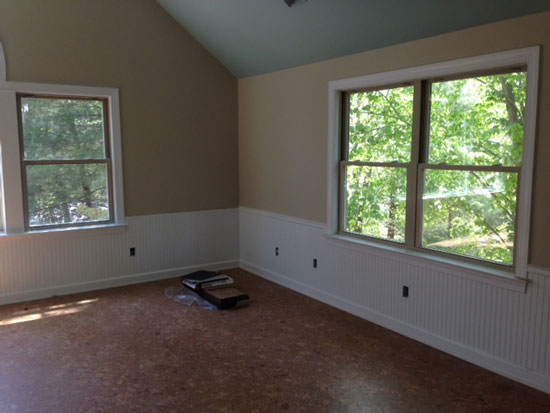
Cork flooring.

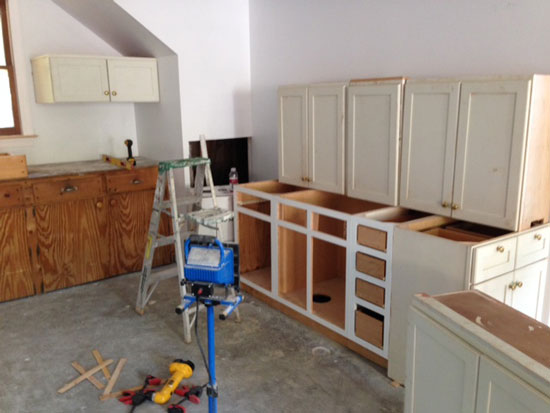
This is part of the workshop area in the garage.  A sink will be installed in the white cabinets.

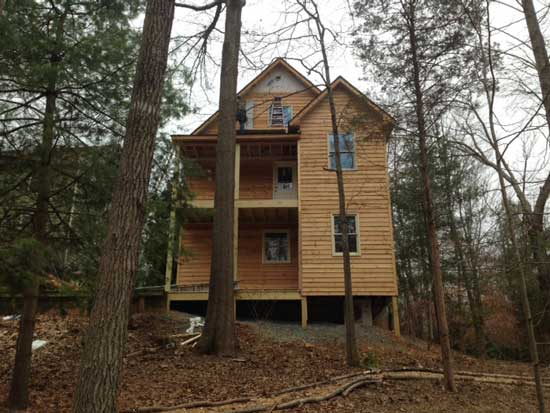
This is the back of the building in its woodland setting.

I am hopeful that once this transition is over, this new space will inspire me to spend more time sewing and creating.  And blogging.  It should help that my youngest child will start kindergarten in the fall, leaving me with (theoretically) more free time.  I am pretty excited about this new chapter in our lives.

Thursday
Mar062014

Heading to the Expo

For those of you in the United States, you know what kind of winter we have had.  Record low temps and snow totals, ice storms in places that rarely see that type of weather, and school closures.  I've nearly lost my mind.  You might think that all of this time stuck inside would have led to lots of sewing projects.  Well, you would be wrong.  Most of my time has been spent refereeing two little boys who have had quite too much "togetherness" and cleaning up piles of Legos and other messes.  So, I have nothing to show for what is usually my most productive time of the year, winter.

I am, however, heading off for a bit of inspirational time at the Original Sewing and Quilt Expo in Baltimore on Thursday.  But this year I won't be shopping and attending classes (well, I might do a little of that, too), I will be teaching some of those classes.  I have been offered a most fantastic opportunity to fill in for a teacher who couldn't make it at the last minute.  I was only asked to do this about a week ago, so I have spent the last week (in between yet more snow and more school closures) coming up with lesson plans, making samples and packing supplies.  Here's my table all piled up with my preparations.

I have to say that sewing these samples has really inspired me to come home and make myself something from the lovely heavy-weight linen that I used for my samples.  Perhaps it will be ready by the time spring arrives.  Which can't be soon enough in my book.  I will leave you with this link to a post from the past which conjurs up memories of spring and cherry blossoms:  What I Like in March:  Cherry Blossoms.

Sunday
Dec012013

Have Yourself a Retro Little Christmas: Medicine Cup Kissing Ball

I can't decide which side of the divide this post will fall, retro cool or super square.  Regardless, I decided to recreate a favorite Christmas decoration from my childhood, the medicine cup kissing ball.  I'll be curious to see how many of my readers remember these.  The one my mother unwrapped from tissue paper every December and hung in our front hallway had Christmas-green glitter and plastic mistletoe.  I've changed a few things on mine to update an old classic just a bit.

One of the reasons I love reading craft blog DIY posts is that someone else has gone through all of the trial and error for me.  This project had quite a bit of both trial and error.  I hope you will take advantage of my experience if you decide to make one of these for yourself.  You aren't likely to find any help elsewhere.  A thorough internet search turned up essentially nothing on the subject of medicine cup kissing balls with the exception of one or two posts asking if anyone remembered them.  As I have noted before, when I run across a topic that seems to be missing from the interwebs I like to cover it, since I know I am not the only person out there looking for information.

You can find the instructions over in my Tutorial section or by clicking here.  I hope you enjoyed this walk down memory lane.  I would love to hear if any of you remember these icons or perhaps still own one.  I hope you are busy making your own memories this holiday season.

Monday
Nov112013

Dressy to Casual: A Challenge

Sarah Veblen is one of my very favorite teachers.  She recently began offering a series of challenges designed to spark creativity in garment making.  The first such challenge asked the participant to find inspiration in one of the photos in Sarah's Dressy Dresses Gallery and use that inspiration to create a casual garment.

I thought this sounded like a great way to jump start some garment sewing for myself so I decided to sign up.  What could be more quintessentially casual than a t-shirt?

The inspiration for this casual tee came from pictures 1-7 of Sarah’s gallery.  Additional inspiration came from one of Sarah’s garments that I loved from the first Knits Class I took with her that used a sheer lace with a knit fabric.

I worked with two chocolate brown fashion fabrics, one an embroidered point d’esprit stretch lace that I bought at Metro Fabrics in NYC and a bamboo knit purchased from Vogue Fabrics.  I added the additional personal challenge to only use items that were already in my stash for this project.

I began with a tried-and-true tee shirt pattern with a bust dart and drew in a style line for the “yoke” portion on the front and back.  I decided on a long sleeve and cut them on the cross grain so I could take advantage of the lace fabric’s selvage for the hem.  After much consideration I decided to underline the yoke portion with a flesh colored 4-way stretch knit.  I thought this would add some stability to the very fragile fabric, simplify construction and allow me to wear a conventional bra with the top.  At first I wanted to leave the sleeves unlined but in the end warmth won out over allure.

I feared that the top would be boring without a little something extra so I opted for some piping along the yoke seam made from stretch panne velvet.  I constructed the piping with cording which I later removed once the piping was applied.  In the end I hand tacked the piping from the inside to keep it flat against the garment.  I also used the same stretch velvet to bind the neckline.

I’m pleased with the final result, am happy that the challenge gave my creativity a little kick start and got me sewing for myself again.  I am looking forward to the next one and I really hope some of you out there will join me.