Julie Bowersett

juliebowersett{at}gmail{dot}com
Navigation
Search
Categories

Blog Writing Course Alumni

From Guide to Art Schools

CraftGossip

Entries in cupcakes (6)

Friday
Oct112013

Cake Pops, Burger Cookies and Birthdays

Hello, friends.  Wow, I have been missing in action for quite a while, haven't I?  I am not even going to offer any excuses except to say that life has gotten in the way of my creativity lately.  But recently my sewing mojo has been seeping back in and I have managed to spend several days this week in my sewing room.  I've been spending even more time in my kitchen in the last few weeks; fall is birthday season at our house and I have been making and baking like crazy.  Since I don't have any of my sewing projects ready to reveal I'll share the goodies I've been making.

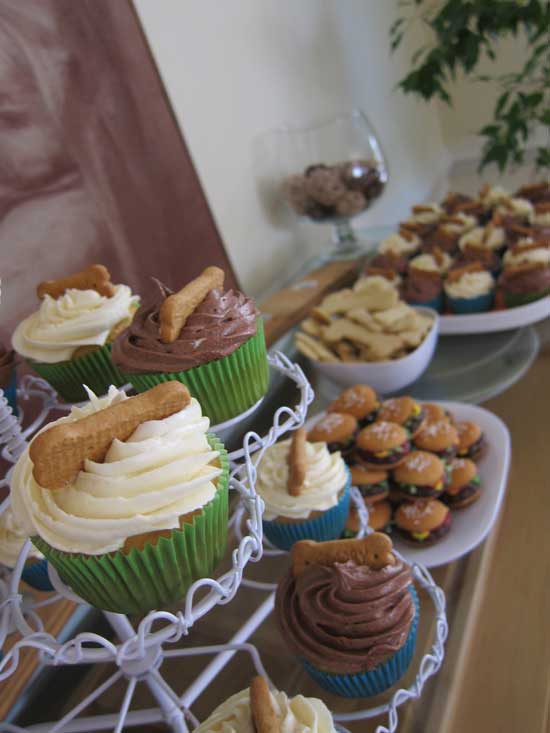
I like cupcakes.  I have always liked cake, and since I've found a great icing recipe I even like that, too.  This year I decided to try out a chocolate version based on the same recipe.  Here's a link to the site where I found the recipe.  I added extra cocoa at the end as suggested in the recipe.  This definitely boosted the chocolate flavor but I found it added a bitterness that some kids might object to.  I think I might up the sugar a bit next time, or try adding more semi-sweet chocolate.

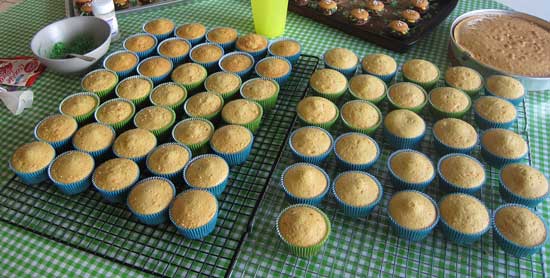
I baked a lot of cupcakes.  I also baked an extra layer cake to make some cake pops.  Cake pops have been around for a while but this was my first attempt at them.  Bakerella is credited with this craze, and I used her book on the subject to get started (her website is full of ideas and recipes).   I read a lot of helpful hints on the internet and found lots of differing opinions about the best way to make them.  Most people agreed that their first attempt was far from perfect.  My experience was the same.

Folks also disagree on the best method for making the cake balls that become cake pops but the general gist is that you bake a cake (boxed mix is fine for this) and once cooled crumble it up into fine crumbs (with your hands, a mixer or any other tool you wish to try).  Add (canned) frosting, anywhere from a few tablespoons to 3/4 of the can.  Mix this up (again, by whatever method you prefer; I used my stand mixer) until you have a soft dough.  You then shape the dough into round balls (I used a cookie scoop for portion control).  Again, people don't agree on whether you have to chill the balls at this point -- I found it was necessary.  I actually made up several batches and put them in the freezer until I was ready for the next step.

The first batch I made I tried candy melts as the coating without a good result.  First, I don't really like candy melts.  I don't like how they taste and I don't love the artifical coloring (you will notice that with most of my cupcakes and baked goods I stick with vanilla and chocolate).  Once it was apparent that I was going to have trouble with the melts I quickly switched to melted chocolate chips (mixed with a small amount of vegetable oil) and had good results with that.  For my first batch I dipped the balls in semi-sweet chocolate and sprinkled on some star and tiny ball sprinkles.

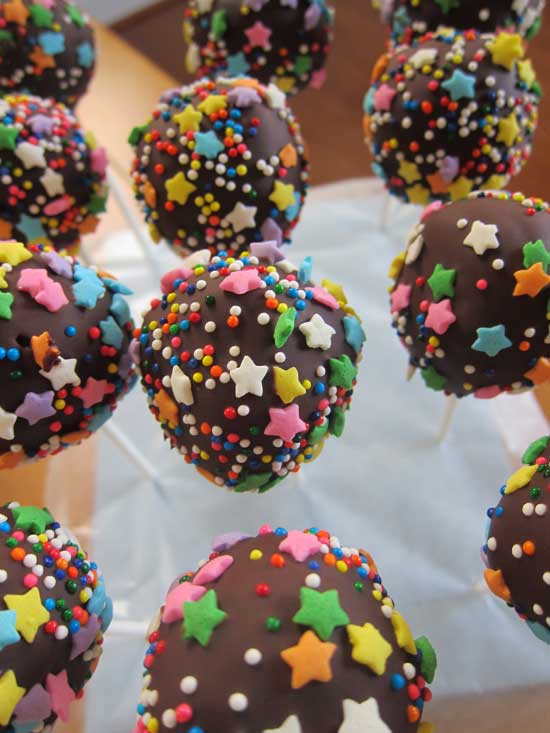
These were really fun (and a great size) to send to school for my youngest son's birthday.

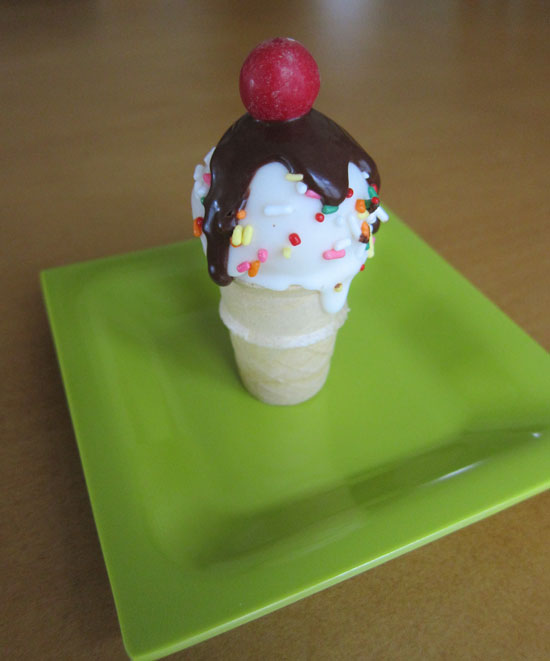
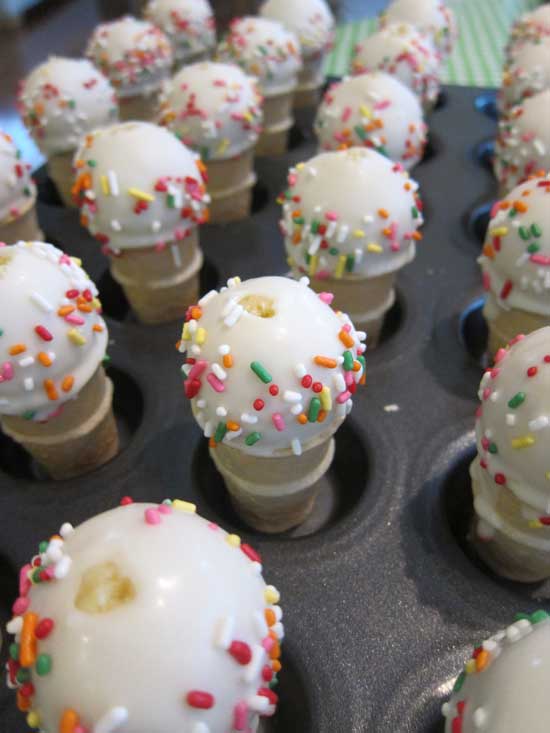
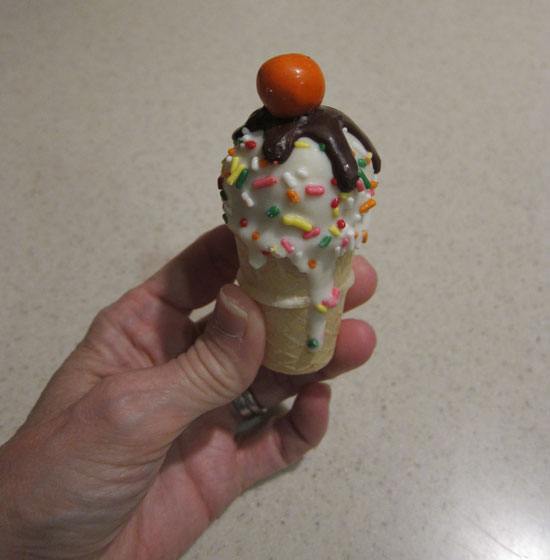
The second batch I attempted worked much better.  These were a lot more complicated than the first but not hard, just a little time consuming.  I made the cake balls as before and dipped them in melted white chocolate chips, then set them into mini ice cream cones (you can find these Joy brand cones at Walmart).  It's OK if the coating drips down the cone a little.  While the chocolate is still soft, add some sprinkles. 

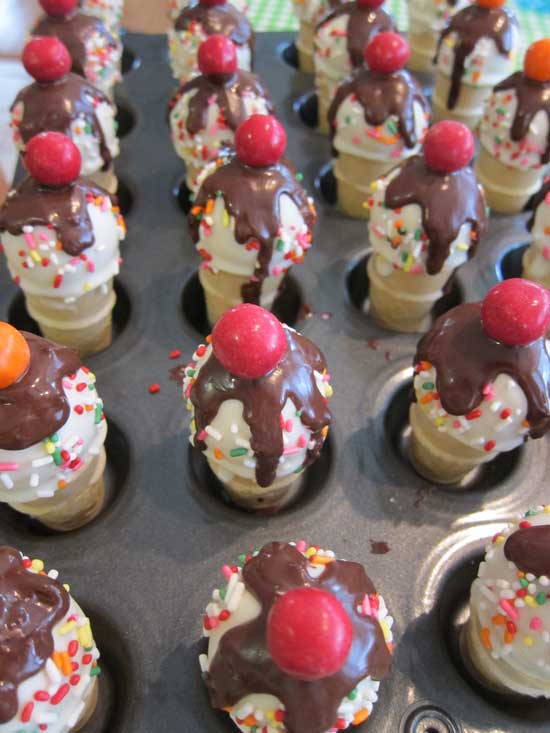
For the chocolate sauce I melted semi-sweet chocolate chips and thinned them down with vegetalbe oil.  I poured it into a squeeze bottle and used that to drizzle it over the top of the cookie ball.  The "cherry on top" is a pretzel M&M though you could use plain or peanut M&Ms or even cinnamon candies.

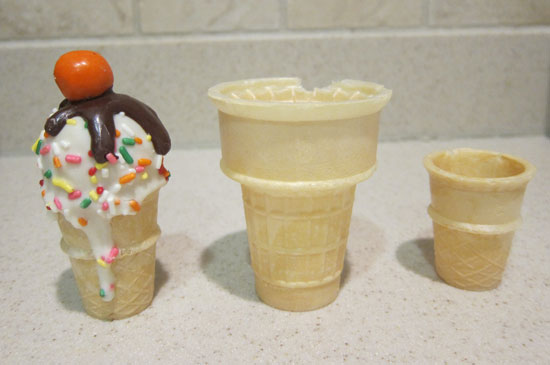
It's a little hard to get a sense for the scale of these from the pictures.  Here's one of me holding one of the finished cones

and another with the mini cones next to a full-sized cone.

These were really delicious and I will make them again.

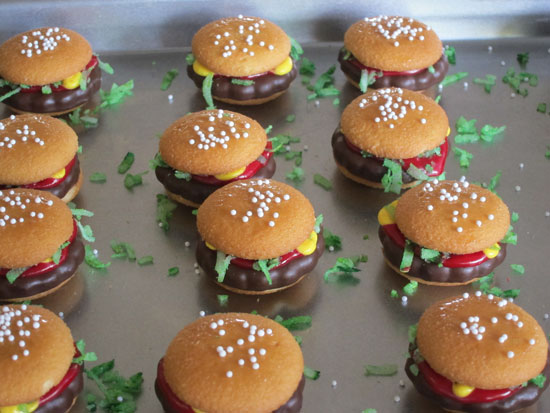
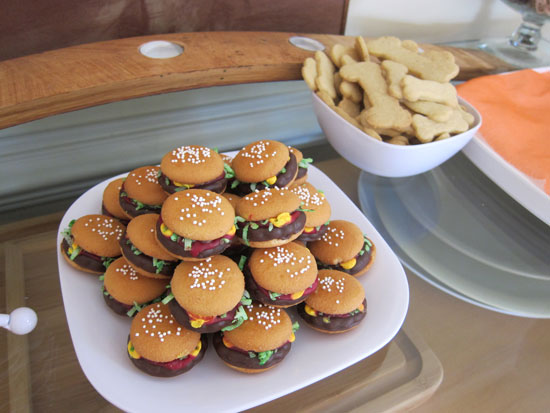
I also made some really cute hamburger cookies for my kids' birthday parties.  I first heard about these cookied from my sister-in-law Sue who made them with her grandkids this summer.  These are really easy -- they require no baking, just assembly.

This picture shows the steps by row.  First lay down a vanilla wafter with the flat side facing up (not shown).  Top each wafer with a Thin Mint-style cookie (I used Keebler brand Grasshopper cookies).  You can either place them in the oven for a minute to melt the chocolate a bit to adhere to the wafer or use a squirt of icing as "glue" (the latter is a more sure method).  Next, using red and yellow icing add some ketchup and mustard.  Tint some coconut with green food coloring and sprinkle it on the icing.  I added another little dollop of icing in the middle after this step to act as glue and topped the whole thing with another vanilla wafer.  The original recipe called for real sesame seeds on top but I knew my kids would balk at that so I used tiny white sprinkles.  I used my finger to rub a little light corn syrup on the top cookie to help the sprinkles stick.

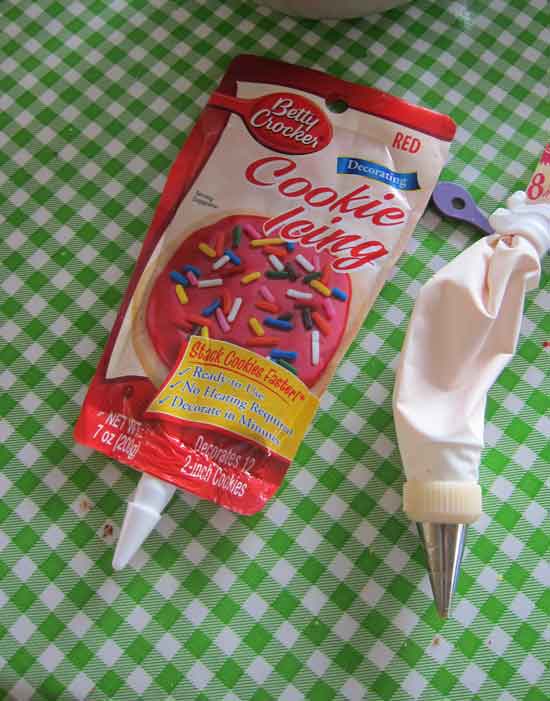
This is the icing I used -- it worked great as it sets up and glues everything together nicely.  I had to mix my own yellow as I couldn't find the color I wanted in the store.

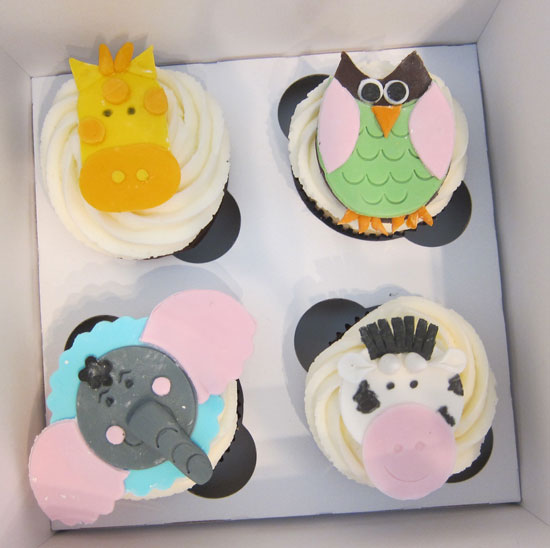
I also treated myself to a cupcake decorating class at the lovely Occasionally Cake.  In this class we learned to make rolled fondant animals to use as cupcake toppers.  It was fun but I now know why bakeries charge $6-7 for one of these.  I think I'll stick to frosting that tastes yummy and work on perfecting my swirl technique for icing cupcakes.

Now that birthdays are out of the way I have turned my attention to Halloween costumes and three challenges that are coming due very soon.  The first is one sponsored by my sewing guild chapter.  Each participant was given one yard of the same fabric and charged to create something from it.  I can't share my project until after our annual meeting which takes place on October 26th.  My ASG Neighborhood Group is also holding a challenge.  Members exchanged fabric pieces at the beginning of the year with instructions to decorate, embellish or change our given piece anyway we want.  We'll be returning the fabric to its original owner in November.  The third challenge is one that I am very excited about.  It is being sponsored by Sarah Veblen.  Sarah is offering several challenges each year to help sewers approach problem-solving in a creative way.  For this first challenge participants are asked to use one of Sarah's Dressy Dresses as inspiration to create a casual garment.  You can find more information here.  I hope you will consider joining me in this fun challenge.

Friday
Mar302012

Spring!

When I think back on how busy the last few weeks have been, I feel like I should have more to show for all of my hard work!  Unfortunately, I have not had one minute to work in my sewing room on any of MY projects.  Right now my to-do list is longer than there are hours in the day, and, with some deadlines looming, I've got to put my projects on the back burner.  I have a beautiful wool skirt that is *almost* finished, but I won't get to wear it this season.  I love how it's turning out, with some hand embellishment, and can't wait to show it to you.  I just hope we haven't reached bathing suit season before I can.

Most of the things that have been keeping me occupied aren't blog- or picture-worthy (tagging items for my church's consignment sale, taxes, yard work, subscription renewals, doctor's appointments) but here are a few little projects that I've been working on.

I needed to come up with five little thank you gifts in a hurry.  Luckily, I had some materials all ready to go that allowed me to whip up these five kanzashi flowers in an evening.  A couple of years ago I led a program at my local ASG group on making kanzashi, and I still have lots of prepared supplies left over which makes it easy to get started on a project.  You can read more about the flowers in some of my previous posts here. 

Today is the last day of school before Spring Break and I sent some special treats to school with my kids today.  I told them that these are the Easter Bunny's favorite cookie.

Lastly, my oldest son is finishing a program he's been in all year (hence, the need for thank you gifts).  They are sending him off with a little party this afternoon so I made these cupcakes for the occasion.  The butterflies are made from gumdrop-style orange slice candy, the antennae are piped icing and the tips of the antennae are sprinkles.

All of these pictures make me feel so happy, like spring has really arrived.  Wish me luck finding time over the next week to finish up some projects in my sewing room -- with Spring Break happening at my house I'll be lucky to find even a few minutes for myself!

Saturday
Nov262011

Icing to die for

I've got a pile of projects that need to be photographed so I can write posts about them.  But that will have to wait until the sun is up again, so tonight I'm going to share with you an icing recipe I discovered this fall and used for my oldest son's birthday cupcakes.

First I should start by telling you that I don't typically like icing.  When I was a teenager I liked to decorate cakes and had my fill of buttercream frosting.  Most often when served a slice of cake or a cupcake, I will scrape the icing off and eat the cake.  The one exception to this is Italian Meringue Buttercream Frosting like I used on my wedding cupcakes.  But this icing is a lot of work and would surely be wasted on a bunch of 4- and 5-year-olds.  So I went looking for another icing recipe.  What I found surprised me.

This recipe is unusual because you begin by cooking a roux from flour and milk.   One of the things I like about the meringue icing is that it uses a sugar syrup made from white sugar instead of confectioners sugar which I don't like the taste of.  The recipe I found also uses white sugar.  The original recipe I started with can be found at this link, but it is buried in a lot of comments so I have rewritten it for you here.

The texture of this icing is almost like whipped cream (there is a grocery store chain in my area that makes a whipped cream frosting for their cakes and this icing is a lot like that).  It is not overly sweet but has the rich taste of butter.  I used a boxed mix for the cupcakes (my favorite is Duncan Hines Moist Deluxe Classic Yellow Cake and Moist Deluxe Devil's Food Cake) and piped the icing on in a swirl pattern using Pampered Chef's Easy Accent Decorator (like a pastry bag with a trigger).  The clown toppers came from Meri Meri.  The cupcakes were a big hit at the party, mostly with the grown-ups (one of my friends ate 4!)

This will be my go-to icing recipe from now on.  It is easy to make, most of the ingredients are always in my pantry and fridge, and the taste and texture are outstanding.  I think next time I make this I will use salted butter as I thought the flavor might be improved a bit with some salt.

Hope you enjoy this.  Some day I will dig out the pictures of my amateur cake decorating from my youth and we can all have a really good laugh.

Saturday
Oct012011

Pig Cupcakes and Musings on What to Wear

My youngest son celebrated his third birthday this week and requested a farm animal-themed party.  I'm all for catering to my kids' wishes when practical but I am not one to spend long hours creating the perfect birthday party.  What I want is something quick that has some visual appeal.  These cupcakes were certainly attention grabbers (particularly amongst the three-year-olds who were delighted to eat the ears) and took only minutes to make.  Start out with regular cupcakes and a batch of pink icing.  The ears are pink wafer cookies cut into triangles, the snouts are pink mints and the eyes are mini chocolate chips.  Simply ice the cupcakes and press the facial features into the icing.  Done.  Big success at the school birthday party.

Since I didn't spend hours in the kitchen making elaborate birthday party fare, I had more time to spend on my real passion, sewing.  Thanks to the generosity of grandparents, I was able to escape for a couple of days this week to the Sewing Expo which is held in my area annually.  I had plenty of time for some classes and for browsing (and spending) in the vendor area.  I've taken some pictures from my classes which will become blog posts in the near future, so stay tuned.  And I'm always so filled with inspiration and the desire to sew after time at the Expo that I spent about 2 hours today cleaning my sewing room in anticipation of some serious garment sewing in the near future.  But during all of this excitement I had a bit of an epiphany which I think many of you will identify with.  I came home with some much-needed (not!) fabric and sat down to write out some ideas I had for the various pieces.  And what I thought about during that note-taking session was the frustrating time I had getting dressed that morning.  I always like to try and wear something that I have made to these Expos (it only seems right) and I must have tried on at least 8 different combinations of garments that morning.  Nothing worked.  With time running out and my hair still wet, I finally threw on my Anniversary Dress and a pair of knee-high black boots and called it quits.  When I thought back on why I had so much trouble I realized that it had to do with separates.  I have several great jackets that I love to wear and a number of skirts that I really like, but none of these seem to have something that coordinates with them.  I think this is one reason I like dresses so much:  you put them on and you're dressed.  So one of my new "resolutions" is to try and create coordinated pieces that work together so I don't have such a frustrating time in the future.  I'd love to hear your thoughts on this and ideas on how to solve or prevent this problem.  Please share.

Thursday
Sep302010

Cupcakes for my Wingman

My littlest guy turned two today.   He’s come such a long way from his almost-three-month-early birth and 3 ½ pound weight to the happy, healthy and hungry toddler he is today.  To celebrate I made carrot cake cupcakes with cream cheese icing.  The icing (Martha Stewart’s recipe) is luscious and rich, made with cream cheese and butter.  The cake, on the other hand, is a much lighter version of the traditional cake and is moist and flavorful with spices.  The recipe comes from Sunset’s Vegetarian Cooking, contains no eggs and uses a unique method of cooking the carrots and raisins in a sugar syrup before adding the dry ingredients.  Here’s the recipe:

Carrot Cake

  • 2 cups lightly packed, shredded raw carrots
  • 1 cup raisins
  • 1 ½ cups each sugar and water
  • 1/3 cup butter
  • 1 cup all-purpose flour
  • 1 ½ teaspoons baking soda
  • ½ teaspoon each salt, ground cloves, and ground allspice
  • 1 teaspoon each ground nutmeg and ground cinnamon
  • 1 cup whole wheat flour
  • 1 teaspoon vanilla
  • 1 cup chopped walnuts

Place carrots, raisins, sugar, water, and butter in a 3-quart pan and bring to a simmer over medium heat; continue to simmer, uncovered, for 5 minutes.  Remove from heat and let cool.

In a bowl, sift together all-purpose flour, baking soda, salt, cloves, allspice, nutmeg, and cinnamon; stir in whole wheat flour.  Stir dry ingredients into cooled carrot mixture until flour is moist.  Stir in vanilla and walnuts.  Spoon intoa greased 9-inch square baking pan.

Bake in a 350 degree oven for 35 minutes or until a wooden pick inserted into the center comes out clean.  Cool on a rack for 10 minutes.  Serve warm or at room temperature.  Makes 12 servings.

Note:  I added ½ teaspoon of ground cardamom.  Omitted the nuts for little children.

The cupcake wrappers and picks are a Wilton product that I purchased at Michael’s.